On Saturday, July 11 Lauren and I treated ourselves to the best vegan ice cream in the world. Okay, so "in the world" may be a stretch as we haven't tried every single place that offers vegan ice cream (but hey, there's a bucket list item!), but this ice cream is by far the best vegan version we've had in our lives.
Back in May, we made a random visit to Franklin Fountain on our way home from a craft fair. Ever since then, we've both been dreaming of those delicious flavors. In the months that have passed since then, we hadn't come up with a good enough reason as to why we needed to go back. But, after discovering that the oldest continually-running candy shop is located right next door, we had to go back. My brother's birthday is coming up, and I honestly thought he would enjoy Philadelphia-made goodies. So on our way to the candy shop, we made a little pit stop and treated ourselves as well. If there was anything to celebrate, it would be that we had just finished our last double-digit training run for our upcoming marathon earlier that morning. If that's not a good reason to seek out ice cream, I don't know what is!
Halfway to Franklin Fountain, the subway came to a sudden halt as it became "out of service". Everyone was forced to exit the train and wait for the next one. We had no idea how long this would take, as the train we were formerly on hadn't moved, preventing a new train to come and pick us up. All was okay though, we thought. We would wait patiently for the next train without complaining, just happy knowing that we would soon find ourselves overjoyed with ice cream. However, after several minutes had passed, there was a terrible smell that neither of us could stand. It was making us both feel sick, so we decided to just exit the subway station and make the long trek to Franklin Fountain by foot. This meant walking fifteen blocks (after having run 12 miles). Despite the heat, it was all worth it.
Franklin Fountain has dozens of flavors- dairy, sugar-free, non-dairy, and vegan ones. Last time we stuck to the officially labeled "vegan" flavors as we didn't know exactly what hindered the "non-dairy" ones from being "vegan". This time Lauren asked, and we figured out that all of the "non-dairy" flavors are made with only vegan ingredients, however they aren't made in a vegan kitchen. Considering most times we go out to eat our food isn't prepared in a vegan kitchen, the "non-dairy" options immediately became additional vegan choices for us.
As far as the vegan options go, there seems to always be at least one sorbet option. This time they offered mango and raspberry sorbets. Their non-dairy flavors were chocolate and vanilla, while the vegan options were strawberry and blueberry. All of the non-dairy and vegan choices are coconut based. I giddily selected chocolate, and Lauren opted for a mix of vanilla and blueberry. As always, we tried each others selections, and we both decided that while we enjoyed all three flavors, our favorite by far was the chocolate. We agreed that it tasted exactly like a Wendy's frosty. It was that good!
Afterwards, we walked next door to Shane Confectionery to pick out a few birthday treats for Nate. We filled up a box of assorted chocolates for him, and also picked out a fancy Liberty Bell lollipop. The colorful salt water taffies looked so cheerful, so we had to get those for him as well. Then we couldn't stop eying the fudge, so I chose the oreo-topped one to give to Nate. Hopefully he likes them!
We had been eagerly awaiting this little expedition for a few weeks now. As soon as Marissa, Heather, and Leti arrive in November, this will be one of the first places we'll throw their way. I'm hoping they love this old-fashioned ice cream parlor just as much as we do, which will give us even more reasons to get our share of vegan ice cream!
And with our bellies stuffed with ice cream, Lauren and I are flying home to California this afternoon to spend four nice, relaxing weeks with our families...and to run the San Francisco Marathon!
Showing posts with label Vegan. Show all posts
Monday, July 13, 2015
Thursday, June 4, 2015
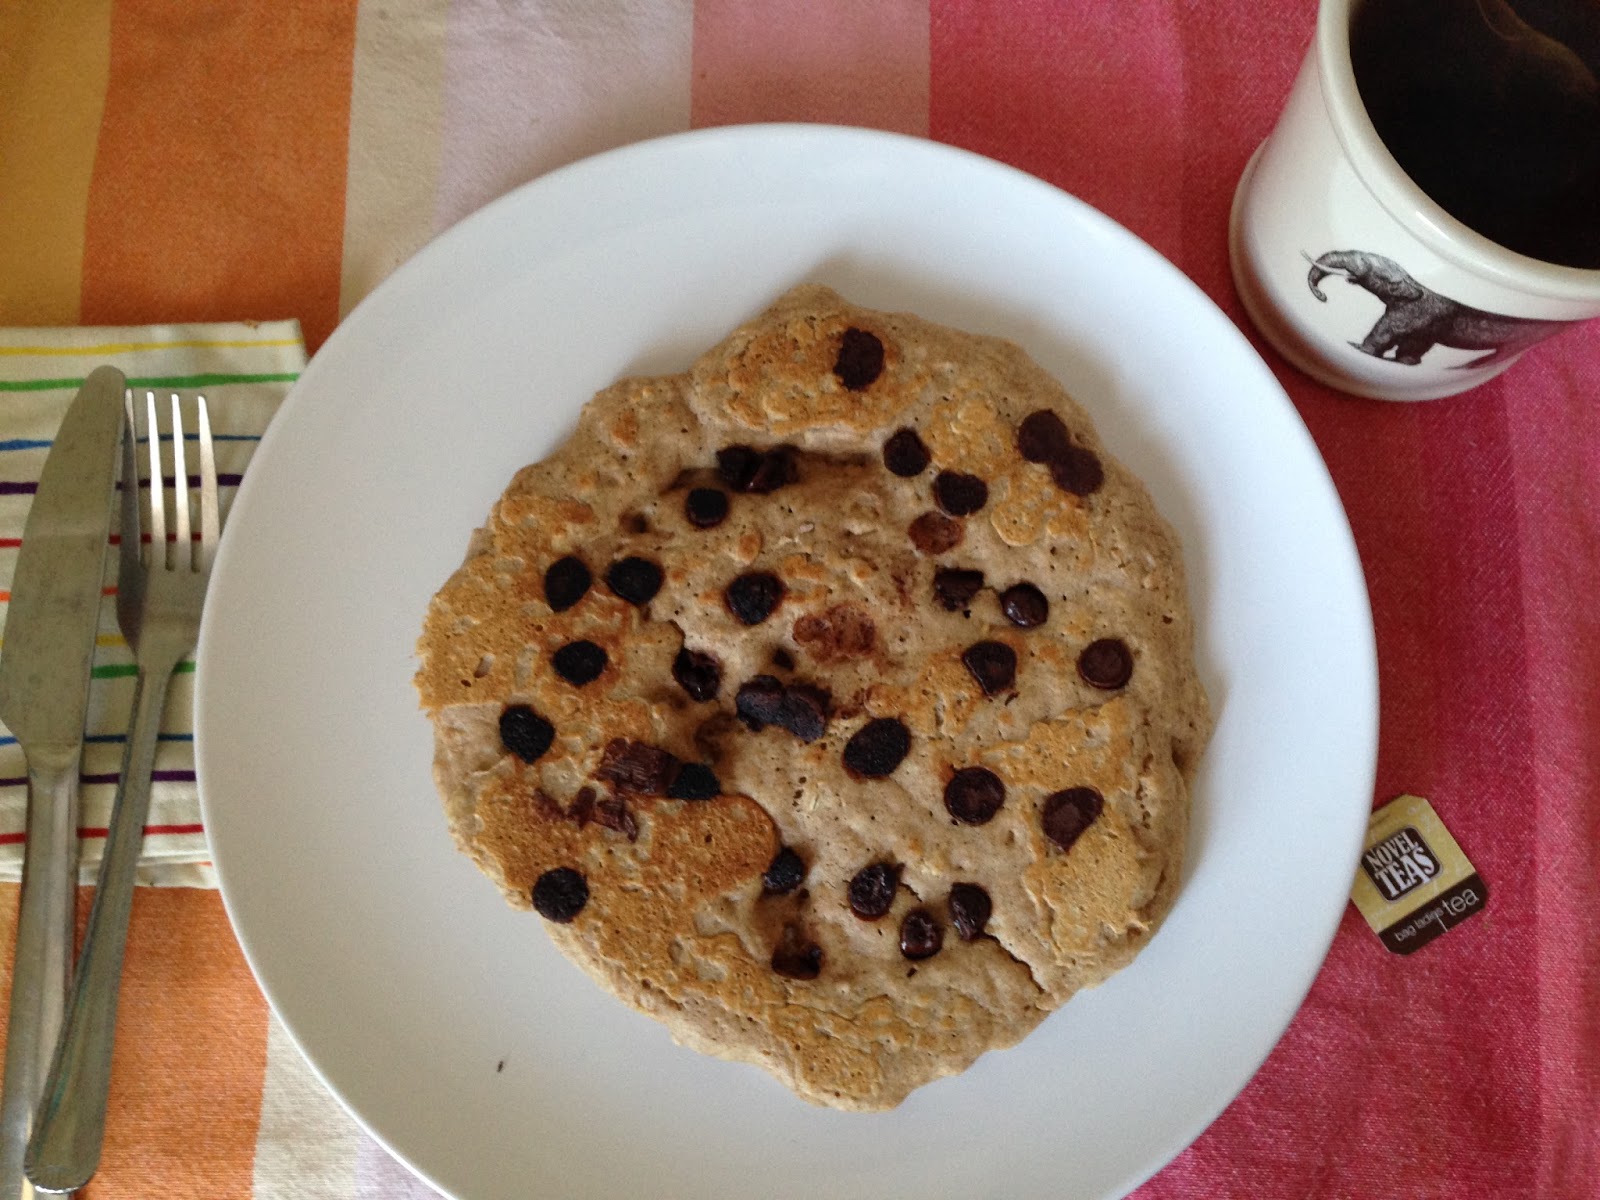
Vegan Banana Pancakes
I'm a creature of habit. There, I said it. I need to have pancakes for breakfast every Friday-Monday morning or else I can't function. It's a serious condition, yet one that's easily curable.
For quite a while, I would wake up on the weekends, immediately starting to make these pancakes (minus the blueberries). These were a good option because they instilled portion control and didn't make me feel super unhealthy eating them. Understandably so, Lauren started to tire of eating the same exact thing all the time, so she started making banana pancakes from the "Thug Kitchen" cookbook instead. While these tasted amazing, the recipe made a huge batch and we both always overstuffed ourselves. The ingredients weren't that bad, but I definitely shouldn't be eating these pancakes four times a week. I dabbled in the overnight oats pancakes, but one morning they went horribly wrong and Lauren has since been turned off from them. I still wanted my weekend pancakes, but I couldn't be feeling like cement after breakfast all the time.
Every week we buy bananas because Lauren likes to add them to her oatmeal. I on the other hand will not eat a plain banana and will run away from anything that tastes/smells like them. Lauren won't eat bananas if they have any brown spots on them, which means that by the end of the week we have several ripe bananas that need to be used. You think we would've learned our lesson by now and simply cut back on the number of bananas we buy. Of course we could bake muffins or bread every weekend (the banana bread recipe in "Thug Kitchen" is amazing!), but I end up eating way more than my half of the share, and I don't need to be doing that either. So when life gives you ripe bananas, make pancakes!
Makes 2 six-inch pancakes:
Ingredients:
- Between 1/2 - 1 ripe banana
- 1/2 cup whole wheat flour
- 1/2 tsp. baking soda
- 1/2 tsp. cinnamon
- pinch of salt
- 1/3 cup old fashioned oats
- 1/2 tbsp. canola oil
- 3/4 cup water
- chocolate chips (optional)*
Mash the banana in a bowl with a fork. I prefer an entire banana, while Lauren likes only half of one. The amount of banana you choose to use won't change the quantity of the remaining ingredients. Using more banana just makes larger, slightly fluffier pancakes.
Start heating a large frying pan on medium heat on the stove.
Add the rest of the ingredients to the bowl and mix well.
Pour half of the batter into the pan and spread with a spatula so that the pancake is about 1/4 inch thick.
When the top gets all bubbly, flip the pancake over and continue to cook for another 2 minutes or so.
Serve the finished pancake with your favorite pancake toppings. For me, that's always almond butter and maple syrup!
*I like my chocolate chips thrown into the batter with all of the other ingredients, while Lauren prefers to place hers directly onto her pancake once it's flipped.
For quite a while, I would wake up on the weekends, immediately starting to make these pancakes (minus the blueberries). These were a good option because they instilled portion control and didn't make me feel super unhealthy eating them. Understandably so, Lauren started to tire of eating the same exact thing all the time, so she started making banana pancakes from the "Thug Kitchen" cookbook instead. While these tasted amazing, the recipe made a huge batch and we both always overstuffed ourselves. The ingredients weren't that bad, but I definitely shouldn't be eating these pancakes four times a week. I dabbled in the overnight oats pancakes, but one morning they went horribly wrong and Lauren has since been turned off from them. I still wanted my weekend pancakes, but I couldn't be feeling like cement after breakfast all the time.
Every week we buy bananas because Lauren likes to add them to her oatmeal. I on the other hand will not eat a plain banana and will run away from anything that tastes/smells like them. Lauren won't eat bananas if they have any brown spots on them, which means that by the end of the week we have several ripe bananas that need to be used. You think we would've learned our lesson by now and simply cut back on the number of bananas we buy. Of course we could bake muffins or bread every weekend (the banana bread recipe in "Thug Kitchen" is amazing!), but I end up eating way more than my half of the share, and I don't need to be doing that either. So when life gives you ripe bananas, make pancakes!
Makes 2 six-inch pancakes:
Ingredients:
- Between 1/2 - 1 ripe banana
- 1/2 cup whole wheat flour
- 1/2 tsp. baking soda
- 1/2 tsp. cinnamon
- pinch of salt
- 1/3 cup old fashioned oats
- 1/2 tbsp. canola oil
- 3/4 cup water
- chocolate chips (optional)*
Mash the banana in a bowl with a fork. I prefer an entire banana, while Lauren likes only half of one. The amount of banana you choose to use won't change the quantity of the remaining ingredients. Using more banana just makes larger, slightly fluffier pancakes.
Start heating a large frying pan on medium heat on the stove.
Add the rest of the ingredients to the bowl and mix well.
Pour half of the batter into the pan and spread with a spatula so that the pancake is about 1/4 inch thick.
When the top gets all bubbly, flip the pancake over and continue to cook for another 2 minutes or so.
Serve the finished pancake with your favorite pancake toppings. For me, that's always almond butter and maple syrup!
*I like my chocolate chips thrown into the batter with all of the other ingredients, while Lauren prefers to place hers directly onto her pancake once it's flipped.
Thursday, May 28, 2015
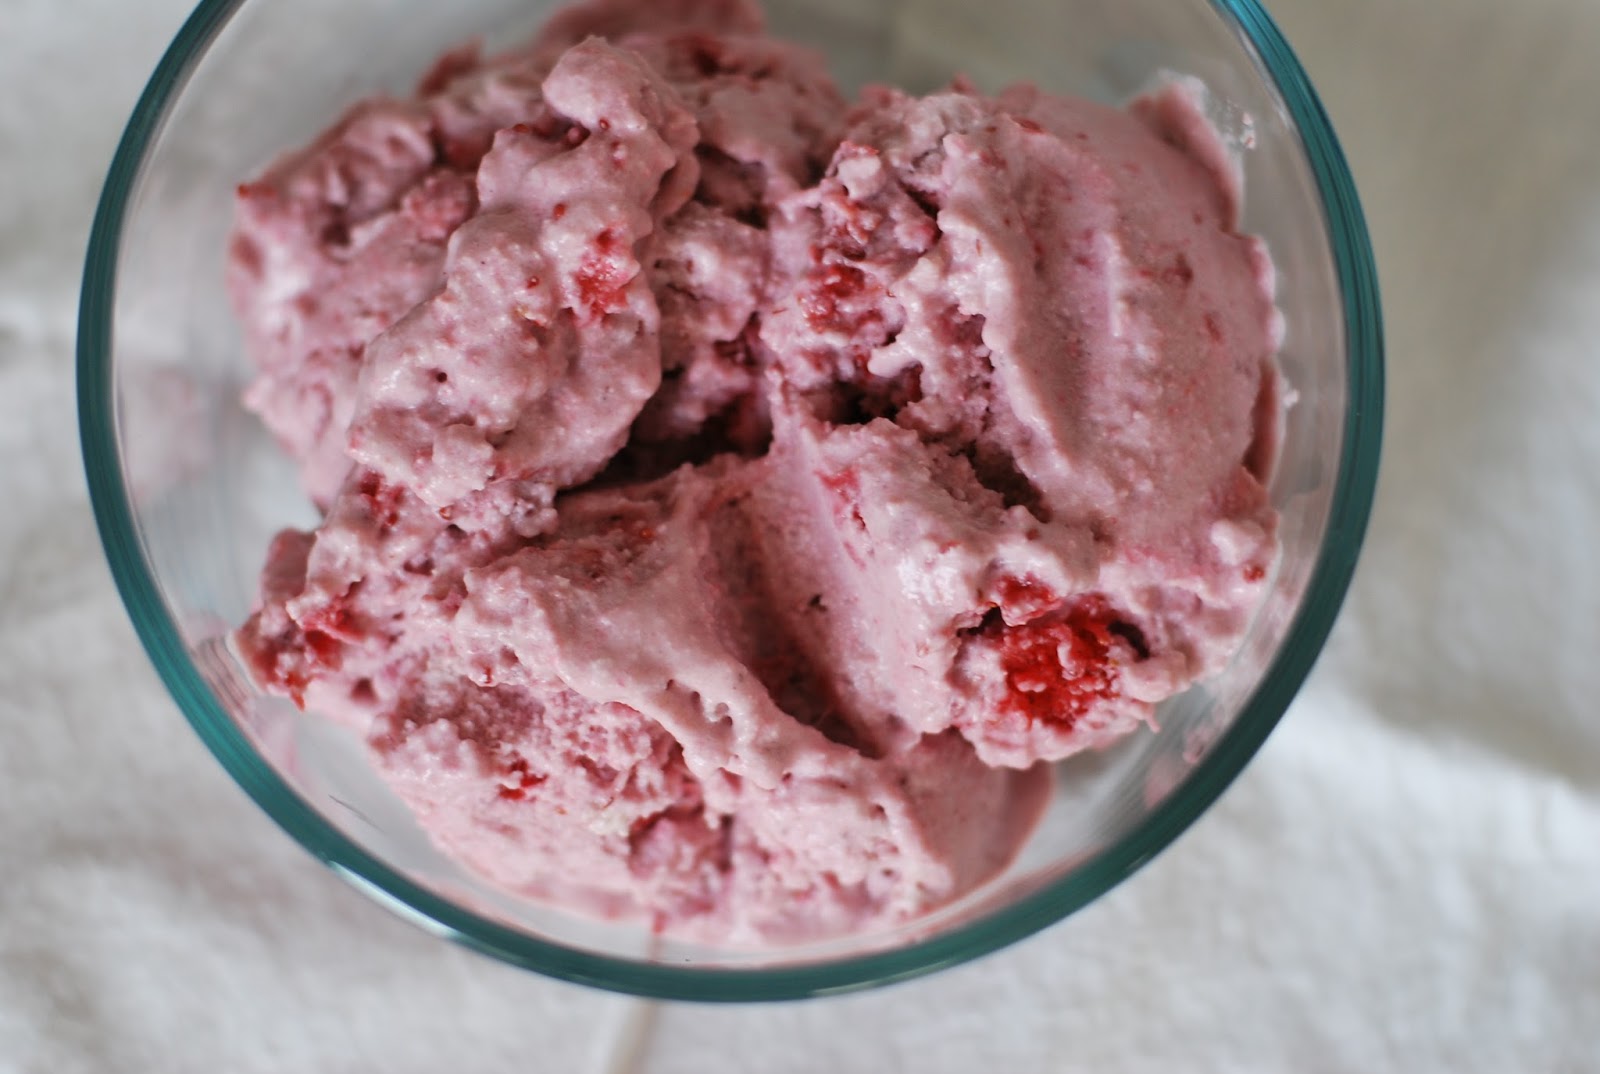
Vegan Strawberry Ice Cream
Whenever I think about strawberry ice cream, I always think about my grandpa. He passed away last year, but I'll always remember how his ice cream preference never faltered. I myself have never been that big on fruit flavored ice cream until I tried Franklin Fountain's version a few weeks ago.
A week after discovering my newfound love for strawberry ice cream, Lauren and I received a massive amount of strawberries in our weekly CSA box. It seemed like the perfect opportunity to bring out the ice cream machine!
Makes about 6 servings
Ingredients:
- 1 3/4 cups raw cashews (soaked overnight)
- 1 15 oz. can coconut milk
- 1/4 cup sugar
- 3/4 cup soy milk
- 1/2 tsp. vanilla extract
- 1/4 tsp. salt
- 2 1/2 cups cut up strawberries (1 1/2 cups cooked)
Day Before:
24 hours in advance, freeze your ice cream machine bowl. Place the cashews in a bowl of water, cover, and soak overnight.
Day Of:
Rinse and drain the cashews. Place cashews and coconut milk in the food processor (or blender), and blend until completely smooth.
Add the sugar, soy milk, vanilla extract, and salt to the food processor and blend once more. Taste your mixture and adjust accordingly. This recipe isn't super sweet, so you may need to add extra sweetener if that's your preference. Once you achieve your desired taste, pour the mixture into a large bowl and cover. Refrigerate for an hour.
Wash, core, and cut your strawberries. You'll be mashing the strawberries next, so the smaller you chop your strawberries, the easier it will be.
Put the strawberries in a small sauce pan and place on the stove on medium heat. Mash the strawberries so that it creates a sauce. I like bites of strawberries in my ice cream, so I left my strawberries slightly chunky. It's going to look like you've made strawberry jam at this point. I found a bean/potato masher to be the most efficient mashing tool versus a whisk or fork. Pour the liquified strawberries into a bowl and refrigerate.
Now it's time to actually make ice cream. Pour the ice cream mixture into the machine's bowl and let run for 30 minutes. After 30 minutes, slowly pour the now cold strawberry mixture into the bowl while letting the ice cream machine continue to run.
Once your ice cream has reached your desired consistency, turn off the machine, and enjoy! I let my ice cream machine run for 10 minutes after adding the strawberries.
A week after discovering my newfound love for strawberry ice cream, Lauren and I received a massive amount of strawberries in our weekly CSA box. It seemed like the perfect opportunity to bring out the ice cream machine!
Makes about 6 servings
Ingredients:
- 1 3/4 cups raw cashews (soaked overnight)
- 1 15 oz. can coconut milk
- 1/4 cup sugar
- 3/4 cup soy milk
- 1/2 tsp. vanilla extract
- 1/4 tsp. salt
- 2 1/2 cups cut up strawberries (1 1/2 cups cooked)
Day Before:
24 hours in advance, freeze your ice cream machine bowl. Place the cashews in a bowl of water, cover, and soak overnight.
Day Of:
Rinse and drain the cashews. Place cashews and coconut milk in the food processor (or blender), and blend until completely smooth.
Add the sugar, soy milk, vanilla extract, and salt to the food processor and blend once more. Taste your mixture and adjust accordingly. This recipe isn't super sweet, so you may need to add extra sweetener if that's your preference. Once you achieve your desired taste, pour the mixture into a large bowl and cover. Refrigerate for an hour.
Wash, core, and cut your strawberries. You'll be mashing the strawberries next, so the smaller you chop your strawberries, the easier it will be.
Put the strawberries in a small sauce pan and place on the stove on medium heat. Mash the strawberries so that it creates a sauce. I like bites of strawberries in my ice cream, so I left my strawberries slightly chunky. It's going to look like you've made strawberry jam at this point. I found a bean/potato masher to be the most efficient mashing tool versus a whisk or fork. Pour the liquified strawberries into a bowl and refrigerate.
Now it's time to actually make ice cream. Pour the ice cream mixture into the machine's bowl and let run for 30 minutes. After 30 minutes, slowly pour the now cold strawberry mixture into the bowl while letting the ice cream machine continue to run.
Once your ice cream has reached your desired consistency, turn off the machine, and enjoy! I let my ice cream machine run for 10 minutes after adding the strawberries.
Monday, May 25, 2015
Best Friend Friday No. 33: Manakeesh
Today is Leti's birthday, Happy Birthday! Unfortunately, Lauren and I aren't able to physically be in Sacramento to celebrate her mom's special day, but that didn't stop us from partaking in the festivities. Leti really wanted us to celebrate for her, so Lauren made the executive decision to make that happen this past Saturday evening.
Every Saturday Lauren and I go on a long run. This weekend that long run consisted of 18 grueling miles. We always make sure to calculate our route so that once we finish our run, we still have a good distance to walk back to our apartment. On our walk back we were talking about we wanted for dinner that night and the next few days. Out of nowhere Lauren kept saying that she "made the executive decision", but she never said exactly what for. I finally questioned her and she surprised me by saying that we could go somewhere for dinner in honor of her mom's upcoming birthday. To say I was excited is a complete understatement. We don't go out to eat often, and so whenever we do it feels like a huge treat.
It seems like the staff don't communicate too well with each other. I wasn't the only customer confused as to whether or not I was supposed to go up to the counter to pick up my food; I heard two different things from two people. Everyone was respectful, but it seemed like they lacked a little professionalism. While I don't have plans to come back soon, it's nice to know of another place in my neighborhood that has plenty of vegan offerings. Most of all though, I'm really glad that Lauren and I chose to go to Manakeesh because it's good to try new things, and right now I'm all into the "experiences" outlook. You won't know whether you like it or not until you try it!
Lauren and I decided to stop at a grocery store on our way back home as well. We found exactly what we were looking for: S'mores Oreos! Of course we had to try a few that night, and they did not disappoint!
I had an awesome weekend with my best friend! Thank you for letting us celebrate your birthday with you, Leti!
Every Saturday Lauren and I go on a long run. This weekend that long run consisted of 18 grueling miles. We always make sure to calculate our route so that once we finish our run, we still have a good distance to walk back to our apartment. On our walk back we were talking about we wanted for dinner that night and the next few days. Out of nowhere Lauren kept saying that she "made the executive decision", but she never said exactly what for. I finally questioned her and she surprised me by saying that we could go somewhere for dinner in honor of her mom's upcoming birthday. To say I was excited is a complete understatement. We don't go out to eat often, and so whenever we do it feels like a huge treat.
There are many places to find a delicious vegan meal in Philadelphia that we had to narrow down our options. We decided that we wanted to be able to walk to the restaurant. Even with that limitation, there are still a handful of places to eat that we love. Together we came up with a list of four restaurants, all of which I would've been more than satisfied to dine at. Ultimately though, I wanted to try somewhere new. We've had the Manakeesh menu on our refrigerator for quite some time because they specify which items are vegan. So, we decided to try it out!
| Photo by Lauren |
Manakeesh is a good sized restaurant/cafe with plenty of seating which we really appreciated. The place is essentially separated into two parts: the restaurant/bakery and a smoothie bar. We just stayed on the restaurant side though since we were there for dinner. There were plenty of different vegan options, many of which sounded good, so I had pretty high hopes. I ordered the falafel wrap, Lauren chose the falafel platter, and we split the grape leaves and fool (fava bean dip) appetizers.
I love falafel. I've never had falafel that I didn't like. That being said though, some falafel are a lot better than others. The falafel at Manakeesh was okay. It wasn't the best I've ever had, but it wasn't the worst either. I felt like my wrap needed more than just the falafel, tahini, and tomatoes (I asked for no pickles). Luckily the grape leaves were sitting on top of a bed of lettuce, so I threw those greens into my wrap. The grape leaves were really good, not too oily, yet not dry either. Lauren didn't particularly care for the tangy-ness of the fava bean dip, so I ended up eating most of it. I think it needed more flavor, but it tasted fine as a dip with pita bread.It seems like the staff don't communicate too well with each other. I wasn't the only customer confused as to whether or not I was supposed to go up to the counter to pick up my food; I heard two different things from two people. Everyone was respectful, but it seemed like they lacked a little professionalism. While I don't have plans to come back soon, it's nice to know of another place in my neighborhood that has plenty of vegan offerings. Most of all though, I'm really glad that Lauren and I chose to go to Manakeesh because it's good to try new things, and right now I'm all into the "experiences" outlook. You won't know whether you like it or not until you try it!
Lauren and I decided to stop at a grocery store on our way back home as well. We found exactly what we were looking for: S'mores Oreos! Of course we had to try a few that night, and they did not disappoint!
I had an awesome weekend with my best friend! Thank you for letting us celebrate your birthday with you, Leti!
Wednesday, April 22, 2015
Vegan Cookies 'n Cream Ice Cream
Recently I've been craving sweets all the time, like I've needed to eat dessert every day. Lately I've been munching on gummy candies, chocolate covered pretzels and almonds, and chocolate truffles. But, I've been missing a very important component to the dessert equation: ice cream! So, I decided to make my own. Not just any old ice cream though, cookies 'n cream!
Makes about 4 servings
Ingredients:
- 1- 15 ounce can of coconut milk
- 3/4 cup of raw cashews (soaked overnight)
- 1/2 tsp. of salt
- 1 tsp. of vanilla extract
- 1/4 cup of sugar
- 3 tbsp. of maple syrup
- 2/3 cup of soy milk
- 15 Trader Joe's Joe-Joe's or Oreo cookies
Place ice cream bowl in the freezer for at least 24 hours. Also, soak the cashews in water in a covered bowl overnight.
When you're ready to make the ice cream, drain and rinse the cashews several times. Pour the cashews into the food processor.
Add coconut milk, salt, and vanilla extract to the food processor and blend until the cashews have become completely liquified.
Add sugar to the food processor and blend until combined. Add maple syrup and soy milk, blend until completely mixed. Taste the mixture; you may need to add additional maple syrup/sugar since this ice cream isn't super sweet.
Place cookies in a zip-loc bag and smash them.
Place the liquid mixture into your ice cream bowl and let the ice cream maker run for approximately 40 minutes. When it reaches your desired texture, let the machine continue running while you slowly add in the crushed cookies.
When the ice cream is thick and the cookies are mixed in well, stop the ice cream maker and scoop several scoops out for yourself and dig in! I apologize for only having one not-so-great photo. It was nighttime and the lighting was horrible. That, and I couldn't wait to eat it...which just shows how delicious this ice cream was!
Makes about 4 servings
Ingredients:
- 1- 15 ounce can of coconut milk
- 3/4 cup of raw cashews (soaked overnight)
- 1/2 tsp. of salt
- 1 tsp. of vanilla extract
- 1/4 cup of sugar
- 3 tbsp. of maple syrup
- 2/3 cup of soy milk
- 15 Trader Joe's Joe-Joe's or Oreo cookies
Place ice cream bowl in the freezer for at least 24 hours. Also, soak the cashews in water in a covered bowl overnight.
When you're ready to make the ice cream, drain and rinse the cashews several times. Pour the cashews into the food processor.
Add coconut milk, salt, and vanilla extract to the food processor and blend until the cashews have become completely liquified.
Add sugar to the food processor and blend until combined. Add maple syrup and soy milk, blend until completely mixed. Taste the mixture; you may need to add additional maple syrup/sugar since this ice cream isn't super sweet.
Place cookies in a zip-loc bag and smash them.
Place the liquid mixture into your ice cream bowl and let the ice cream maker run for approximately 40 minutes. When it reaches your desired texture, let the machine continue running while you slowly add in the crushed cookies.
When the ice cream is thick and the cookies are mixed in well, stop the ice cream maker and scoop several scoops out for yourself and dig in! I apologize for only having one not-so-great photo. It was nighttime and the lighting was horrible. That, and I couldn't wait to eat it...which just shows how delicious this ice cream was!
Wednesday, April 15, 2015
My Favorite Foods
Lauren says that I'm a creature of habit, but I prefer to say that I know exactly what I like. When we're walking back from the gym in the evening, we like to pass the time by talking about how I have an unwritten list of foods/meals that I always tend to crave over others. Well, I think it's time to make the list official, so here it is!
1. Almond butter. I'll eat almond butter on pretty much anything- bread, rice cakes, pancakes, oatmeal. You name it, almond butter belongs on it.
2. Pizza. I bet you already knew this one though since I beg Lauren to indulge in my Friday Night, Pizza nights weekly.
3. Trail mix. While there are tons of packaged trail mixes out there, nothing beats making your own. Whenever I eat trail mix (which is often), I always toss together some roasted cashews, raw almonds, raisins, pretzels, and chocolate chips. You can never have enough trail mix, seriously. It's the perfect, non-messy snack to munch on while watching TV. Trail mix also makes the perfect meal when your fridge is empty, just saying.
4. Pancakes. Like pizza, I make it a point to eat pancakes on the regular. More specifically, I like to have pancakes for breakfast every weekend day. I like my pancakes with chocolate chips, almond butter, and maple syrup.
5. Smoothies. My fifth favorite food was a tough one to come up with. I've always thought it would either be beans and rice, or oranges. But lately, we've been eating beans and rice for dinner at least once a week without chips or tortillas (trying to be a little healthy over here), so Mexican food isn't as exciting anymore. But don't worry, I still love this meal, it just doesn't make the top five list anymore. Oranges would have made the list if I were still living in California. The quality (and prices!) of produce in Philadelphia is so different from what I'm used to having on the West Coast. Don't get me wrong, oranges are still my favorite fruit, but they don't make the cut anymore either. I've had a smoothie as part of my lunch the last few days and I've really come to enjoy and anticipate them, so as of right now, they've earned a highly coveted spot on my favorite foods list. My usual smoothie consists of frozen fruit (strawberries, peaches, pineapple, apple, blueberries, banana), spinach/kale, and soy milk. Basically, deliciousness in a cup.
Just so you know, I do eat plenty of vegetables. In fact, I just finished a huge salad with a ton of veggies for dinner. These five foods are just my favorites, but I do supplement them with other basic nutrients ;)
This is probably way more than you'd ever like to know about me. But just think of it as a little insight into my weekly routine, because let's be real, I easily eat all of these foods/meals on a weekly basis.
1. Almond butter. I'll eat almond butter on pretty much anything- bread, rice cakes, pancakes, oatmeal. You name it, almond butter belongs on it.
2. Pizza. I bet you already knew this one though since I beg Lauren to indulge in my Friday Night, Pizza nights weekly.
3. Trail mix. While there are tons of packaged trail mixes out there, nothing beats making your own. Whenever I eat trail mix (which is often), I always toss together some roasted cashews, raw almonds, raisins, pretzels, and chocolate chips. You can never have enough trail mix, seriously. It's the perfect, non-messy snack to munch on while watching TV. Trail mix also makes the perfect meal when your fridge is empty, just saying.
4. Pancakes. Like pizza, I make it a point to eat pancakes on the regular. More specifically, I like to have pancakes for breakfast every weekend day. I like my pancakes with chocolate chips, almond butter, and maple syrup.
5. Smoothies. My fifth favorite food was a tough one to come up with. I've always thought it would either be beans and rice, or oranges. But lately, we've been eating beans and rice for dinner at least once a week without chips or tortillas (trying to be a little healthy over here), so Mexican food isn't as exciting anymore. But don't worry, I still love this meal, it just doesn't make the top five list anymore. Oranges would have made the list if I were still living in California. The quality (and prices!) of produce in Philadelphia is so different from what I'm used to having on the West Coast. Don't get me wrong, oranges are still my favorite fruit, but they don't make the cut anymore either. I've had a smoothie as part of my lunch the last few days and I've really come to enjoy and anticipate them, so as of right now, they've earned a highly coveted spot on my favorite foods list. My usual smoothie consists of frozen fruit (strawberries, peaches, pineapple, apple, blueberries, banana), spinach/kale, and soy milk. Basically, deliciousness in a cup.
Just so you know, I do eat plenty of vegetables. In fact, I just finished a huge salad with a ton of veggies for dinner. These five foods are just my favorites, but I do supplement them with other basic nutrients ;)
This is probably way more than you'd ever like to know about me. But just think of it as a little insight into my weekly routine, because let's be real, I easily eat all of these foods/meals on a weekly basis.
Monday, April 13, 2015
Overnight Oats Pancake
You read that right, PANCAKE!
I love my precious almond butter so much that every time I reach the bottom of the jar and I can no longer scrape anymore nut butter out, I always make overnight oats in the jar to use up every last bit of that deliciousness. The other day I realized I still had two jars of overnight oats that had been sitting in the fridge for close to two weeks. "Gross", you may think, but don't worry, I did the smell and taste tests and the oats were still perfectly fine. I decided that I better polish them off soon though, before they reach the three week mark! The problem though, was that I really hadn't and didn't feel like eating overnight oats. I couldn't just let them go to waste, but all I really wanted to eat was a pancake. So I thought, why not make a pancake with my overnight oats?
Ingredients:
- Almost empty jar of almond butter (or just an empty jar and 1 tsp. of almond butter)
- 1/2 cup of old fashion oats
- 3/4 cup of soy milk
- 1 tsp. of baking powder
- 3 tsp. of water
- Chocolate chips (optional topping)
- Additional 1 tbsp. of almond butter (optional topping)
- Maple syrup (optional topping)
1. Make your overnight oats at least one day in advance. Combine the oats and soy milk in the almost empty jar of almond butter. Shake it up really well and refrigerate overnight.
2. When you're ready to make your pancake, heat a skillet on low/medium heat. Add the baking powder and water to the overnight oats and stir until completely combined.
3. When the skillet is hot enough (test by dripping water on the pan, if it sizzles, it's ready!), pour the overnight oats batter onto the pan and spread out to desired pancake size. Don't spread it out too thinly though, otherwise the pancake will be impossible to flip.
4. Like with any other regular pancake, flip the pancake over when the top starts to bubble and the bottom looks firm enough. This oat pancake will still be slightly gooey so I found using two spatulas to be very helpful in the flipping process.
5. Place your finished pancake on a plate, top with whatever sounds delicious (chocolate chips, more almond butter, and maple syrup for me!) and eat up!
Full disclosure: I still enjoy regular pancakes so much more (these are my absolute favorite), but this overnight oats pancake is still tasty and a good way to turn an ordinary meal (I eat oatmeal for breakfast almost every morning) into something more exciting!
And just in case you have the overwhelming desire, you can also read about my trials and tribulations when I first started making overnight oats over a year ago.
I love my precious almond butter so much that every time I reach the bottom of the jar and I can no longer scrape anymore nut butter out, I always make overnight oats in the jar to use up every last bit of that deliciousness. The other day I realized I still had two jars of overnight oats that had been sitting in the fridge for close to two weeks. "Gross", you may think, but don't worry, I did the smell and taste tests and the oats were still perfectly fine. I decided that I better polish them off soon though, before they reach the three week mark! The problem though, was that I really hadn't and didn't feel like eating overnight oats. I couldn't just let them go to waste, but all I really wanted to eat was a pancake. So I thought, why not make a pancake with my overnight oats?
Ingredients:
- Almost empty jar of almond butter (or just an empty jar and 1 tsp. of almond butter)
- 1/2 cup of old fashion oats
- 3/4 cup of soy milk
- 1 tsp. of baking powder
- 3 tsp. of water
- Chocolate chips (optional topping)
- Additional 1 tbsp. of almond butter (optional topping)
- Maple syrup (optional topping)
1. Make your overnight oats at least one day in advance. Combine the oats and soy milk in the almost empty jar of almond butter. Shake it up really well and refrigerate overnight.
2. When you're ready to make your pancake, heat a skillet on low/medium heat. Add the baking powder and water to the overnight oats and stir until completely combined.
3. When the skillet is hot enough (test by dripping water on the pan, if it sizzles, it's ready!), pour the overnight oats batter onto the pan and spread out to desired pancake size. Don't spread it out too thinly though, otherwise the pancake will be impossible to flip.
4. Like with any other regular pancake, flip the pancake over when the top starts to bubble and the bottom looks firm enough. This oat pancake will still be slightly gooey so I found using two spatulas to be very helpful in the flipping process.
5. Place your finished pancake on a plate, top with whatever sounds delicious (chocolate chips, more almond butter, and maple syrup for me!) and eat up!
Full disclosure: I still enjoy regular pancakes so much more (these are my absolute favorite), but this overnight oats pancake is still tasty and a good way to turn an ordinary meal (I eat oatmeal for breakfast almost every morning) into something more exciting!
And just in case you have the overwhelming desire, you can also read about my trials and tribulations when I first started making overnight oats over a year ago.
Wednesday, April 8, 2015
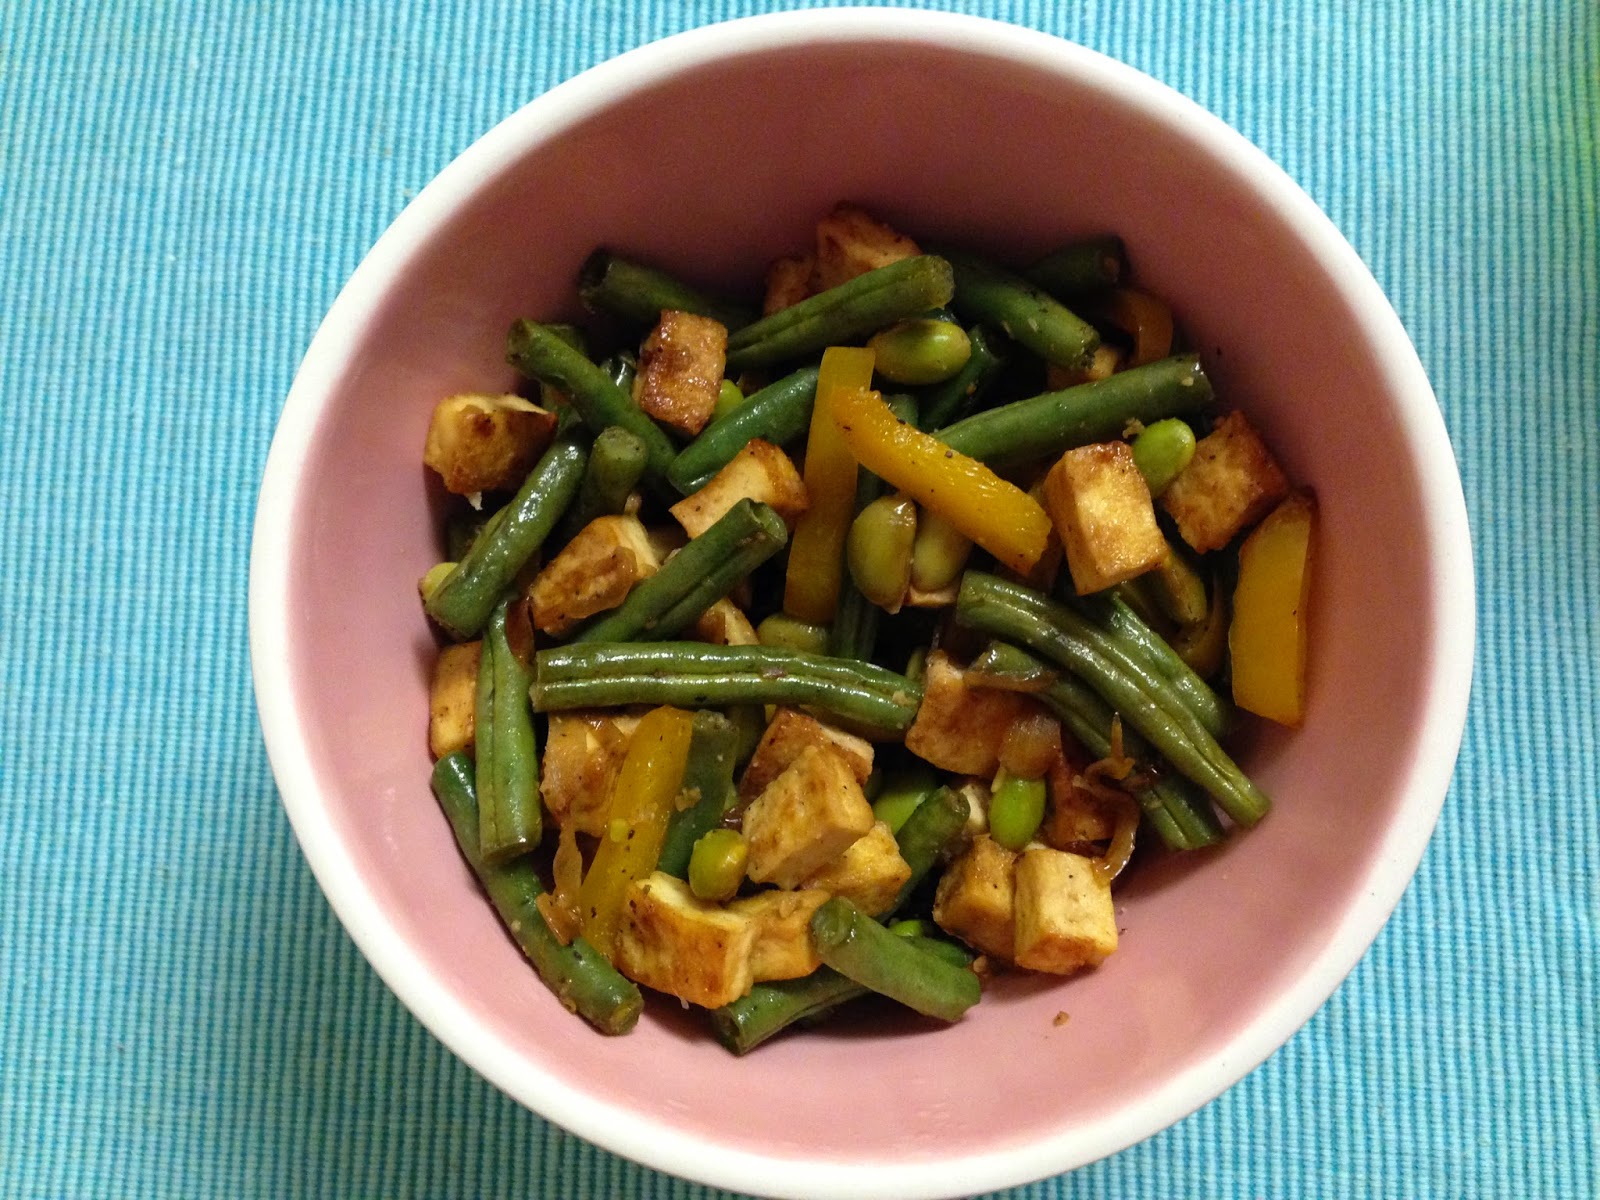
Tofu and Veggie Stir Fry
I know, I know. How hard can it be to make stir fry? The truth is, I agree it's actually pretty easy, but the trickiest part is cooking the tofu just right! Of course if you own a deep fryer (I wish!), it would be pretty simple to just plop the cut up tofu right into the boiling oil and let that tofu get super crispy. Although I would love a deep fryer, it's probably a good thing I don't own one. I would seriously deep fry everything.
Lauren and I have experimented with cooking tofu in various ways in the past, but we never could really get it just right. Lauren did make marinated baked tofu a few times that was really good, but I wanted to come up with a way to cook it on the stove (less dishes!), yet have it still be delicious without being super greasy. I'm really not a fan of the silky texture of tofu and much prefer it to be a tiny bit crispy. Lauren likes to call homemade stir fry, "stir fry of my eye". That's how good it is!
Makes 4 servings
Ingredients:
- 1 1/2 cups of uncooked rice (I used half brown, half black this time)
- 1 tablespoon of olive oil
- 1 package of extra firm tofu
- 1/4 cup of soy sauce
- 3 cloves of garlic
- 1/4 of a yellow onion
- 1 bell peppers (any color, I used yellow)
- 1 pound of green beans
- 1 cup of frozen, shelled edamame
- Pepper to taste
1. Start cooking the rice. I find that the easiest and most reliable way is using a rice cooker. I add 2 cups of water to the 1 1/2 cups of brown/black rice, and simply just turn the rice cooker on. It takes about 45 minutes to completely cook, which gives me plenty of time to prepare and finish the rest of the meal.
2. While the rice is cooking, start heating the olive oil in a large sauce pan on high heat.
3. Drain and squeeze as much liquid as possible from the tofu. Chop the tofu into bite-size cubes. Toss the tofu into the sizzling pan of oil and reduce heat to medium. Keep a continuous eye on the tofu so it doesn't burn. Using a spatula, flip the tofu onto its various sides so that the entire cube gets an even golden brown color. I end up needing to flip my tofu every five minutes or so. Once the majority of the tofu achieves its golden brown color, pour the cooked tofu into a separate and set aside. Leave the pan on the stove, add just a little bit more olive oil and reduce to low.
4. Chop the onion into thin strips and saute on low heat until lightly browned and translucent.
5. Wash the bell pepper and green beans. Chop your vegetables however you desire. I like to chop my green beans into bite-size pieces, and my bell pepper into strips.
6. Microwave the green beans in a covered bowl with a little bit of water for two minutes. Drain the green beans and add to the pan with onion. Also, mince the garlic and add with the green beans. Turn the heat up to medium.
7. Add the bell pepper strips.
8. Put the edamame in a colander and run warm water over it until all pieces are completely defrosted. Add the edamame to the saute pan. Continue sauteing until all veggies are completely cooked.
9. Add the cooked tofu and soy sauce to the veggies. Pepper to taste. Mix and saute for 2-3 minutes.
8. By this time, your rice should be finished, or almost ready. Throw some of your veggies and tofu on top of a scoop of rice, add a bit more soy sauce (if you wish), and enjoy that stir fry of your eye!
Lauren and I have experimented with cooking tofu in various ways in the past, but we never could really get it just right. Lauren did make marinated baked tofu a few times that was really good, but I wanted to come up with a way to cook it on the stove (less dishes!), yet have it still be delicious without being super greasy. I'm really not a fan of the silky texture of tofu and much prefer it to be a tiny bit crispy. Lauren likes to call homemade stir fry, "stir fry of my eye". That's how good it is!
Makes 4 servings
Ingredients:
- 1 1/2 cups of uncooked rice (I used half brown, half black this time)
- 1 tablespoon of olive oil
- 1 package of extra firm tofu
- 1/4 cup of soy sauce
- 3 cloves of garlic
- 1/4 of a yellow onion
- 1 bell peppers (any color, I used yellow)
- 1 pound of green beans
- 1 cup of frozen, shelled edamame
- Pepper to taste
1. Start cooking the rice. I find that the easiest and most reliable way is using a rice cooker. I add 2 cups of water to the 1 1/2 cups of brown/black rice, and simply just turn the rice cooker on. It takes about 45 minutes to completely cook, which gives me plenty of time to prepare and finish the rest of the meal.
2. While the rice is cooking, start heating the olive oil in a large sauce pan on high heat.
3. Drain and squeeze as much liquid as possible from the tofu. Chop the tofu into bite-size cubes. Toss the tofu into the sizzling pan of oil and reduce heat to medium. Keep a continuous eye on the tofu so it doesn't burn. Using a spatula, flip the tofu onto its various sides so that the entire cube gets an even golden brown color. I end up needing to flip my tofu every five minutes or so. Once the majority of the tofu achieves its golden brown color, pour the cooked tofu into a separate and set aside. Leave the pan on the stove, add just a little bit more olive oil and reduce to low.
4. Chop the onion into thin strips and saute on low heat until lightly browned and translucent.
5. Wash the bell pepper and green beans. Chop your vegetables however you desire. I like to chop my green beans into bite-size pieces, and my bell pepper into strips.
6. Microwave the green beans in a covered bowl with a little bit of water for two minutes. Drain the green beans and add to the pan with onion. Also, mince the garlic and add with the green beans. Turn the heat up to medium.
7. Add the bell pepper strips.
8. Put the edamame in a colander and run warm water over it until all pieces are completely defrosted. Add the edamame to the saute pan. Continue sauteing until all veggies are completely cooked.
9. Add the cooked tofu and soy sauce to the veggies. Pepper to taste. Mix and saute for 2-3 minutes.
8. By this time, your rice should be finished, or almost ready. Throw some of your veggies and tofu on top of a scoop of rice, add a bit more soy sauce (if you wish), and enjoy that stir fry of your eye!
Monday, April 6, 2015
Vegan Easter Brunch
I know I've said it before, but I"ll say it again just once more. This year was my first Easter away from my family, and since I'm really into celebrating the holidays, I had to adapt and recreate some of the traditions I'm accustomed to. One of the most important Easter traditions is of course, brunch.
I didn't really want to go through the whole hassle of finding a restaurant that met every single item off of my long list of needs for this long-anticipated brunch. For me, Easter brunch most certainly needs to have plenty of vegan options, and it wouldn't hurt for it to be a buffet either. Hey, Easter only comes once a year, so why not indulge?
One night when I couldn't fall asleep and my mind was racing, I decided that Lauren and I should just make our own Easter brunch. This way would could cook whatever we wanted and there would be plenty of food for seconds and leftovers. That same restless night, I went through my "Vegan Food" board and Pinterest and created an Easter menu in my head. The next morning, I told Lauren about my plans and she was gladly on board.
Yesterday we stuffed ourselves with:
- Fruit salad (strawberries, oranges, pineapple, pink lady apples, and raspberries)
- Caesar salad
- Sauteed green beans with slivered almonds
- Smashed potatoes
- Mini sandwiches made from dinner rolls, Celebration Field Roast, Chao cheese, and herb cream cheese
- Chocolate cake
I didn't really want to go through the whole hassle of finding a restaurant that met every single item off of my long list of needs for this long-anticipated brunch. For me, Easter brunch most certainly needs to have plenty of vegan options, and it wouldn't hurt for it to be a buffet either. Hey, Easter only comes once a year, so why not indulge?
One night when I couldn't fall asleep and my mind was racing, I decided that Lauren and I should just make our own Easter brunch. This way would could cook whatever we wanted and there would be plenty of food for seconds and leftovers. That same restless night, I went through my "Vegan Food" board and Pinterest and created an Easter menu in my head. The next morning, I told Lauren about my plans and she was gladly on board.
Yesterday we stuffed ourselves with:
- Fruit salad (strawberries, oranges, pineapple, pink lady apples, and raspberries)
- Caesar salad
- Sauteed green beans with slivered almonds
- Smashed potatoes
- Mini sandwiches made from dinner rolls, Celebration Field Roast, Chao cheese, and herb cream cheese
- Chocolate cake
Everything was so delicious and now we have plenty of leftovers to last us the next couple of days. Brunch is the best!
Also, Lauren made me an assortment of vegan truffles, almond butter-chocolate dipped pretzels, and chex mix as part of my Easter goodies. They're even better than brunch!
Wednesday, March 4, 2015
Vegan Asian Noodles
One of my goals for this month is to try a new recipe each week. Several weeks ago, I pinned this Simple Sesame Noodle dish and have been dying to try it since. I'll admit though, Lauren was pretty hesitant to try it at first. Luckily though, as part of our shared meal prepping/cooking deal, we have to at least try the other person's creation, within reason of course.
I loved the simplicity of this recipe, and the fact that I already had most of the ingredients on hand. The entire recipe was already vegan, so I didn't have to come up with any substitutions! However, I wanted this dish to serve as a complete meal, and felt it needed a little more veggies. I used her recipe as a great starting point for my completed Asian Noodle dish.
Ingredients:
(serves about 6, as a full meal)
- 1 pound whole wheat spaghetti noodles
- 1/2 cup soy sauce
- 1/4 cup water
- 4-5 cloves garlic, minced
- 3 tbsp olive oil
- 2 tbsp apple cider vinegar
- 2 tbsp sugar
- 1 tbsp Sriracha sauce
- 5 whole green onions
- 1 bell pepper (I used half of two different ones, for more color)
- 1 package extra firm tofu
- 1 cup frozen edamame
- 1 large carrot
1. Cook the entire package of spaghetti according to the provided directions. I cooked mine for about 11 minutes in boiling water. Then drain, and rinse noodles in cold water to prevent them from sticking together. Toss the noodles in a large bowl.
2. Slice tofu into cubes, bell pepper into thin strips, and mince the garlic.
3. Heat a tablespoon of olive oil over medium heat in a large frying pan. Once the oil is hot, toss the tofu cubes into the pan, and cook until all sides are golden brown. With the tofu still in the pan, throw in the bell peppers and half of the minced garlic. Continue to saute, but make sure not to overcook the bell peppers. Remove pan from heat and let cool. When completely cool, add the contents to the bowl of noodles.
4. Defrost the frozen edamame and add to the bowl of noodles.
5. Shred the carrot and add to the bowl of noodles.
6. Chop the green onions and add to the bowl of noodles. I like to save the bottoms of the green onions and regrow them!
7. Make the sauce. In a separate smaller bowl, mix the soy sauce, remaining olive oil and garlic, water, apple cider vinegar, sugar, and Sriracha sauce. Pour over the bowl of noodles and mix the entire bowl thoroughly. Cover and refrigerate for several hours before serving to let all of the flavors soak in.
* This dish can be served either chilled or hot, but I prefer it on the colder side!
I loved the simplicity of this recipe, and the fact that I already had most of the ingredients on hand. The entire recipe was already vegan, so I didn't have to come up with any substitutions! However, I wanted this dish to serve as a complete meal, and felt it needed a little more veggies. I used her recipe as a great starting point for my completed Asian Noodle dish.
Ingredients:
(serves about 6, as a full meal)
- 1 pound whole wheat spaghetti noodles
- 1/2 cup soy sauce
- 1/4 cup water
- 4-5 cloves garlic, minced
- 3 tbsp olive oil
- 2 tbsp apple cider vinegar
- 2 tbsp sugar
- 1 tbsp Sriracha sauce
- 5 whole green onions
- 1 bell pepper (I used half of two different ones, for more color)
- 1 package extra firm tofu
- 1 cup frozen edamame
- 1 large carrot
1. Cook the entire package of spaghetti according to the provided directions. I cooked mine for about 11 minutes in boiling water. Then drain, and rinse noodles in cold water to prevent them from sticking together. Toss the noodles in a large bowl.
2. Slice tofu into cubes, bell pepper into thin strips, and mince the garlic.
3. Heat a tablespoon of olive oil over medium heat in a large frying pan. Once the oil is hot, toss the tofu cubes into the pan, and cook until all sides are golden brown. With the tofu still in the pan, throw in the bell peppers and half of the minced garlic. Continue to saute, but make sure not to overcook the bell peppers. Remove pan from heat and let cool. When completely cool, add the contents to the bowl of noodles.
4. Defrost the frozen edamame and add to the bowl of noodles.
5. Shred the carrot and add to the bowl of noodles.
6. Chop the green onions and add to the bowl of noodles. I like to save the bottoms of the green onions and regrow them!
7. Make the sauce. In a separate smaller bowl, mix the soy sauce, remaining olive oil and garlic, water, apple cider vinegar, sugar, and Sriracha sauce. Pour over the bowl of noodles and mix the entire bowl thoroughly. Cover and refrigerate for several hours before serving to let all of the flavors soak in.
* This dish can be served either chilled or hot, but I prefer it on the colder side!
Thursday, February 26, 2015
Healthier Vegan Banana Muffins
Last week we had several almost too-ripe bananas that quickly needed to be used, which only means one thing around here: baking! Around this time, Lauren and I had decided we needed to start eating better, so I didn't want to bake anything with too much sugar or oil. Lauren has made countless delicious banana breads and dozens of muffins in the past, but this time I really just wanted something simple. I didn't want anything too sweet since your basic muffins can easily be dressed up with a dollop of almond butter. I'd pick almond butter over anything else any day!
Ingredients:
(Makes 12 muffins)
- 3 ripe bananas
- 2 cups whole wheat flour
- 1/4 cup sugar
- 1/2 tsp baking powder
- 1/2 tsp baking soda
- 1/4 tsp salt
- 1/2 tsp cinnamon
- 1/2 cup soy milk (I used Silk Light Vanilla)
- 1 tsp vanilla extract
- 2 tsp canola oil
1. Preheat oven to 375 degrees. Grease muffin pan and set aside.
2. In a medium bowl, mash all of the bananas.
3. Add the sugar, soy milk, vanilla extract, and oil to the bananas. Mix thoroughly.
4. In a large bowl, combine the flour, baking powder, baking soda, salt, and cinnamon.
5. Add the wet ingredients to the dry ingredients, and mix just until everything is combined. Don't over-mix though.
6. Distribute the batter evenly amongst the muffin pan.
7. Place the muffin pan in the oven and bake for approximately 15 minutes.
8. Let the muffins cool in the pan, then remove and enjoy...perhaps with a spoonful of almond butter!
After scouring Pinterest for awhile and not being able to find anything that met my picky criteria, I decided to just roll with it and create my own recipe. As an added "fun" bonus, I even calculated the caloric count per muffin. Only 127 calories per muffin, not too bad!
Ingredients:
(Makes 12 muffins)
- 3 ripe bananas
- 2 cups whole wheat flour
- 1/4 cup sugar
- 1/2 tsp baking powder
- 1/2 tsp baking soda
- 1/4 tsp salt
- 1/2 tsp cinnamon
- 1/2 cup soy milk (I used Silk Light Vanilla)
- 1 tsp vanilla extract
- 2 tsp canola oil
1. Preheat oven to 375 degrees. Grease muffin pan and set aside.
2. In a medium bowl, mash all of the bananas.
3. Add the sugar, soy milk, vanilla extract, and oil to the bananas. Mix thoroughly.
4. In a large bowl, combine the flour, baking powder, baking soda, salt, and cinnamon.
5. Add the wet ingredients to the dry ingredients, and mix just until everything is combined. Don't over-mix though.
6. Distribute the batter evenly amongst the muffin pan.
7. Place the muffin pan in the oven and bake for approximately 15 minutes.
8. Let the muffins cool in the pan, then remove and enjoy...perhaps with a spoonful of almond butter!
Tuesday, February 24, 2015
Year of the Sheep
Happy Chinese New Year! I know, I'm almost a week late. But better late than never?
Being half Chinese, I've celebrated Chinese New Year somewhat traditionally for my entire life. Normally I would go over to my grandparents' house and have customary "jai" for dinner and take a grapefruit leaf bath, amongst other things. This year though, since I'm in Philadelphia and away from my family, I had to celebrate in a much more Americanized way, and I made Lauren join me.
Since I don't have access to any of the traditional Chinese foods or customs, I honored the New Year the best and most fun way possible...Americanized Chinese food!
Lauren and I went to our favorite Philadelphia Chinese restaurant, Su Xing House, where everything is vegetarian (almost all vegan), and ordered whatever and however much we wanted.
We started with fried dumplings, which reminded me more of pot stickers. We also dined on brown fried rice, veggie chow fun (because noodles are a must as they represent longevity), broccoli with garlic sauce, and two different varieties of fried seitan. I'm in love with their fake meat dishes! Saying that everything was delicious is a complete understatement. There are no words to describe how excited Lauren and I had been looking forward to this meal (and the ensuing leftovers). So I'll just leave you with a few photos of the amazingness! I wasn't able to take pictures of all of the dishes, because let's face it, my hunger got the best of me!
Being half Chinese, I've celebrated Chinese New Year somewhat traditionally for my entire life. Normally I would go over to my grandparents' house and have customary "jai" for dinner and take a grapefruit leaf bath, amongst other things. This year though, since I'm in Philadelphia and away from my family, I had to celebrate in a much more Americanized way, and I made Lauren join me.
Since I don't have access to any of the traditional Chinese foods or customs, I honored the New Year the best and most fun way possible...Americanized Chinese food!
Lauren and I went to our favorite Philadelphia Chinese restaurant, Su Xing House, where everything is vegetarian (almost all vegan), and ordered whatever and however much we wanted.
We started with fried dumplings, which reminded me more of pot stickers. We also dined on brown fried rice, veggie chow fun (because noodles are a must as they represent longevity), broccoli with garlic sauce, and two different varieties of fried seitan. I'm in love with their fake meat dishes! Saying that everything was delicious is a complete understatement. There are no words to describe how excited Lauren and I had been looking forward to this meal (and the ensuing leftovers). So I'll just leave you with a few photos of the amazingness! I wasn't able to take pictures of all of the dishes, because let's face it, my hunger got the best of me!
Sunday, January 25, 2015
Best Friend Friday No. 16: The Green Line Cafe Edition
January 23 couldn't come soon enough. For the whole week leading up to Friday I was transfixed and so excited to try The Green Line Cafe for the first time. I was able to taste Dottie's Donuts the week before, and I was pumped to try them again at a different location. After stalking The Green Line Cafe on Instagram, I happily noticed that their coffee joint seemed a lot less crowded than Hub Bub and they had a ton more vegan options than just the donuts. All of this meant that Lauren and I wouldn't have to squeeze into a shared table and we could order a lot more food!
I had absolutely no idea how busy The Green Line Cafe would be on a Friday morning, and therefore didn't know how quickly they would sell out of their donuts and other vegan favorites I had been wanting to try. So, Lauren and I woke up at least an hour earlier than the week before, hoping for a wide selection of vegan treats.
Lauren and I also had a few other errands to run. Lately we've been using Fridays to get stuff done while still throwing some fun into the mix. After taking our time at Green Line, we hopped on the subway and headed over to Staples to use up some more of our rewards. We picked up some cute washi tape, to-do list notepads, and cards. I also bought watercolors!
Next, we made our way to Whole Foods. We were in dire need of veggie broth, and since we prefer a very specific brand and type (Better Than Bullion's No Chicken Broth), we made the trek since we were already in Center City. Since Whole Foods is the only place that sells this particular broth and half the time we're searching for it they're out of stock, we grabbed three jars like the apocalypse was coming. Sadly they were out of the Field Roast Chao cheese, but we did pick up some mozzarella Daiya.
We could have easily jumped back on the subway to get back home, but we decided to soak up nice day since it wasn't too cold and the sun was out. I also really like walking down South Street; so many cute shops/eateries and townhouses to admire! After walking over 30 blocks, it was nice to be back at our apartment.
The rest of the day was spent sewing! Lauren and I recently got interested in garment sewing again. We have a "collection" of pdf patterns that are just waiting to be used. I printed several out and we got to work. Lauren worked on a Linden Sweatshirt and I started with a Tova Top.
The past handful of Fridays were really lacking a special feature. It had been a long time since we indulged in Friday night pizza night, so we eagerly agreed upon making pizza for dinner and I quickly devoured my share!
This is what Best Friend Fridays are all about! I love trying new places, getting errands out of the way, crafting with my bestie, and eating pizza. Nothing beats that!
I had absolutely no idea how busy The Green Line Cafe would be on a Friday morning, and therefore didn't know how quickly they would sell out of their donuts and other vegan favorites I had been wanting to try. So, Lauren and I woke up at least an hour earlier than the week before, hoping for a wide selection of vegan treats.
Green Line Cafe's new location is only five blocks from our apartment which made it a quick walk. To my joyful surprise there were only two other patrons already seated when we arrived. We were the only ones in line to order which was one of my first clues that I was going to enjoy this experience much more. Whenever we're presented with a lot of vegan options, it always takes Lauren and I a pretty long time to decide what we want. I'm so used to finding that one item on a menu that I can actually eat, so when I have numerous choices to pick from I'm overwhelmed! Because I had my sights set on donuts, I selected the chocolate blueberry and cinnamon and sugar ones. Lauren chose the peach donut and the Steve Sandwich. We also ordered our favorite fancy drinks; chai again for me!
All of the donuts were delicious of course, and it was really nice to have all four flavors still left to choose from. I was really impressed by the sandwich! It was a toasted marinated tofu sandwich with veggies and a delicious vegan chipotle aioli dressing. It was a tiny bit spicy, but overall it was amazing! Luckily Lauren and I like order different things so that we can share and try even more items. I split my donuts with her and she gave me half of her sandwich. I wasn't super thrilled with my chai though; it was too watery for me. That being said though, I'll definitely be going back to Green Line Cafe again thanks to their extensive vegan offerings. I'll skip a fancy drink and stick to the food. I'm thinking of trying the sweet potato burrito next!Lauren and I also had a few other errands to run. Lately we've been using Fridays to get stuff done while still throwing some fun into the mix. After taking our time at Green Line, we hopped on the subway and headed over to Staples to use up some more of our rewards. We picked up some cute washi tape, to-do list notepads, and cards. I also bought watercolors!
Next, we made our way to Whole Foods. We were in dire need of veggie broth, and since we prefer a very specific brand and type (Better Than Bullion's No Chicken Broth), we made the trek since we were already in Center City. Since Whole Foods is the only place that sells this particular broth and half the time we're searching for it they're out of stock, we grabbed three jars like the apocalypse was coming. Sadly they were out of the Field Roast Chao cheese, but we did pick up some mozzarella Daiya.
We could have easily jumped back on the subway to get back home, but we decided to soak up nice day since it wasn't too cold and the sun was out. I also really like walking down South Street; so many cute shops/eateries and townhouses to admire! After walking over 30 blocks, it was nice to be back at our apartment.
The rest of the day was spent sewing! Lauren and I recently got interested in garment sewing again. We have a "collection" of pdf patterns that are just waiting to be used. I printed several out and we got to work. Lauren worked on a Linden Sweatshirt and I started with a Tova Top.
The past handful of Fridays were really lacking a special feature. It had been a long time since we indulged in Friday night pizza night, so we eagerly agreed upon making pizza for dinner and I quickly devoured my share!
This is what Best Friend Fridays are all about! I love trying new places, getting errands out of the way, crafting with my bestie, and eating pizza. Nothing beats that!
Friday, December 5, 2014
Whole Wheat Sandwich Bread
Two weeks ago I made bread! Whole wheat sandwich bread, more specifically. Lately I've been eating an almond butter sandwich for lunch on days where I was lazy and just wanted something quick. Because I like to indulge in pizza made from white flour most Fridays, I try to eat as much whole grains throughout the rest of the week. I also find that whole wheat flour tends to give food an extra dimension in flavor, especially in breads. I was so spoiled back in California. I didn't live too far away from Costco where they sold several vegan whole wheat breads (in packs of two!) for a very reasonable price. Unfortunately, there aren't too many whole wheat bread options at my neighborhood grocery store here in Philadelphia. The one vegan brand that they do sale is over $5 per loaf, and while that doesn't really break the bank in the long run, I do try to stick to a monthly budget and every little bit that I can save allows me to do more things that I enjoy. Plus the only store-bought option here isn't my favorite. I figured I'd give bread making a go and if it turned out to be a complete failure or it tasted like cardboard, then I could just go back to buying bread like a normal person. If on the other hand I actually liked the taste of homemade bread and it wasn't super time consuming, well then this little lesson in baking would save me from depending on the grocery store to support my almond butter sandwich addiction.
I googled "vegan whole wheat bread recipe" and looked at several different variations before selecting this one. I wanted a recipe with minimal ingredients (sandwich bread doesn't need to be super fancy when you're going to be dressing it up with sandwich fixings, just my opinion), and I didn't want the entire process to take over a day to make a single loaf of bread (this needs to be something that I can do pretty often if I want to make this a permanent change). The only change I made was using honey instead of maple syrup or agave. I know that most people don't consider honey to be vegan, and that's fine. I on the other hand eat honey and still consider myself vegan, but that's a whole other story. Anyway, I also did not take advantage of the cold dough fermentation option because I felt that was too time consuming for my needs.
The entire process of this bread baking experience took about 5 hours from start to finish, with the majority of this time spent waiting for the dough to rise.
I ended up overcooking the bread a little bit, so next time I'll bake it for only 40 minutes instead of 45.
I cut the bread into thicker slices and yielded 11 slices, including the heels. The bread doesn't taste that great on its own since there aren't really any flavorful ingredients, but an almond butter sandwich sounds delectable!
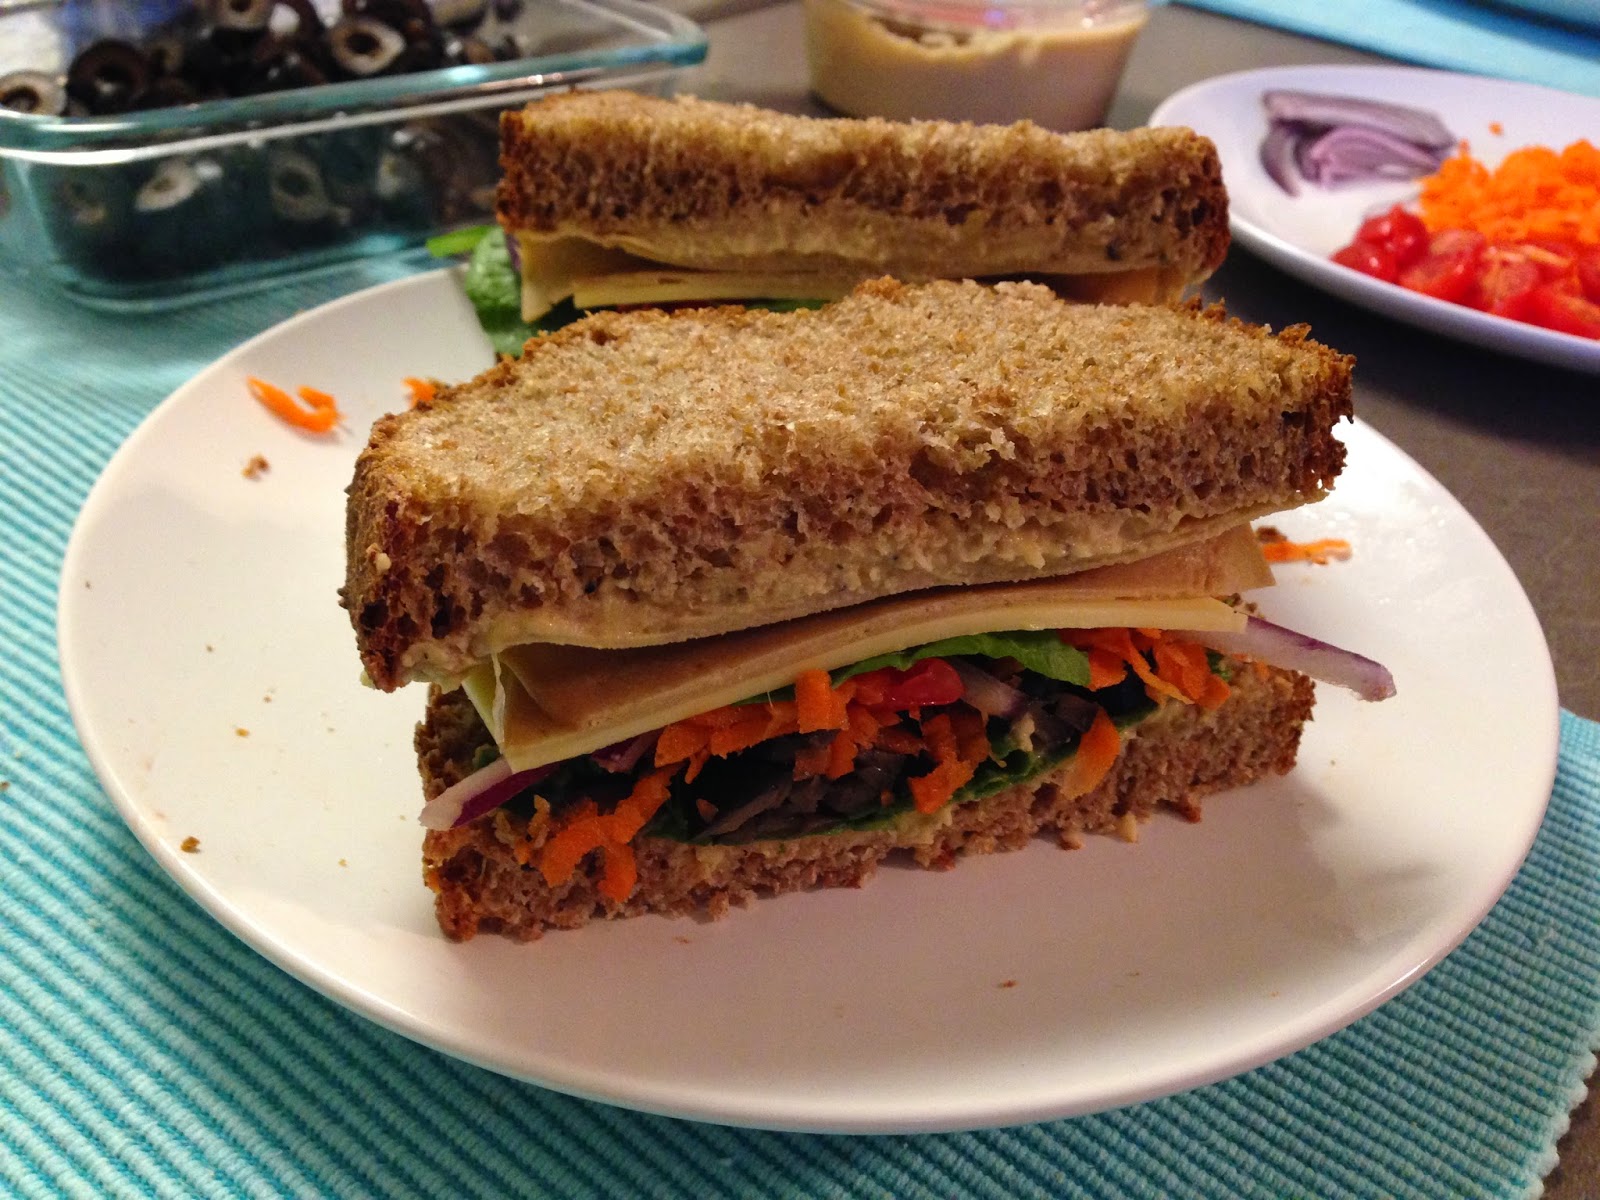
Yesterday I used up the last few pieces of bread to make myself a hearty veggie sandwich. Mostly I wanted a reason to eat more Field Roast Chao cheese slices. With the cheese I added Tofurky slices, hummus, shredded carrots, sliced olives, tomatoes, onion, and spinach. This was the best sandwich I've had in the longest time and it was honestly due to the bread. Even though the bread was in the freezer for several weeks and after defrosting it in the microwave for a minute, it still tasted really fresh. I've never had any brand of store-bought bread, vegan or non-vegan, taste this freshly made (except of course for bread bought directly from a bakery).
This recipe produced the perfect whole wheat sandwich bread and I'll definitely be making it again, probably like every other week to be honest actually!
I googled "vegan whole wheat bread recipe" and looked at several different variations before selecting this one. I wanted a recipe with minimal ingredients (sandwich bread doesn't need to be super fancy when you're going to be dressing it up with sandwich fixings, just my opinion), and I didn't want the entire process to take over a day to make a single loaf of bread (this needs to be something that I can do pretty often if I want to make this a permanent change). The only change I made was using honey instead of maple syrup or agave. I know that most people don't consider honey to be vegan, and that's fine. I on the other hand eat honey and still consider myself vegan, but that's a whole other story. Anyway, I also did not take advantage of the cold dough fermentation option because I felt that was too time consuming for my needs.
The entire process of this bread baking experience took about 5 hours from start to finish, with the majority of this time spent waiting for the dough to rise.
I ended up overcooking the bread a little bit, so next time I'll bake it for only 40 minutes instead of 45.
I cut the bread into thicker slices and yielded 11 slices, including the heels. The bread doesn't taste that great on its own since there aren't really any flavorful ingredients, but an almond butter sandwich sounds delectable!
Yesterday I used up the last few pieces of bread to make myself a hearty veggie sandwich. Mostly I wanted a reason to eat more Field Roast Chao cheese slices. With the cheese I added Tofurky slices, hummus, shredded carrots, sliced olives, tomatoes, onion, and spinach. This was the best sandwich I've had in the longest time and it was honestly due to the bread. Even though the bread was in the freezer for several weeks and after defrosting it in the microwave for a minute, it still tasted really fresh. I've never had any brand of store-bought bread, vegan or non-vegan, taste this freshly made (except of course for bread bought directly from a bakery).
This recipe produced the perfect whole wheat sandwich bread and I'll definitely be making it again, probably like every other week to be honest actually!
Thursday, December 4, 2014
Vegan Friendsgiving
This was my first year in my entire life not being with my family for Thanksgiving. Sadly this meant that I missed the delicious feast my aunt prepares every year. She even makes me an entire vegan spread, just for me!
Also spoiled by past traditions, Lauren was sad that she couldn't partake in her family's festivities on Thanksgiving. We were lucky to be able to spend time with some of my other relatives this holiday though, but nothing tops tradition. We're so used to having certain dishes, prepared a certain way. Instead of hijacking Thanksgiving as guests, we decided to have our own vegan Friendsgiving the day before the real deal. This way we could make all of the dishes we wanted to, however we wanted. This plan also allowed us to bring some leftovers to the actual Thanksgiving dinner.
For having a relatively tiny kitchen to prep and cook in, Lauren and I worked together pretty well to get Friendsgiving prepared. Lauren did most of the cooking though.
This Friendsgiving we enjoyed:
- Mashed potatoes with gravy
- Sauteed green beans with slivered almonds
- Roasted brussel sprouts
- Cranberry sauce
- Gardein Holiday Roast
- Lauren's homemade stuffing
And for dessert Lauren baked a chocolate pudding pie with a homemade graham cracker crust!
Everything was delicious. Friendsgiving is now one of my favorite holidays!
Friday, November 14, 2014
Vegan Apple Pulp Pancakes
A few days ago I talked about how in the past, I was hesitant to use my juicer out of guilt of wasting so much of the fruit and veggie pulp. My first endeavor using the leftover pulp was in making chocolate chip apple (pulp) muffins, and they were delicious! After this baking success, I decided to try my hand at another recipe since I still had some apple pulp to use up.
I decided to make apple pulp pancakes (from the same blog as the muffins) because, who doesn't love pancakes? Even though I would be perfectly happy eating the same boring oatmeal every morning for breakfast, Lauren doesn't quite feel the same way. I thought this would be a good way and reason to change things up, for one day at least.
This is a single-serving recipe, so I made two batches in separate bowls. I love how simple the recipe is and that the batter can be made in just one bowl (per serving). It speeds up the process and makes washing the ensuing dishes a bit easier.
I mostly followed the recipe, but like usual I made a few changes. I added only half of the recommended oil, left out the nutmeg and cardamon, and used all whole wheat flour. Since the recipe said it would make one serving, I assumed that meant one regular sized pancake. So I poured out all of the batter into the pan in one glob, and started spreading it out. It was huge! Not that I'm complaining or anything, I do love large pancakes. It was so big that it almost filled out the entire pan. Although they'd be a lot easier to flip if I made two smaller pancakes, I actually like having one colossal one.
I topped my apple pulp pancake with a little bit of almond butter and some maple syrup. It was delicious and a great change to my normal breakfast routine. Lauren still likes the muffins better, although both recipes are yummy. At the moment I don't have anymore pulp to use up, nor any produce needing to be juiced. So it seems like these pulp-y posts have come to an end, until I get a sudden urge to juice again!
This is a single-serving recipe, so I made two batches in separate bowls. I love how simple the recipe is and that the batter can be made in just one bowl (per serving). It speeds up the process and makes washing the ensuing dishes a bit easier.
I mostly followed the recipe, but like usual I made a few changes. I added only half of the recommended oil, left out the nutmeg and cardamon, and used all whole wheat flour. Since the recipe said it would make one serving, I assumed that meant one regular sized pancake. So I poured out all of the batter into the pan in one glob, and started spreading it out. It was huge! Not that I'm complaining or anything, I do love large pancakes. It was so big that it almost filled out the entire pan. Although they'd be a lot easier to flip if I made two smaller pancakes, I actually like having one colossal one.
I topped my apple pulp pancake with a little bit of almond butter and some maple syrup. It was delicious and a great change to my normal breakfast routine. Lauren still likes the muffins better, although both recipes are yummy. At the moment I don't have anymore pulp to use up, nor any produce needing to be juiced. So it seems like these pulp-y posts have come to an end, until I get a sudden urge to juice again!
Subscribe to:
Posts (Atom)