First off, happy 24th birthday to my favorite sister in the world! 24 is a good number, Marissa! Since it's her birthday and she should've received her presents by now, I
thought it was perfect to share her first handmade item on her actual
birthday. I decided to sew Marissa a nightgown, something pretty basic and comfortable to sleep in.
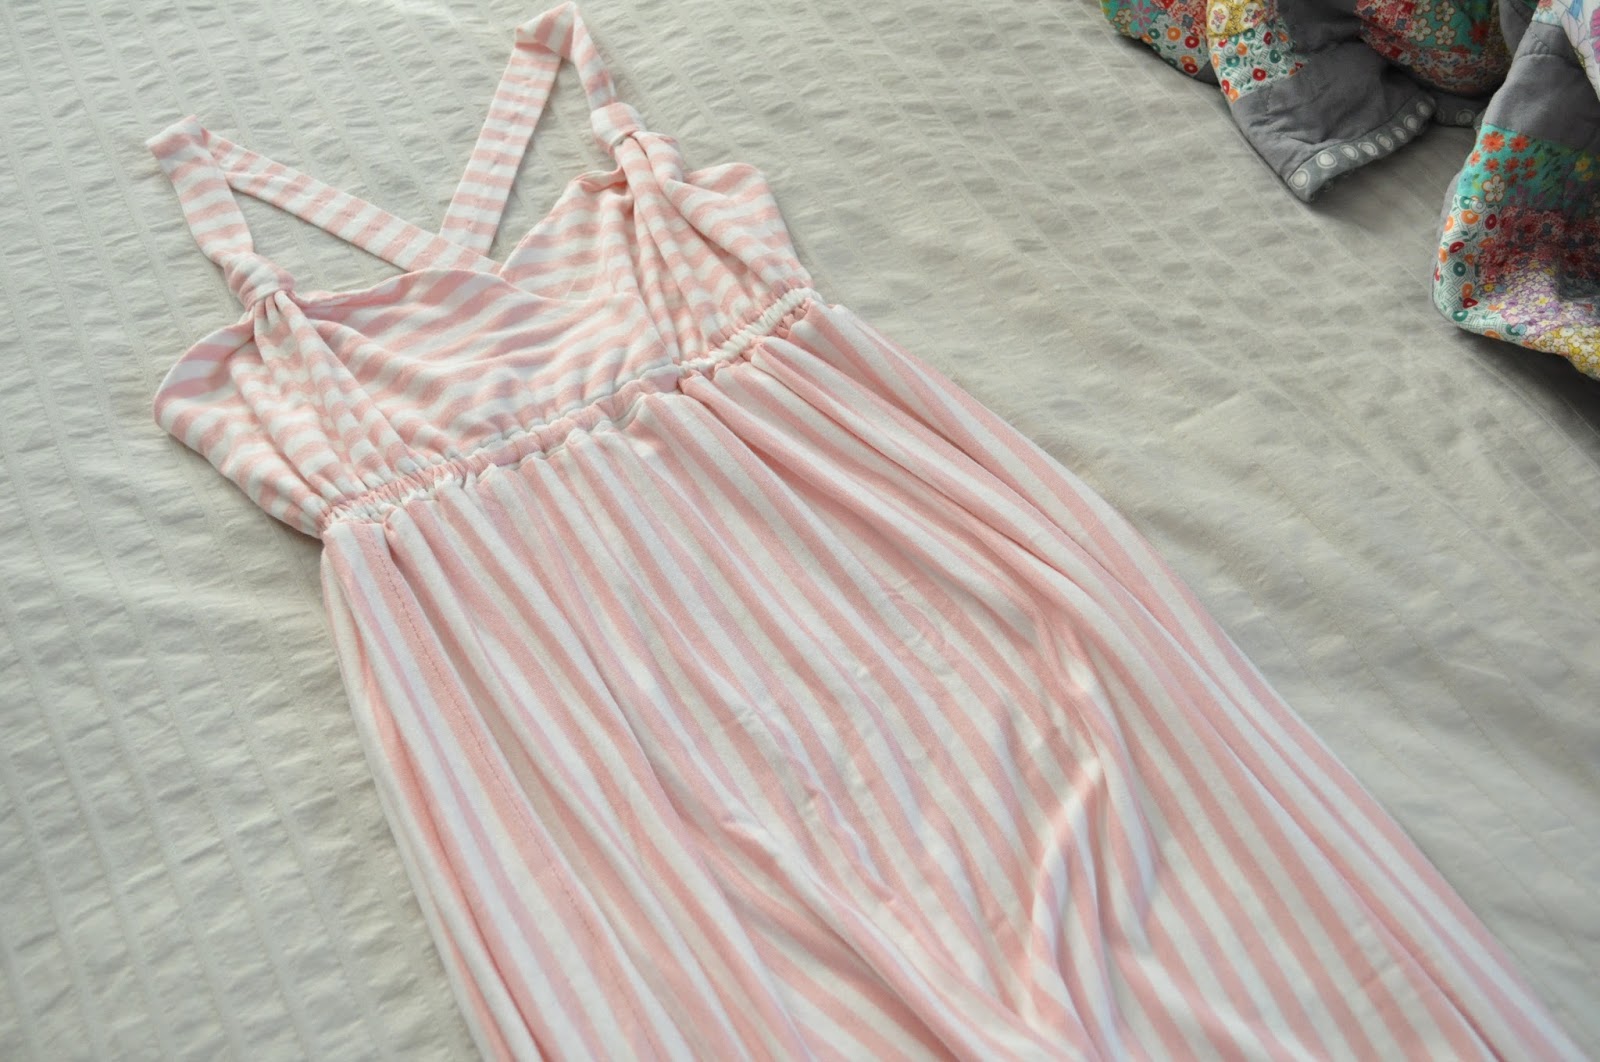
I approached this nightgown as if it were a simple empire waist dress with a fun bust and a simple skirt. I loosely designed the top of this dress made up of two separate breast/cup pieces attached to two straps, with an elastic casing on the bottom. I have no experience in bra making and so had no idea what the cups for the bust should look like. I sketched out a very rough idea and went with it. Because the fabric I chose is a little bit sheer, I decided to line the top with the same fabric, basically making that part reversible. I cut the straps extra long, and since I had plenty of fabric to work with, I attached the straps so that they criss-cross in the back; I won't tell you how many times I had to redo this because I kept sewing them on twisted! Criss-crossing the straps also makes the top more supportive, I think.
I made a casing for the elastic 1 inch from the bottom of the bust piece, using 2/8 inch elastic. Surprisingly, this was my first time making a casing like this and although it was time consuming, it was so simple. Once the bust portion of the dress was "done", I tried it on and it was huge. Even though Marissa's bust measurement is larger than mine, there was no way she would be able to fill out the cups. Not only were the cups too big, but there was too much fabric under the arms, and the straps were way too long.
To fix all of these problems without having to start completely over while still making a finished garment that I'm proud of, I decided to rethink my original design. While wearing the bust piece, I played around with the excess fabric, and came up with a good solution. Twisting the the bust pieces several times, where they meet the straps, made the cups slimmer at the top. The resulting gathers at the top of the bust pieces were extra bonus details. The only problem now was the massive unsightly seam where the bust pieces meet the straps. I wanted this "fix" to look intentional. Instead of cutting off the excess fabric from the straps, I wrapped the extra fabric around the large seam several times. I folded down the raw edge on the back side, and hand stitched it in place so that it wouldn't be visible on the front. Although time consuming, I love how this turned out!
For the skirt, I cut two pieces of fabric- each 20.5 in. wide x 25 in. long. To make sure the skirt would be long enough, I had to piece the skirt together with the stripes going vertically. This contrast (the stripes on the top are horizontal) has really grown on me since. I sewed the two side seams, and then gathered the top of the skirt with basting stitches. I then sewed the skirt to the top with a 1/2 inch seam allowance, later cut down to 1/4 inch. I hemmed the dress so that it hits several inches above my knee; Marissa is an inch shorter than me so I think this will be a good length for her.
The nightgown is so soft! I hope Marissa enjoys wearing it to sleep, and even more so, I desperately hope that it fits her well. Happy birthday!
Showing posts with label Sewing. Show all posts
Friday, September 4, 2015
Wednesday, August 26, 2015
Striped Plantain Tee
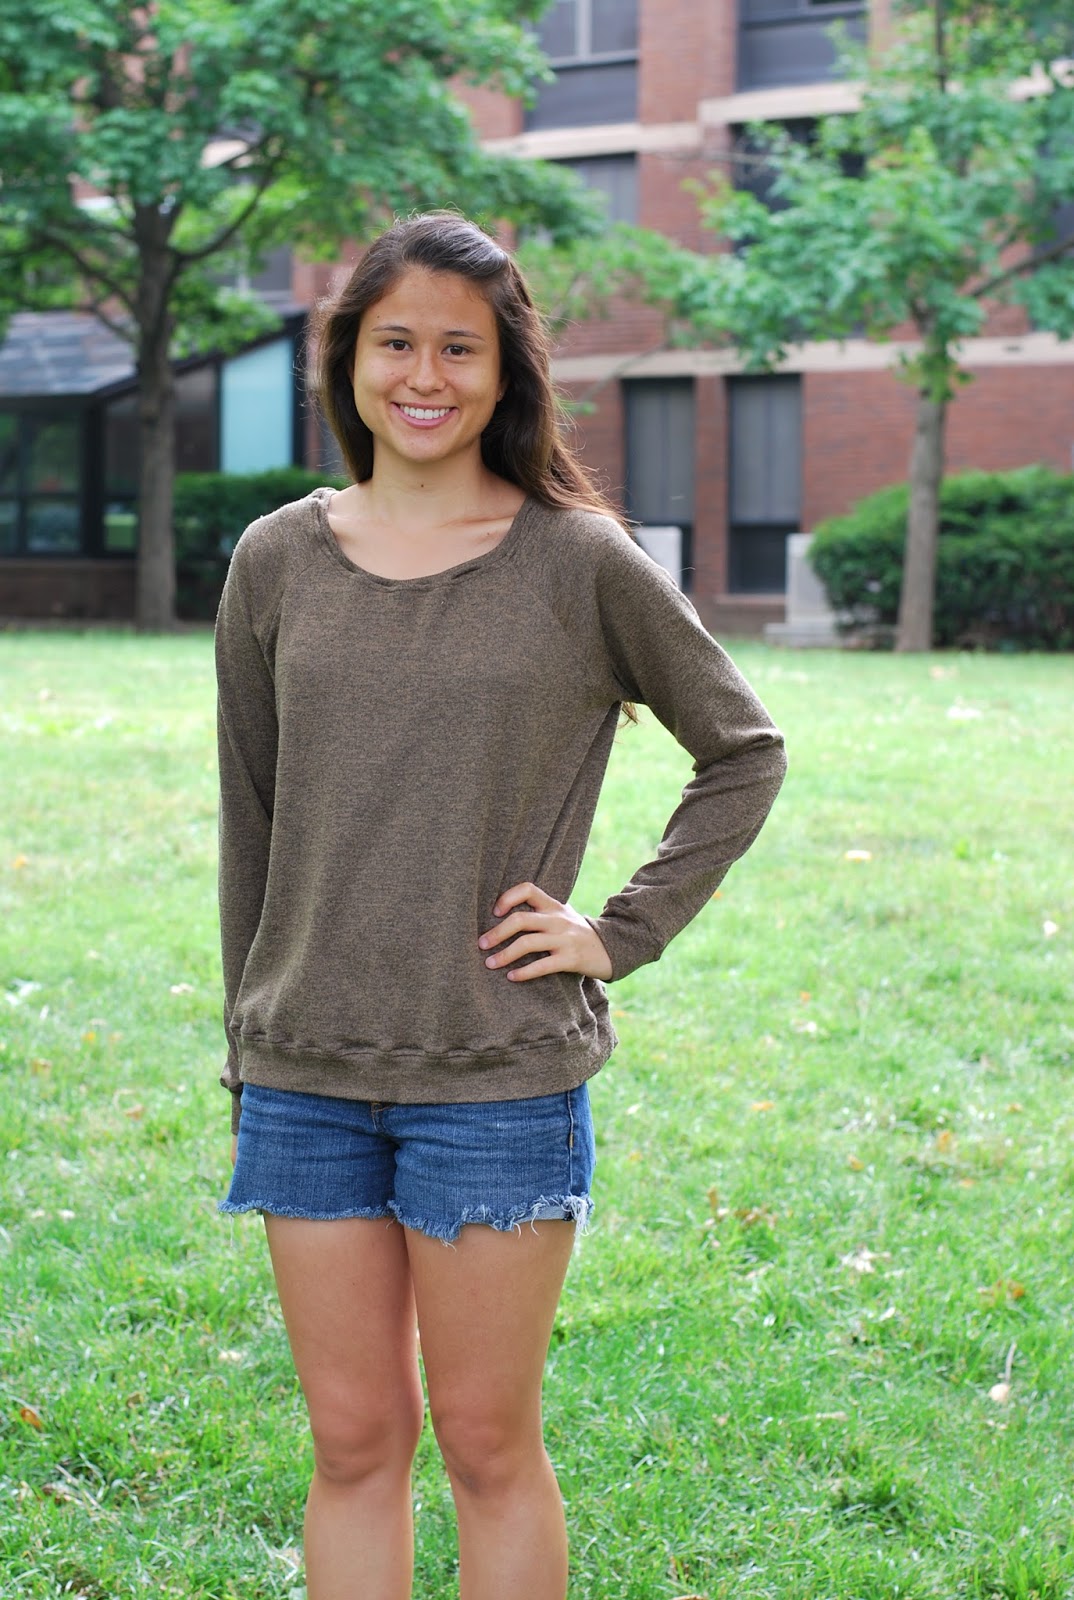
A few years ago I bought a bunch of cute knit fabric thinking that I wouldn't have any issues sewing with it. I felt pretty confident sewing with quilting cottons, and I didn't think knits would be much different. However, after my first attempt at sewing with knits without a serger, I gave up. My pretty knit fabric sat in a large tub, waiting for me to work up the courage to try again.
I recently started to love wearing knits again. I used to think they clung too much to my body, and I refused to wear garments made out of knits, unless they were super loose. I no longer have that issue, and want to wear comfortable knits all the time. So, I decided to give sewing with knits another try.
My first knit fabric attempt was a Scout Tee which is okay. I was just impressed that I managed to make something wearable. I knew I needed to figure out a better way to hem knits after reassessing that first top. I sewed the hems of that tee with a simple zig-zag stitch, but overall, it just looked funny to me.
I had been on the mission to find the perfect pattern to sew simple knit tees, and I honestly thought the Scout Tee was going to be the winner. I love the pattern, but it's not drafted specifically for knits, so I continued my search. The Plantain Tee was offered as a free pattern, so I figured I had nothing to lose trying it. To my surprise, as of now, I've found that perfect knit tee pattern I had been searching for. The pattern is written for knits, and my top fits perfectly.
This time, I used a regular straight stitch for all of my hems and I love the way that turned out. The hems turned out smooth without any waves or irregularities. I folded the fabric up at 1/2 inch and sewed as close to the raw edge as possible. I also attached the neck binding with a straight stitch, but zig-zag stitched that seam shut. Doing this made it much easier to top stitch the seam down, and also gives makes it look more finished. Like all of my newly sewn tops and dresses, I included a tag with the garment's size stamped on, made from twill tape. I sewed the side and shoulder seams also with a straight stitch, but left them unfinished since fraying won't be an issue with knits.
The pattern offers both long and short sleeve versions. I opted for the later, but I'll definitely be sewing several long sleeved tops this fall/winter. I didn't need to make any changes to the pattern pieces or instructions because I love the way this tee fits as written! It's not super flow-y (like how my Scout Tee turned out), but gradually flares out below the waist.
Even though I'm trying to work up the courage to go through my entire closest and purge clothing, I'm already thinking about what I want to sew for myself to add to my fall/winter wardrobe. Like I said before, more Plantain Tees (with elbow patches!) will definitely be included!
Pattern: Plantain Tee
Size: 38
I recently started to love wearing knits again. I used to think they clung too much to my body, and I refused to wear garments made out of knits, unless they were super loose. I no longer have that issue, and want to wear comfortable knits all the time. So, I decided to give sewing with knits another try.
My first knit fabric attempt was a Scout Tee which is okay. I was just impressed that I managed to make something wearable. I knew I needed to figure out a better way to hem knits after reassessing that first top. I sewed the hems of that tee with a simple zig-zag stitch, but overall, it just looked funny to me.
I had been on the mission to find the perfect pattern to sew simple knit tees, and I honestly thought the Scout Tee was going to be the winner. I love the pattern, but it's not drafted specifically for knits, so I continued my search. The Plantain Tee was offered as a free pattern, so I figured I had nothing to lose trying it. To my surprise, as of now, I've found that perfect knit tee pattern I had been searching for. The pattern is written for knits, and my top fits perfectly.
This time, I used a regular straight stitch for all of my hems and I love the way that turned out. The hems turned out smooth without any waves or irregularities. I folded the fabric up at 1/2 inch and sewed as close to the raw edge as possible. I also attached the neck binding with a straight stitch, but zig-zag stitched that seam shut. Doing this made it much easier to top stitch the seam down, and also gives makes it look more finished. Like all of my newly sewn tops and dresses, I included a tag with the garment's size stamped on, made from twill tape. I sewed the side and shoulder seams also with a straight stitch, but left them unfinished since fraying won't be an issue with knits.
The pattern offers both long and short sleeve versions. I opted for the later, but I'll definitely be sewing several long sleeved tops this fall/winter. I didn't need to make any changes to the pattern pieces or instructions because I love the way this tee fits as written! It's not super flow-y (like how my Scout Tee turned out), but gradually flares out below the waist.
Even though I'm trying to work up the courage to go through my entire closest and purge clothing, I'm already thinking about what I want to sew for myself to add to my fall/winter wardrobe. Like I said before, more Plantain Tees (with elbow patches!) will definitely be included!
Pattern: Plantain Tee
Size: 38
Monday, August 24, 2015
Floral Tiny Pocket Tank
Perhaps you recognize this fabric from my graduation dress? Well, I just had to use it again since it's the perfect weight fabric for this muggy, humid Philadelphia Summer. That, and my graduation dress no longer fits. So it seemed like a good idea to make a second garment with the same exact, leftover fabric.
I bought this pattern over three years ago, but never actually finished a single top. I've been trying (slowly but surely) to work my way through my fabric stash. I had just enough of this floral print left to squeak out one of these tanks. I didn't have enough fabric left for the neck or arm hole bindings, but found some leftover gray linen instead. The sturdiness of the linen worked better anyway.
This was a fairly simple pattern, and I didn't encounter any real problems. The only fit adjustment I made was cutting about an inch off from the bottom to take into account my short torso. Placing the pocket on straight definitely took effort, but I like that little added detail so it was worth the struggle. I haven't sewn bust darts in so long that I had to look up how to do this technique. I also decided to use French seams throughout the top for a more finished look. Otherwise, this tank was a quick sew. It took me about a week to finish with a lot of starting and stopping in between.
Pattern: Grainline Studio's Tiny Pocket Tank
Size: 4
I bought this pattern over three years ago, but never actually finished a single top. I've been trying (slowly but surely) to work my way through my fabric stash. I had just enough of this floral print left to squeak out one of these tanks. I didn't have enough fabric left for the neck or arm hole bindings, but found some leftover gray linen instead. The sturdiness of the linen worked better anyway.
This was a fairly simple pattern, and I didn't encounter any real problems. The only fit adjustment I made was cutting about an inch off from the bottom to take into account my short torso. Placing the pocket on straight definitely took effort, but I like that little added detail so it was worth the struggle. I haven't sewn bust darts in so long that I had to look up how to do this technique. I also decided to use French seams throughout the top for a more finished look. Otherwise, this tank was a quick sew. It took me about a week to finish with a lot of starting and stopping in between.
Pattern: Grainline Studio's Tiny Pocket Tank
Size: 4
Friday, July 10, 2015
My First Knit Linden
This top may look a little familiar; I wore it while sharing my Melodia shawl and my tubular stockinette cowl. It's my second Linden I've made, and I love the pattern even more than I did before. For this one, I decided to go with knit fabric to see how I'd like this combination.
I sewed up my regular Grainline size (4), and it ended up fitting perfectly. I typically like to wear looser tops, and using a knit, I was able to achieve this desired fit.
I chose this particular fabric mainly for its color and the simple fact that it's a knit. After sewing and ironing it a lot, I realize that the polyester content is too high for my liking. I'll definitely still wear this top a lot, but now I know which fabrics not to buy.
I love the Linden pattern, but I still need to work on perfecting it for my personal situation. This fit is spot on, but wanting finished seams without owning a serger can be tricky. I'm willing to keep trying though because this is the best fitting, quickly sewn, relaxed top I've made yet.
I sewed up my regular Grainline size (4), and it ended up fitting perfectly. I typically like to wear looser tops, and using a knit, I was able to achieve this desired fit.
After sewing my first Linden, I knew I needed to make a few adjustments in order have more professionally finished seams. For all of the bindings (neck, cuffs, and bottom hem), I used a 1/2 inch seam allowance to ensure that I would have plenty of fabric to zig-zag together and then securely top stitch down. This easy change was a great solution. In the future, I'll probably add an extra inch to the width of the neck binding pattern piece to allow for this alteration. I may also add a 1/2 inch to the length of the neck binding as well, as I had to stretch the binding more than usual.
Unlike my first Linden, this time I made sure to have ample fabric to tack down with top stitching. I love how much more finished it makes my garment look. However, the neck and bottom hem bands became pretty wave-y after top stitching. I think the tension on my machine was too tight, causing the fabric to pull too much. Next time I'll change the tension on my machine during this step to see if that helps.I chose this particular fabric mainly for its color and the simple fact that it's a knit. After sewing and ironing it a lot, I realize that the polyester content is too high for my liking. I'll definitely still wear this top a lot, but now I know which fabrics not to buy.
I love the Linden pattern, but I still need to work on perfecting it for my personal situation. This fit is spot on, but wanting finished seams without owning a serger can be tricky. I'm willing to keep trying though because this is the best fitting, quickly sewn, relaxed top I've made yet.
Tuesday, July 7, 2015
Gray Fleece Linden
This past Fall Lauren surprised me and bought me a copy of the Linden sweatshirt just as a fun, random present. We quickly went fabric shopping with this pattern in mind. I picked up two fabrics specifically for the Linden pattern, one of them being this black and white (essentially gray) fleece. I had a few unfinished projects collecting dust on my shelves that I needed to complete before starting anything new. This took me a few months to accomplish, but as soon as I could, I cut right into this fleece, super excited to try my hand at the ever-popular Linden!
I actually cut my fabric out months ago, but it wasn't until recently when I became excited about sewing again. May was approaching and I really wanted to participate in Me Made May this year. Also, Lauren was eager to sew, which made me want to as well. Lauren had made a Linden before and kept telling me how easy and quick of a project it was. I doubted her a bit, but I still had high hopes of finishing it in a relatively short amount of time. After reading through the instructions and sewing the first two seams, I realized how correct Lauren was. She wasn't exaggerating when she said how quickly this sweatshirt basically sews itself up. After the first couple of seams, I essentially had a wearable top. Although I still had a decent amount of work to do, this really boosted my confidence and encouraged me to stick with this project.
Unfortunately I didn't finish my Linden until the end of Spring, so I don't expect to get much use out of it till later in the year. Hopefully by that time though, I'll have sewn up a slew of other Lindens and my closest will just be one huge Linden party!
I actually cut my fabric out months ago, but it wasn't until recently when I became excited about sewing again. May was approaching and I really wanted to participate in Me Made May this year. Also, Lauren was eager to sew, which made me want to as well. Lauren had made a Linden before and kept telling me how easy and quick of a project it was. I doubted her a bit, but I still had high hopes of finishing it in a relatively short amount of time. After reading through the instructions and sewing the first two seams, I realized how correct Lauren was. She wasn't exaggerating when she said how quickly this sweatshirt basically sews itself up. After the first couple of seams, I essentially had a wearable top. Although I still had a decent amount of work to do, this really boosted my confidence and encouraged me to stick with this project.
I had all of the cuffs and bindings added to my bodice piece within a week of stop-and-go sewing. In actuality, the whole process only took me a few hours. However, my Linden sat uncompleted with the seams unfinished for two weeks because I was unsure exactly how I wanted to do this. In a perfect world I would own a serger and this wouldn't be a problem. In a semi-perfect world I would've used a larger seam allowance to either top stitch the seams down, or zig-zag them together for a more finished look. Needless to say, I don't live in either of those worlds. In reality, my sleeve cuffs, neck and bottom bindings aren't perfect. I was trying to adhere to a 1/4 inch seam allowance for my first time using this binding technique. At times this went very smoothly, but in more areas than not, I was a little shaky. In the end I decided to call this first Linden my very-wearable muslin. I just cut down the seam allowances to the shortest one so that they would be even throughout the garment. Since there wasn't much fabric left to work with at this point, I didn't finish the edges. I'm hoping the fabric won't fray (it shouldn't, it's fleece), but even if it does I know I'll still wear this piece a lot.
I sewed up a size 4 without any alterations, and this size fits me perfectly. There's plenty of ease to make this a comfortable, casual top to wear. Yet the Linden is still fitted just enough to make it appear more stylish than a normal sweatshirt, without losing any of that comfort. Unfortunately I didn't finish my Linden until the end of Spring, so I don't expect to get much use out of it till later in the year. Hopefully by that time though, I'll have sewn up a slew of other Lindens and my closest will just be one huge Linden party!
Friday, June 26, 2015
Tribal Print Pretty Blouse
In the Summer of 2010 my grandpa gave me a sewing machine and at first I didn't really use it. My mom had an old one that she seldom used, and since I had learned how to sew on her machine, I was more comfortable operating that particular one. I hadn't really seen the value of owning my own machine and learning how to use a different one.
Around this time I would watch Lauren read blogs, but I had absolutely no idea what a blog was. I too eventually started reading blogs, mainly sewing-related ones. I thought that it was amazing that people sewed most of their and their kids' clothing for fun. My mom would sew our Halloween costumes, but our everyday clothes were ready-to-wear. I was impressed and wanted to sew more. I talked to Lauren about this idea and she too took more of an interest in sewing. Her sewing machine was inoperable, so that meant that we would need to use mine. Not an issue, I just didn't know how to use it. Of course Lauren figured it out pretty quickly and then taught me how to use my own machine.
I've always associated the packaged patterns at JoAnn as Halloween/elementary school biography costumes. I recall my mom loading up all four of us kids in the car and heading to JoAnn when she needed to make one of us a costume. We would start by flipping through book after book, brand after brand, looking at various patterns and trying to visualize how a simple dress could be made into an elegant queen's royal dress. After what felt like hours sitting at that table we finally got to look at the fabric. By this time though we were all tired and hungry and just wanted to go home. So, my mom would go through the aisles of fabric by herself. Once she finally got her fabric choices cut and paid for everything we were able to go home. I remember watching her cut out the numerous pattern pieces, pinning them to the fabric, and then cutting out the various fabric shapes. She would then bring out her sewing machine and for a week or so, until the dress was complete, the kitchen table turned into her sewing room.
There had to be an easier way to go about this garment sewing business though. I didn't want to spend tireless hours searching for a pattern and corresponding fabric.
Lauren showed me that a few bloggers create clothing patterns that they either offer for free or for purchase. At this time I was against paying for patterns so I went for the free options. Don't worry, I no longer have any qualms about paying for patterns and happily do every time I see something I want to sew. Somehow I found the "Pretty Blouse" on Sew Mama Sew and immediately knew that's where I wanted to begin. Thanks to my stubbornness, I had to start the project right then. I didn't want to spend time shopping for fabric; I just wanted to start. Luckily Lauren had a bin full of fabric and she let me use whatever I wanted. I didn't know the difference between fibers and picked fabric based on the print alone. Lauren warned me of the consequences, but I didn't want to pre-wash or iron my fabric; I was ready to start cutting. She told me I should at least wait until we went to her house so I could use the cutting mat and rotary cutter. But since my mom never used those items, I didn't think I needed to either. I just started. I sewed together the yoke and shoulder seams, but I became frustrated and stopped after that. For several years this project sat in my "unfinished bag".
Like the paint chips, this unfinished blouse moved across the country with me. Once I was all settled in, I realized that if this project was worthy enough of being shipped across the United States, it had better get finished. I pulled out the unfinished top and the other untouched pieces and just stared at it. What was I thinking? It was so obvious this quilting cotton hadn't been washed and will most likely shrink. I couldn't even sew a straight line then; the seams were so uneven. The fabric was fraying because I didn't use sharp scissors. This Pretty Blouse wasn't going to turn out so pretty.
Thankfully I got frustrated and stopped sewing when I did. I decided that I needed to unpick everything I had managed to get my hands on, and just start over. Not only did my sewing skills improve in the past five years, but my measurements changed as well. I laid out all of the already cut pieces and cut them down to one size smaller. Even though I knew the fabric would end up shrinking once the finished garment was washed, there was a big difference in the bust measurement between the small and medium sizes. Because this top is only fitted at the bust and I had plenty of wiggle room even with the smaller size, I went ahead and chopped the pieces down. The edges were no longer frayed and I already felt so much better.
I used French seams throughout and like always, I think this made the finished piece look a thousand times better. The only real issue I had whilst sewing were the silly sleeves. Since I was using French seams, I knew I needed to first sew the sleeves to the bodice, wrong sides together. I knew that and I still messed up three times. That was not fun to seam rip, but it had to be done.
Around this time I would watch Lauren read blogs, but I had absolutely no idea what a blog was. I too eventually started reading blogs, mainly sewing-related ones. I thought that it was amazing that people sewed most of their and their kids' clothing for fun. My mom would sew our Halloween costumes, but our everyday clothes were ready-to-wear. I was impressed and wanted to sew more. I talked to Lauren about this idea and she too took more of an interest in sewing. Her sewing machine was inoperable, so that meant that we would need to use mine. Not an issue, I just didn't know how to use it. Of course Lauren figured it out pretty quickly and then taught me how to use my own machine.
I've always associated the packaged patterns at JoAnn as Halloween/elementary school biography costumes. I recall my mom loading up all four of us kids in the car and heading to JoAnn when she needed to make one of us a costume. We would start by flipping through book after book, brand after brand, looking at various patterns and trying to visualize how a simple dress could be made into an elegant queen's royal dress. After what felt like hours sitting at that table we finally got to look at the fabric. By this time though we were all tired and hungry and just wanted to go home. So, my mom would go through the aisles of fabric by herself. Once she finally got her fabric choices cut and paid for everything we were able to go home. I remember watching her cut out the numerous pattern pieces, pinning them to the fabric, and then cutting out the various fabric shapes. She would then bring out her sewing machine and for a week or so, until the dress was complete, the kitchen table turned into her sewing room.
Lauren showed me that a few bloggers create clothing patterns that they either offer for free or for purchase. At this time I was against paying for patterns so I went for the free options. Don't worry, I no longer have any qualms about paying for patterns and happily do every time I see something I want to sew. Somehow I found the "Pretty Blouse" on Sew Mama Sew and immediately knew that's where I wanted to begin. Thanks to my stubbornness, I had to start the project right then. I didn't want to spend time shopping for fabric; I just wanted to start. Luckily Lauren had a bin full of fabric and she let me use whatever I wanted. I didn't know the difference between fibers and picked fabric based on the print alone. Lauren warned me of the consequences, but I didn't want to pre-wash or iron my fabric; I was ready to start cutting. She told me I should at least wait until we went to her house so I could use the cutting mat and rotary cutter. But since my mom never used those items, I didn't think I needed to either. I just started. I sewed together the yoke and shoulder seams, but I became frustrated and stopped after that. For several years this project sat in my "unfinished bag".
Like the paint chips, this unfinished blouse moved across the country with me. Once I was all settled in, I realized that if this project was worthy enough of being shipped across the United States, it had better get finished. I pulled out the unfinished top and the other untouched pieces and just stared at it. What was I thinking? It was so obvious this quilting cotton hadn't been washed and will most likely shrink. I couldn't even sew a straight line then; the seams were so uneven. The fabric was fraying because I didn't use sharp scissors. This Pretty Blouse wasn't going to turn out so pretty.
Thankfully I got frustrated and stopped sewing when I did. I decided that I needed to unpick everything I had managed to get my hands on, and just start over. Not only did my sewing skills improve in the past five years, but my measurements changed as well. I laid out all of the already cut pieces and cut them down to one size smaller. Even though I knew the fabric would end up shrinking once the finished garment was washed, there was a big difference in the bust measurement between the small and medium sizes. Because this top is only fitted at the bust and I had plenty of wiggle room even with the smaller size, I went ahead and chopped the pieces down. The edges were no longer frayed and I already felt so much better.
I used French seams throughout and like always, I think this made the finished piece look a thousand times better. The only real issue I had whilst sewing were the silly sleeves. Since I was using French seams, I knew I needed to first sew the sleeves to the bodice, wrong sides together. I knew that and I still messed up three times. That was not fun to seam rip, but it had to be done.
Once I set the sleeves correctly, the rest of the top was a breeze to finish. I ended up taking about five inches off of the length. I have a short
torso for my height, and I think this top looks a lot better on me when
it's shorter. All I had left to do were the neck binding and the hem, which I could've easily finished in less than a day. However, I procrastinated once again and let my unfinished garment stay incomplete for way too long. After being hung up all alone in the corner of my room for well over a month, I finally sat back down at my sewing machine to finish the blouse. My favorite little detail to add in handmade garments now is a cute little tag made from a piece of twill tape stamped with the correct size. I think the tag makes the piece feel more fun, but even more importantly I really appreciate the functionality of it. Now I no longer have to worry about recording which size I made for each handmade garment.
I'm glad I finally finished this Pretty Blouse; it only took me less than five years! It's not my favorite thing I've ever sewn; I'm not a big fan of the puffy sleeves. But, I am grateful to have finished it and been able to transform the original mess that is was (circa 2010) into something actually wearable. It's also interesting to see how my style has changed in the past half-decade; the flowy, peasant blouse tops that I always felt I needed to wear back then are a complete 180 to the solid, simple knit tees I gravitate toward now.
Thursday, May 21, 2015
The Log Cabin Quilt
The weather has been pretty gloomy here today in Philadelphia. It's cold, the sky is overcast, and there has been on-and-off rain. So, I figured today was the perfect day to share the quilt I finally finished for Lauren about a month ago.
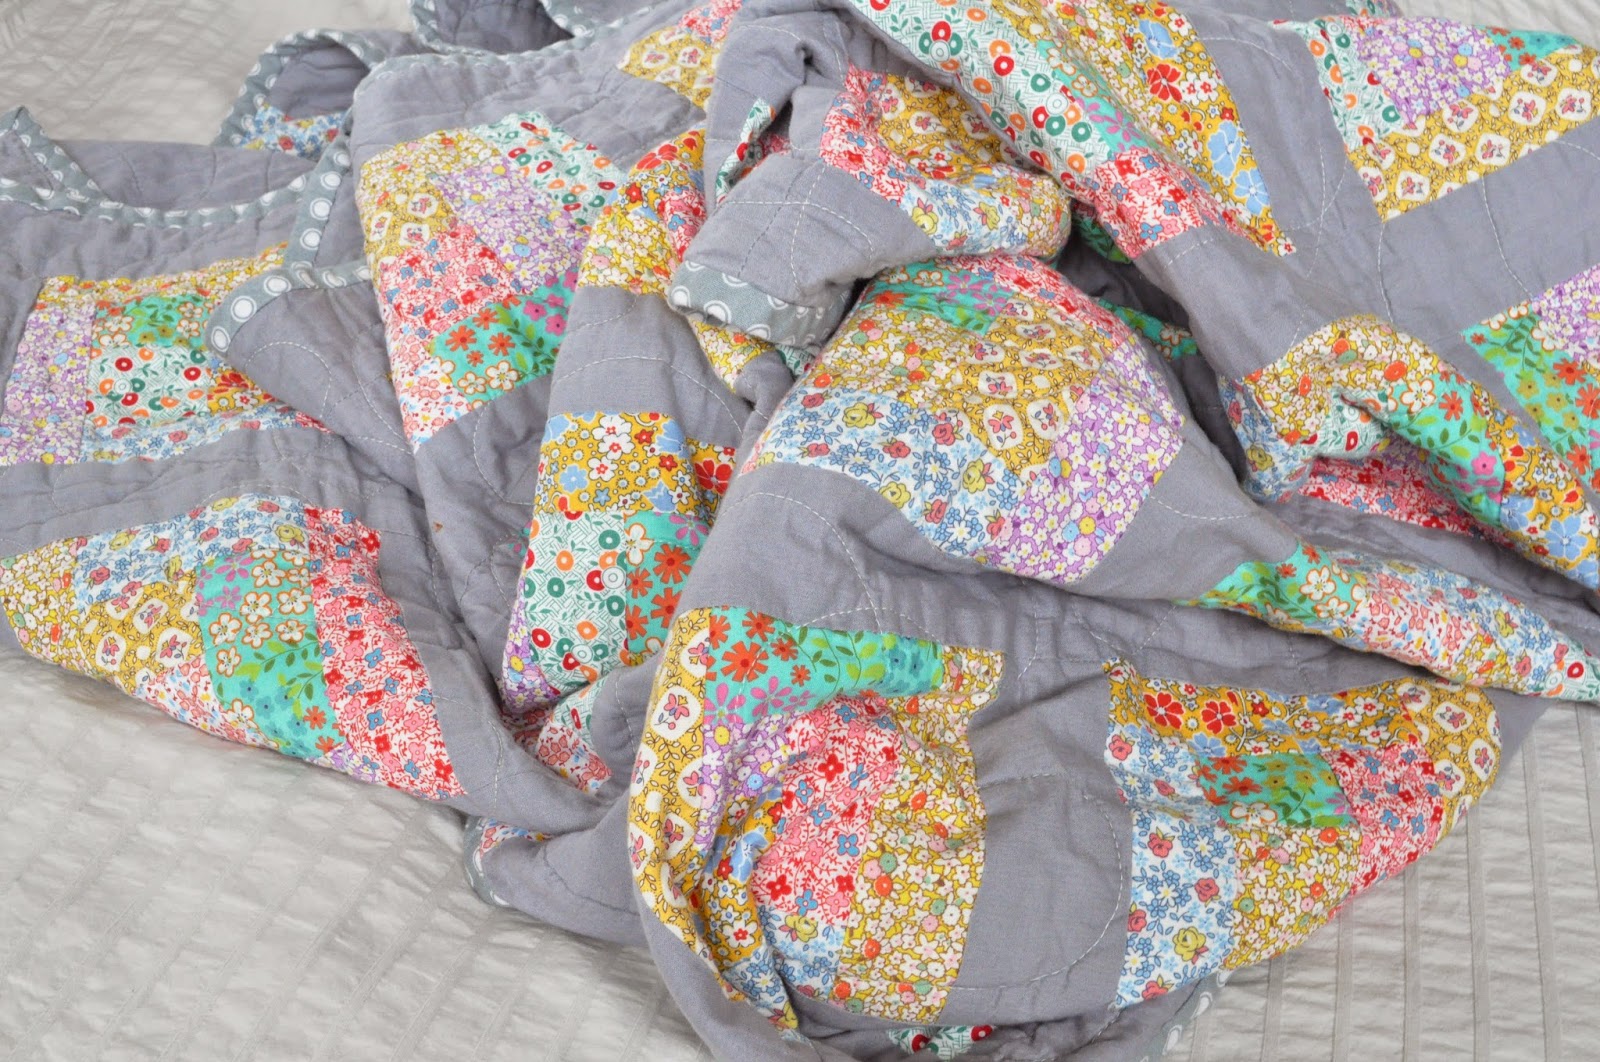
Way back in the Summer of 2010 I believe, I started sewing a log cabin quilt top. I was really into cute tiny floral fabric at the time, so that was the starting point for this quilt. Lauren had a bunch of different florals and she let me use whatever fabric she owned since I was letting her store her craft stuff at my house. I really wanted to use the floral fabrics in all of their fun, pretty colors, but I also didn't want to take away so many hoarded fabrics from Lauren, so I decided to make the quilt for Lauren. I still got to play with the fabric, but she still got to keep the fabric in a way. Lauren also wanted to make a quilt, so we just decided to sew quilts for each other.
Prior to this quilt, I've had a little bit of experience in the quilting realm. In 2008 I sewed my first quilt top from a pattern in a random quilting book I found in my mom's crafting stuff. I tried basting the quilt top to the batting and backing, but it was too frustrating and I gave up. A year later in 2009 I actually completed a mini quilt, also for Lauren. I knew that if I wanted to finish it, I needed to start smaller to make the project seem more doable. Even though the quilting isn't even close to perfect, and the seams and binding are starting to come apart six years later, I'm just proud of myself for finishing it.
My sewing skills have improved a lot since then. I figured that it'd be a challenge, but that sewing a full size quilt from start to finish was a realistic goal for me. I knew that the quilting step would be the hardest hurdle to overcome, but I'd cross that bridge when I got to that point. It probably took me about the entire summer to completely finish the quilt top. I'm a pretty patient person when it comes to menial tasks, and so I actually really enjoyed cutting the fabric out to the precise measurements. I kept seven separate zip-loc bags, each holding a different size cut fabric piece for the log cabin squares. When all of the pieces were cut out and it was time to actually assemble the squares, I literally picked a piece of each size randomly for each square, so long as there weren't two of the same fabrics per one log cabin. As weird as it may seem, this was probably my favorite part of the entire process. I love the randomization of it and how many different squares I could create.
For the quilt back, I decided to go with the solid gray fabric that I used on the front to break up the log cabin squares. Due to the huge size of the quilt, I would've had to use several separate pieces of fabric just to create a back large enough. I figured that since I already needed to macgyver the back, mind as well make it into a larger puzzle. I used some leftover floral fabric to make one two horizontal rows (one not going fully across), intercepted by one vertical column.
Then it was time for the actual quilting, the step I had been dreading from the start. I had enough trouble quilting the mini quilt on my machine, and I knew there was no way I'd be able to quilt a full size quilt without a longer arm. Thank goodness Lauren's aunt Natalie is much more talented than me when it comes to sewing. She has made probably dozens of quilts before and has even taken several classes at a local quilt shop and learned to use their huge quilting machine. Because she mastered those classes, she was able to rent the machine by the hour for personal use. I'm so grateful to Lauren's aunt for this. While Lauren and I tagged along, we weren't allowed to actually use the machine since we weren't "certified", but we were still able to choose the quilting design (we both chose for Natalie to freehand random swirls), and best of all we got to admire the entire process. I was and still am in awe of her talent. I finished the quilt top towards the end of the Summer of 2010, but didn't have the quilting done until December of 2012. Talk about a work in progress! I'm the queen of leaving projects in limbo.
Then the quilt sat quilted without binding for a very long time. Again daunted by the next and final step, I hesitated starting the hand stitching. Machine sewing the binding onto the quilt was an easy, non-stressful task. I did that shortly after having the quilt quilted. But because I wanted this quilt to look as perfect and finished as possible, I knew that I needed to hand sew the back side of the binding on. This last task wasn't started until April of 2015. I don't have a lot of practice with impeccable hand stitching, but after watching Lauren bind my quilt, I quickly picked up the technique. It took a few tries, but I managed to finish binding the entire quilt in less than a week. I really don't know what I was so afraid of. Binding is now one of my favorite things to do while watching TV. I want to make more quilts just so I can hand sew the binding now. After securing the binding, I promptly tossed the quilt in the washer and dryer, soaking up all of its wrinkled squishy-ness.
Even though it took me five years to complete just one quilt, I learned so much in the process. I need someone to sit down with me and walk me through the steps to fully comprehend how to do something. Luckily my best friend is the opposite and can teach herself by watching online videos and reading tutorials, then she repeats the steps to me so that I learn how to do something new. It's also really important and rewarding to do something the correct way the first time around. The first quilt I made for Lauren, while I did put a lot of effort into it, I didn't do any research. I neglected to iron all of the seams which has caused parts of the quilt to begin to tear. I used clear plastic thread for the entire quilt which is now starting to break, also causing the seams to rip; the ends of the thread are also really pokey. I didn't baste the quilt properly and the backside is super wonky because of that. I quickly machine stitched the entire binding on and didn't attempt the corners correctly. Basically my first finished quilt isn't nearly as good looking as this last one. Luckily Lauren still likes it, but I know she appreciates the time and research this latest log cabin quilt received. Five years is still an awfully long time and I hope to finish my next quilt in a fraction of that time. I can't wait to get started cutting out and piecing all of the little bits of fabric, but this next quilt won't be happening for a while!
Way back in the Summer of 2010 I believe, I started sewing a log cabin quilt top. I was really into cute tiny floral fabric at the time, so that was the starting point for this quilt. Lauren had a bunch of different florals and she let me use whatever fabric she owned since I was letting her store her craft stuff at my house. I really wanted to use the floral fabrics in all of their fun, pretty colors, but I also didn't want to take away so many hoarded fabrics from Lauren, so I decided to make the quilt for Lauren. I still got to play with the fabric, but she still got to keep the fabric in a way. Lauren also wanted to make a quilt, so we just decided to sew quilts for each other.
Prior to this quilt, I've had a little bit of experience in the quilting realm. In 2008 I sewed my first quilt top from a pattern in a random quilting book I found in my mom's crafting stuff. I tried basting the quilt top to the batting and backing, but it was too frustrating and I gave up. A year later in 2009 I actually completed a mini quilt, also for Lauren. I knew that if I wanted to finish it, I needed to start smaller to make the project seem more doable. Even though the quilting isn't even close to perfect, and the seams and binding are starting to come apart six years later, I'm just proud of myself for finishing it.
My sewing skills have improved a lot since then. I figured that it'd be a challenge, but that sewing a full size quilt from start to finish was a realistic goal for me. I knew that the quilting step would be the hardest hurdle to overcome, but I'd cross that bridge when I got to that point. It probably took me about the entire summer to completely finish the quilt top. I'm a pretty patient person when it comes to menial tasks, and so I actually really enjoyed cutting the fabric out to the precise measurements. I kept seven separate zip-loc bags, each holding a different size cut fabric piece for the log cabin squares. When all of the pieces were cut out and it was time to actually assemble the squares, I literally picked a piece of each size randomly for each square, so long as there weren't two of the same fabrics per one log cabin. As weird as it may seem, this was probably my favorite part of the entire process. I love the randomization of it and how many different squares I could create.
For the quilt back, I decided to go with the solid gray fabric that I used on the front to break up the log cabin squares. Due to the huge size of the quilt, I would've had to use several separate pieces of fabric just to create a back large enough. I figured that since I already needed to macgyver the back, mind as well make it into a larger puzzle. I used some leftover floral fabric to make one two horizontal rows (one not going fully across), intercepted by one vertical column.
Then it was time for the actual quilting, the step I had been dreading from the start. I had enough trouble quilting the mini quilt on my machine, and I knew there was no way I'd be able to quilt a full size quilt without a longer arm. Thank goodness Lauren's aunt Natalie is much more talented than me when it comes to sewing. She has made probably dozens of quilts before and has even taken several classes at a local quilt shop and learned to use their huge quilting machine. Because she mastered those classes, she was able to rent the machine by the hour for personal use. I'm so grateful to Lauren's aunt for this. While Lauren and I tagged along, we weren't allowed to actually use the machine since we weren't "certified", but we were still able to choose the quilting design (we both chose for Natalie to freehand random swirls), and best of all we got to admire the entire process. I was and still am in awe of her talent. I finished the quilt top towards the end of the Summer of 2010, but didn't have the quilting done until December of 2012. Talk about a work in progress! I'm the queen of leaving projects in limbo.
Then the quilt sat quilted without binding for a very long time. Again daunted by the next and final step, I hesitated starting the hand stitching. Machine sewing the binding onto the quilt was an easy, non-stressful task. I did that shortly after having the quilt quilted. But because I wanted this quilt to look as perfect and finished as possible, I knew that I needed to hand sew the back side of the binding on. This last task wasn't started until April of 2015. I don't have a lot of practice with impeccable hand stitching, but after watching Lauren bind my quilt, I quickly picked up the technique. It took a few tries, but I managed to finish binding the entire quilt in less than a week. I really don't know what I was so afraid of. Binding is now one of my favorite things to do while watching TV. I want to make more quilts just so I can hand sew the binding now. After securing the binding, I promptly tossed the quilt in the washer and dryer, soaking up all of its wrinkled squishy-ness.
Even though it took me five years to complete just one quilt, I learned so much in the process. I need someone to sit down with me and walk me through the steps to fully comprehend how to do something. Luckily my best friend is the opposite and can teach herself by watching online videos and reading tutorials, then she repeats the steps to me so that I learn how to do something new. It's also really important and rewarding to do something the correct way the first time around. The first quilt I made for Lauren, while I did put a lot of effort into it, I didn't do any research. I neglected to iron all of the seams which has caused parts of the quilt to begin to tear. I used clear plastic thread for the entire quilt which is now starting to break, also causing the seams to rip; the ends of the thread are also really pokey. I didn't baste the quilt properly and the backside is super wonky because of that. I quickly machine stitched the entire binding on and didn't attempt the corners correctly. Basically my first finished quilt isn't nearly as good looking as this last one. Luckily Lauren still likes it, but I know she appreciates the time and research this latest log cabin quilt received. Five years is still an awfully long time and I hope to finish my next quilt in a fraction of that time. I can't wait to get started cutting out and piecing all of the little bits of fabric, but this next quilt won't be happening for a while!
Monday, May 18, 2015
Striped Knit Scout Tee
As I've mentioned at least a dozen times before, I've been terribly afraid of sewing with knits. I don't own a serger and I don't plan on purchasing one anytime soon, so it was up to my standard sewing machine to get the job done. This meant researching various knit tricks and practicing every single one multiple times before starting on my actual garment.
For the seams I debated between using a regular straight stitch or a zig-zag stitch. I ended up going with the straight stitch for all of the seams and the neck binding because zig-zagging made the fabric way too wavy, even when I adjusted the tension and used a jersey fabric needle. For my first attempt at finishing the sleeve hems, I folded the edge of the fabric twice and then used a straight stitch to secure it. While I didn't have any issues with it being too wavy, this method was way too bulky and just didn't look right. Instead of seam ripping the hems, I simply cut the binding completely off since the sleeves had plenty of length to them.
After abandoning the original sleeve hems, I realized that I needed to go back to my scrap fabric and practice different hemming techniques. I thought using a twin needle would be the best option, but I was definitely wrong. Because my machine wasn't built to hold two spools of thread at one time, the tension was messed up and I always ended up with huge knots of thread. Using a straight stitch for hemming created way too many ripples. So, as a last resort I switched to the zig-zag stitched expecting to be disappointed again. However, zig-zagging the hems followed by ironing them worked perfectly. I did this for both the body and sleeve hems, and will probably stick to this technique in the future. The sleeve hems are still a tiny bit wavy which I'm content with for it being my first time sewing with knits, but I'll try sewing on top of tissue paper next time to see if that helps.
For the neck binding, I used the same instructions that were given for the Linden pattern. This worked out really well. The only change I made was shortening the neck binding piece by about 1.5 inches since I was working with super stretchy fabric.
I'm not sure what happened while I was cutting out my pattern pieces, but the back bodice piece ended up being a lot shorter than the front when sewn together. I should've waited till the very end to trim the front piece because I haphazardly cut too much fabric off. Luckily I have a short torso so this wasn't a huge setback. It's a little shorter in the front than I would've liked, but I doubt this will deter me from tossing on this top often.
For my first adventure in sewing with knits, I'm pretty stoked with what I was able to make. Thankfully I have plenty more knit fabric to practice with, and hope to have a bundle of ultra comfortable knit tops to wear daily. The Scout Tee ended up being a great pattern to sew with knits. It's a loose fitting top to begin with, add in knit fabric, and it becomes even more drape-y. For my next knit Scout I'll go a size down for a more fitted tee to see which version I like better.
For the seams I debated between using a regular straight stitch or a zig-zag stitch. I ended up going with the straight stitch for all of the seams and the neck binding because zig-zagging made the fabric way too wavy, even when I adjusted the tension and used a jersey fabric needle. For my first attempt at finishing the sleeve hems, I folded the edge of the fabric twice and then used a straight stitch to secure it. While I didn't have any issues with it being too wavy, this method was way too bulky and just didn't look right. Instead of seam ripping the hems, I simply cut the binding completely off since the sleeves had plenty of length to them.
After abandoning the original sleeve hems, I realized that I needed to go back to my scrap fabric and practice different hemming techniques. I thought using a twin needle would be the best option, but I was definitely wrong. Because my machine wasn't built to hold two spools of thread at one time, the tension was messed up and I always ended up with huge knots of thread. Using a straight stitch for hemming created way too many ripples. So, as a last resort I switched to the zig-zag stitched expecting to be disappointed again. However, zig-zagging the hems followed by ironing them worked perfectly. I did this for both the body and sleeve hems, and will probably stick to this technique in the future. The sleeve hems are still a tiny bit wavy which I'm content with for it being my first time sewing with knits, but I'll try sewing on top of tissue paper next time to see if that helps.
For the neck binding, I used the same instructions that were given for the Linden pattern. This worked out really well. The only change I made was shortening the neck binding piece by about 1.5 inches since I was working with super stretchy fabric.
I'm not sure what happened while I was cutting out my pattern pieces, but the back bodice piece ended up being a lot shorter than the front when sewn together. I should've waited till the very end to trim the front piece because I haphazardly cut too much fabric off. Luckily I have a short torso so this wasn't a huge setback. It's a little shorter in the front than I would've liked, but I doubt this will deter me from tossing on this top often.
For my first adventure in sewing with knits, I'm pretty stoked with what I was able to make. Thankfully I have plenty more knit fabric to practice with, and hope to have a bundle of ultra comfortable knit tops to wear daily. The Scout Tee ended up being a great pattern to sew with knits. It's a loose fitting top to begin with, add in knit fabric, and it becomes even more drape-y. For my next knit Scout I'll go a size down for a more fitted tee to see which version I like better.
Friday, May 15, 2015
Patriotic Plaid Tova Top
A few years ago Lauren and I really got into the idea of sewing our own clothes, so much so that we quickly purchased several indie pdf patterns. Although we loved the concept, we never really jumped at the actual producing anything.
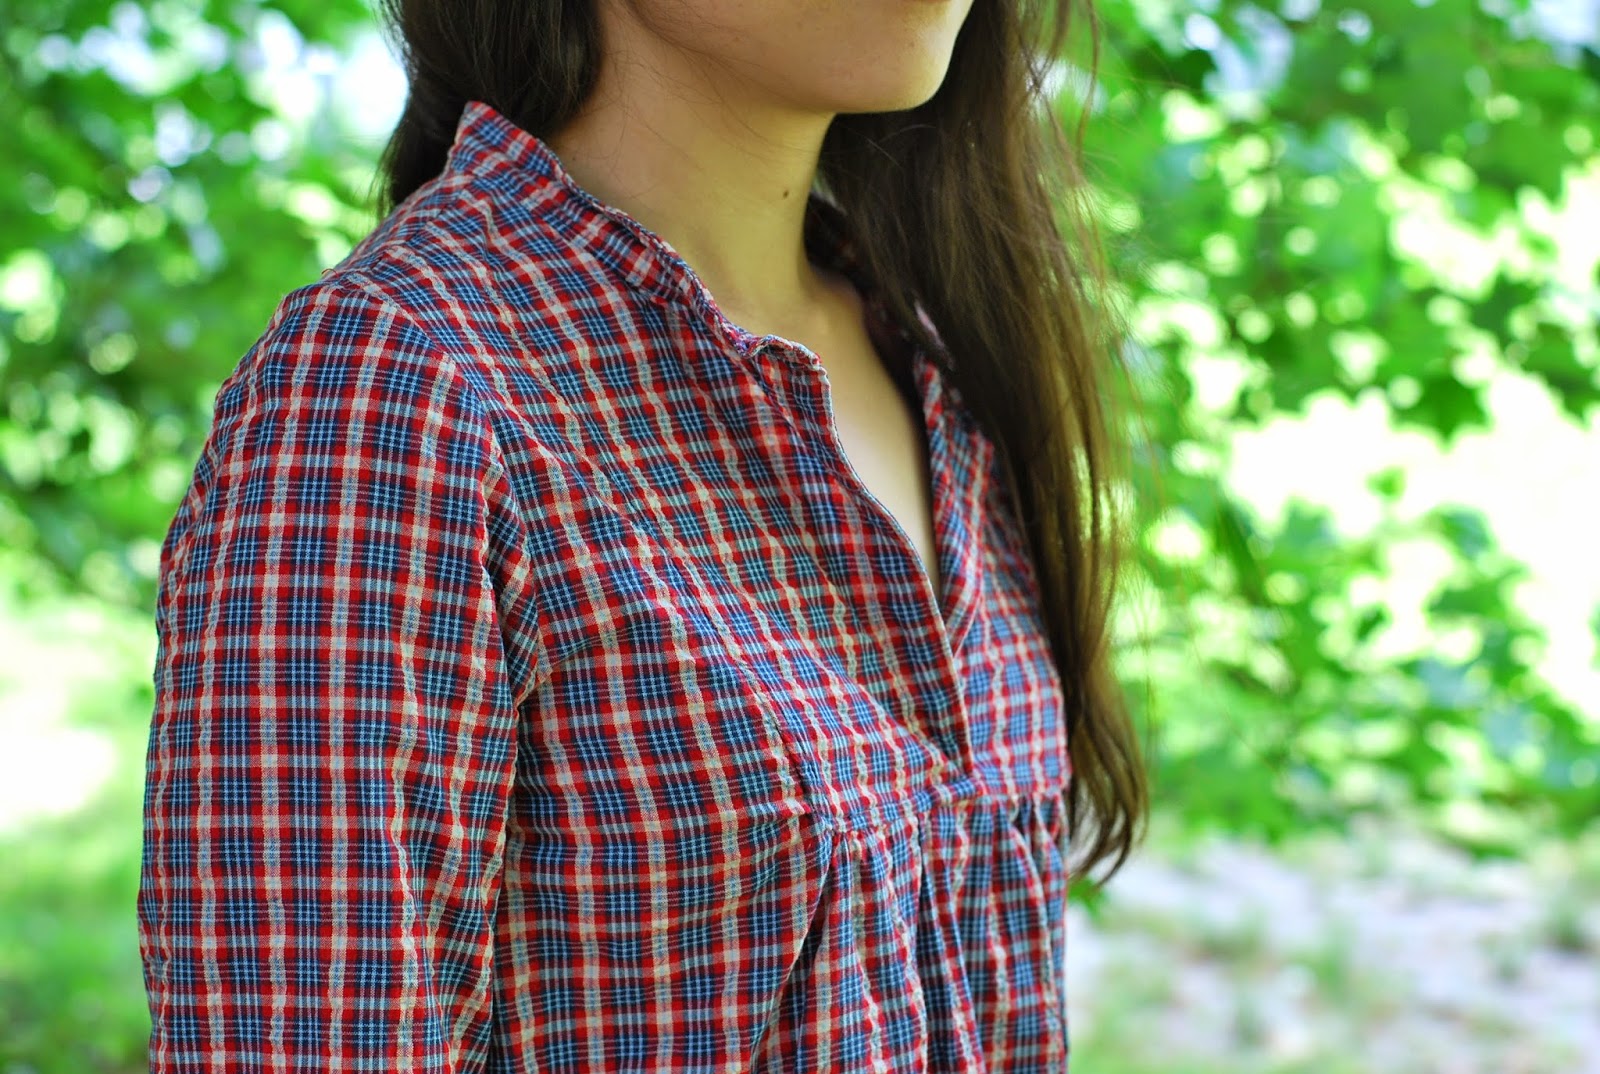
Lauren received a new sewing machine for Christmas and our desire to sew was soon rekindled. I have bins full of fabric that I bought a while ago, many with the intention of making specific garments. So, I decided to pull out the red, white, and blue woven plaid and get started with a Wiksten Tova Top for myself. The patriotic-ness of the fabric didn't occur to me when I bought it, I just thought it was the perfect weight with plenty of softness for this specific pattern.
It took me about a week to sew up this top for several reasons. I do have a lot of patience when it comes to sewing which is a blessing, but also a curse. I know I need to stop sewing when I get too tired because I'll just keeping making mistakes which will take even longer to fix. I tell myself I should put off the next step till tomorrow when I have a fresher mind, but then I end up doing this every night instead of just pushing through. I'm grateful that this prevents me from making as many mistakes as I normally would, but this also means that it takes me easily twice as long to finish a project. I actually finished sewing this Tova Top several months ago, but it's taken a while to get blogged since being photographed like this in public can be a little intimidating to say the least.
I would love to own a serger someday, but right now it's not in my budget. Maybe if I get a lot better at sewing and I start sewing a lot more of my daily clothing, I'll find more a need for one. But right now, I'm all about the French seams. I love stitching 1/4 inch seams thanks to the ease of lining up my fabric against the foot of my machine. So when I do French seams, the total seam ends up needing a 1/2 inch seam allowance. This pattern though was designed with a 3/8 inch seams allowance. I did take these facts into account, but I decided to just cut my fabric with the existing pattern pieces and hope for the best. I figured it's a pretty loose fitting top, and mostly I honestly didn't want to have to do any extra work.
The biggest difficulty I encountered was sewing in the placket. It wouldn't have been an issue at all had I not chosen to use French seams. After a little frustration and a lot of seam ripping, I managed to make my placket look decent and I'm perfectly okay with its finished look. I had some issues understanding how to sew the sleeve cuffs on, but after some Google searching and stumbling upon a Sew Along, I finally figured it out! I also realized that I need to practice top stitching a lot more. This technique required a lot more seemingly endless seam ripping to achieve my desired finished look.
I sewed up a size small in the top length versus the tunic (and still needed to take an additional several inches off in length). Besides the length, the only other adjustment I made to the pattern was increasing the overall seam allowance from 3/8 inch to 1/2 inch, as mentioned above. Luckily, the finished garment fits perfectly even with this slight variation! And hey, now I have the perfect top to wear on the Fourth of July!
Even though they were a little annoying to sew, I love the details of the top. The adorable collar, sleeve cuffs, and placket completely make the piece and I'm sure I'll be using this pattern again. I want to make a tunic now! How cute would that be with some leggings/tights and boots for the Fall?
Lauren received a new sewing machine for Christmas and our desire to sew was soon rekindled. I have bins full of fabric that I bought a while ago, many with the intention of making specific garments. So, I decided to pull out the red, white, and blue woven plaid and get started with a Wiksten Tova Top for myself. The patriotic-ness of the fabric didn't occur to me when I bought it, I just thought it was the perfect weight with plenty of softness for this specific pattern.
It took me about a week to sew up this top for several reasons. I do have a lot of patience when it comes to sewing which is a blessing, but also a curse. I know I need to stop sewing when I get too tired because I'll just keeping making mistakes which will take even longer to fix. I tell myself I should put off the next step till tomorrow when I have a fresher mind, but then I end up doing this every night instead of just pushing through. I'm grateful that this prevents me from making as many mistakes as I normally would, but this also means that it takes me easily twice as long to finish a project. I actually finished sewing this Tova Top several months ago, but it's taken a while to get blogged since being photographed like this in public can be a little intimidating to say the least.
I would love to own a serger someday, but right now it's not in my budget. Maybe if I get a lot better at sewing and I start sewing a lot more of my daily clothing, I'll find more a need for one. But right now, I'm all about the French seams. I love stitching 1/4 inch seams thanks to the ease of lining up my fabric against the foot of my machine. So when I do French seams, the total seam ends up needing a 1/2 inch seam allowance. This pattern though was designed with a 3/8 inch seams allowance. I did take these facts into account, but I decided to just cut my fabric with the existing pattern pieces and hope for the best. I figured it's a pretty loose fitting top, and mostly I honestly didn't want to have to do any extra work.
The biggest difficulty I encountered was sewing in the placket. It wouldn't have been an issue at all had I not chosen to use French seams. After a little frustration and a lot of seam ripping, I managed to make my placket look decent and I'm perfectly okay with its finished look. I had some issues understanding how to sew the sleeve cuffs on, but after some Google searching and stumbling upon a Sew Along, I finally figured it out! I also realized that I need to practice top stitching a lot more. This technique required a lot more seemingly endless seam ripping to achieve my desired finished look.
I sewed up a size small in the top length versus the tunic (and still needed to take an additional several inches off in length). Besides the length, the only other adjustment I made to the pattern was increasing the overall seam allowance from 3/8 inch to 1/2 inch, as mentioned above. Luckily, the finished garment fits perfectly even with this slight variation! And hey, now I have the perfect top to wear on the Fourth of July!
Even though they were a little annoying to sew, I love the details of the top. The adorable collar, sleeve cuffs, and placket completely make the piece and I'm sure I'll be using this pattern again. I want to make a tunic now! How cute would that be with some leggings/tights and boots for the Fall?
Thursday, April 16, 2015
Cross Stitched Knitting Pouch
A few months ago I sewed my first pouch as part of my swap for the Secret Valentine Exchange. Both Lauren and I loved the colors so much that Lauren requested a similar one as part of her Easter basket goodies. We both loved the mint colored linen, and I had just enough to make one more pouch. I bought several yards of this linen a few years ago, and as soon as I had it cut, I remember thinking, "Why am I getting so much of this? I can't think of anything to make out of it.". My how things have changed though. Now that I no longer have any linen left, I want to make everything with it- skirts, tops, more pouches/bags. I do have a dress already cut out in this linen, so hopefully that project works out.
Back to the pouch though. I didn't have any of the light pink cotton left, so I went through our tub of scraps and picked out several other contenders. Out of the various choices, Lauren selected this aqua and black dots fabric for the inside.
She also suggested a cross stitch patch be sewed to the outside of the pouch. Of course she loved the patterns related to knitting, so we picked this little design from the Autumn Sampler. I thought it would be cute to personalize it a tad. Lauren has been knitting a pair of socks on ChiaoGoo circular needles. So, I changed the colors of the cross stitch pattern, making the needle cable red and the socks blue/purple, just like her actual socks in progress.
The trickiest part for me when sewing a pouch is always the zipper ends. On my last pouch I mentioned that I would try this method next time. Well, I started using this tutorial and then I just assumed I knew how to do the rest and stopped following it. Bad idea. I didn't realize the pouch fabric needed to be longer than the zipper, which created multiple problems. I ended up having to unpick the top corner seams countless times. This was the only way I could get this pouch to look decently finished. This whole project took way longer than it needed to because of this problem. I've learned my lesson, and will now follow every single step in a tutorial for now on.
Despite the setbacks, I still love this pouch. The color, the style, and the little cross stitch detail make it so fun. I hope Lauren likes it just as much as I do, otherwise I guess I'll have a new pouch!
Back to the pouch though. I didn't have any of the light pink cotton left, so I went through our tub of scraps and picked out several other contenders. Out of the various choices, Lauren selected this aqua and black dots fabric for the inside.
She also suggested a cross stitch patch be sewed to the outside of the pouch. Of course she loved the patterns related to knitting, so we picked this little design from the Autumn Sampler. I thought it would be cute to personalize it a tad. Lauren has been knitting a pair of socks on ChiaoGoo circular needles. So, I changed the colors of the cross stitch pattern, making the needle cable red and the socks blue/purple, just like her actual socks in progress.
The trickiest part for me when sewing a pouch is always the zipper ends. On my last pouch I mentioned that I would try this method next time. Well, I started using this tutorial and then I just assumed I knew how to do the rest and stopped following it. Bad idea. I didn't realize the pouch fabric needed to be longer than the zipper, which created multiple problems. I ended up having to unpick the top corner seams countless times. This was the only way I could get this pouch to look decently finished. This whole project took way longer than it needed to because of this problem. I've learned my lesson, and will now follow every single step in a tutorial for now on.
Despite the setbacks, I still love this pouch. The color, the style, and the little cross stitch detail make it so fun. I hope Lauren likes it just as much as I do, otherwise I guess I'll have a new pouch!
Tuesday, April 14, 2015
Sewing Plans
Lauren and I have dubbed this upcoming weekend, a sewing weekend! I really want to be able to participate in Me Made May this year, so I'm hoping to make a lot of progress on my handmade wardrobe this weekend.
In the past two years I've bought a ton of fabric with the idea to sew a lot of garments. Sadly, I've only made several pieces for myself since then. Being optimistic, at least I have seemingly infinite yards of fabric to work with which should be plenty to carry me through May. However, a lot of this hoarded fabric are knits and I've been terrified of using it. I know I just need to power through it and eventually I'll get used to it, but it's so daunting! I'm hoping to get tons of practice sewing with knits this weekend though. With both of our sewing machines running, I'm thinking we'll be having a mini sweat shop in our apartment.
My favorite patterns are definitely Grainline patterns. I have numerous Scout Tees, Tiny Pocket Tanks, Lindens, and Hemlock Tees already planned out in my head. Relatively speaking, these should be fairly quick sews. If I can get over my fear, I plan on living in these tops sewn from knits. Even though it definitely won't be happening this weekend, I also hope to eventually make a few Alder Dresses as well.
I already have a few garments cut out that just need to be sewed. So, my number one goal for this weekend is to sew up all of these projects and get them to the wearable stage. If all goes well, I'll also cut out several additional garments. This encourages me to keep sewing, and it makes sharing the cutting mat/rotary cutter with Lauren so much easier.
I've been reading lots of posts about other bloggers' wardrobes, many of whom are using a capsule wardrobe. While this concept is so interesting to me and I think it's a fantastic idea to live as minimally as possible, at my current stage in life (no storage space, way too many clothes, unpredictable weather patterns), it's not for me. But, this has made think a lot about my own wardrobe; what I own, what I always tend to grab from my closest first, what I need, what colors I wear most often. Because I have so many clothes that fit and I love, I've been trying really hard to not buy any new clothing items that I don't need or can't make. I'll purchase work out clothes (when needed) without hesitation because I don't want to challenge the chaffing issue. I also don't mind buying jeans (always from Gap) because they fit me so well, and basic tank tops/camis for layering under other tops. Because I enjoy sewing and it's one of my hobbies, I'm okay with making myself new garments and expanding my wardrobe even more in this way. In the not so distant future, I'm planning on doing a major closest clean out and only keeping the items that I truly enjoy wearing. If it makes me look or feel funny, it's got to go! Please hold me to this task; I have the hardest time parting ways with things. One of these days, I want to be able to open my closest and see a bunch of handmade items staring back at me. Tops are fairly easy to make so I'll start there, and I think it would be fun to also try sewing my own undergarments from scrap knits. Hopefully this all works out well and I get a good start on my Me Made May wardrobe!
In the past two years I've bought a ton of fabric with the idea to sew a lot of garments. Sadly, I've only made several pieces for myself since then. Being optimistic, at least I have seemingly infinite yards of fabric to work with which should be plenty to carry me through May. However, a lot of this hoarded fabric are knits and I've been terrified of using it. I know I just need to power through it and eventually I'll get used to it, but it's so daunting! I'm hoping to get tons of practice sewing with knits this weekend though. With both of our sewing machines running, I'm thinking we'll be having a mini sweat shop in our apartment.
My favorite patterns are definitely Grainline patterns. I have numerous Scout Tees, Tiny Pocket Tanks, Lindens, and Hemlock Tees already planned out in my head. Relatively speaking, these should be fairly quick sews. If I can get over my fear, I plan on living in these tops sewn from knits. Even though it definitely won't be happening this weekend, I also hope to eventually make a few Alder Dresses as well.
I already have a few garments cut out that just need to be sewed. So, my number one goal for this weekend is to sew up all of these projects and get them to the wearable stage. If all goes well, I'll also cut out several additional garments. This encourages me to keep sewing, and it makes sharing the cutting mat/rotary cutter with Lauren so much easier.
I've been reading lots of posts about other bloggers' wardrobes, many of whom are using a capsule wardrobe. While this concept is so interesting to me and I think it's a fantastic idea to live as minimally as possible, at my current stage in life (no storage space, way too many clothes, unpredictable weather patterns), it's not for me. But, this has made think a lot about my own wardrobe; what I own, what I always tend to grab from my closest first, what I need, what colors I wear most often. Because I have so many clothes that fit and I love, I've been trying really hard to not buy any new clothing items that I don't need or can't make. I'll purchase work out clothes (when needed) without hesitation because I don't want to challenge the chaffing issue. I also don't mind buying jeans (always from Gap) because they fit me so well, and basic tank tops/camis for layering under other tops. Because I enjoy sewing and it's one of my hobbies, I'm okay with making myself new garments and expanding my wardrobe even more in this way. In the not so distant future, I'm planning on doing a major closest clean out and only keeping the items that I truly enjoy wearing. If it makes me look or feel funny, it's got to go! Please hold me to this task; I have the hardest time parting ways with things. One of these days, I want to be able to open my closest and see a bunch of handmade items staring back at me. Tops are fairly easy to make so I'll start there, and I think it would be fun to also try sewing my own undergarments from scrap knits. Hopefully this all works out well and I get a good start on my Me Made May wardrobe!
Thursday, April 9, 2015
Cross Stitched Bookmark Tutorial
One of the items I made for my contribution to the Secret Valentine Exchange was a set of three cross stitched bookmarks. Cross stitching is one of those hobbies that I think creates a beautiful finished project, yet not that many people choose to do. For these reasons, I wanted to incorporate a cross stitched present into my swap package. Since my swap partner likes to read, Lauren came up with the idea to turn miniature cross stitched patterns into bookmarks.
After I finished these bookmarks and sent them on their merry way to their new owner, Lauren decided she wanted one as well. So, I decided a cross stitched bookmark would be the perfect addition to her Easter basket. I let her choose the design (she picked a "scene" from the Summer Sampler and adapted it), and then I whipped it up like a short order cook! And when I say I "whipped it up", I really mean that it was a slightly belated Easter gift.
Supplies:
- Cross stitch pattern (I used an adapted design from the Summer Sampler)
- Evenweave fabric (like this one)
- Embroidery floss (colors and quantity depend on your chosen pattern)
- Sewing machine
- Natural colored fabric
- Any other fabric (I used a solid blue, but patterns work just as well)
- Felt (color doesn't matter, it will be hidden)
- 5 inches of 1/2 inch twill tape
First you need to decide the finished size of your bookmark. For example, my finished bookmark is 7.5 x 3.5 inches.
Cross stitch whatever pattern suits your fancy, making sure it's centered on your evenweave fabric (linen). Aim for the linen piece you're cross stitching on to be about 1/2 inch shorter than your finished bookmark on all four sides. My linen piece ended up being 6.5 x 2.5 inches. It works a lot better to cross stitch on a larger piece of linen and then cut it down when you're done. Lauren wanted the arrow patterns repeated three times, with a slight variation to each set of three arrows.
Cut out the natural colored fabric so that it's 1/4 inch longer than your desired finished measurements on each side. Cut out the other fabric of your choice and the felt the same exact size as the natural fabric. You'll need one of each piece per bookmark. I cut my pieces out to be 8 x 4 inches.
Pin the linen cross stitched piece onto the center of the natural colored fabric. Use a tight, short zig zag stitch to sew around the entire linen piece. This helps prevent the linen from fraying from future use. Stitch as close to the edge as possible (while still making sure to securely fasten the linen down) to prevent excess fraying.
Next, place the felt under the natural colored fabric/linen piece. Place the right side of the unused second fabric on top of the right side of the linen piece. Make a loop with the twill tape and sandwich it in between the two top layers at the top of the bookmark. Make sure the loop part is being sandwiched (hidden) and the ends of the twill tape are sticking out of the top. Pin all three pieces together.
With a 1/4 inch seam allowance, sew around 3 sides of the bookmark and all four corners. Sew around the two longest sides, the top, and the bottom corners. Leave the straight part of the bottom side unsewn though.
Trim the corners and the excess twill tape hanging over the edge. Turn the fabric so the right sides are now showing. Poke the corners out. Fold the unsewn side so that it matches the rest of the sewn sides. Iron all four sides, and pin the open side shut.
Top stitch around the entire bookmark, as close to the edge as possible.
Trim all of the loose threads, and now you have a wonderful, finished bookmark. Find a book and put that beauty to use! Lauren is using hers in a Biostatistics textbook, how nerdy!
After I finished these bookmarks and sent them on their merry way to their new owner, Lauren decided she wanted one as well. So, I decided a cross stitched bookmark would be the perfect addition to her Easter basket. I let her choose the design (she picked a "scene" from the Summer Sampler and adapted it), and then I whipped it up like a short order cook! And when I say I "whipped it up", I really mean that it was a slightly belated Easter gift.
- Cross stitch pattern (I used an adapted design from the Summer Sampler)
- Evenweave fabric (like this one)
- Embroidery floss (colors and quantity depend on your chosen pattern)
- Sewing machine
- Natural colored fabric
- Any other fabric (I used a solid blue, but patterns work just as well)
- Felt (color doesn't matter, it will be hidden)
- 5 inches of 1/2 inch twill tape
First you need to decide the finished size of your bookmark. For example, my finished bookmark is 7.5 x 3.5 inches.
Cross stitch whatever pattern suits your fancy, making sure it's centered on your evenweave fabric (linen). Aim for the linen piece you're cross stitching on to be about 1/2 inch shorter than your finished bookmark on all four sides. My linen piece ended up being 6.5 x 2.5 inches. It works a lot better to cross stitch on a larger piece of linen and then cut it down when you're done. Lauren wanted the arrow patterns repeated three times, with a slight variation to each set of three arrows.
Cut out the natural colored fabric so that it's 1/4 inch longer than your desired finished measurements on each side. Cut out the other fabric of your choice and the felt the same exact size as the natural fabric. You'll need one of each piece per bookmark. I cut my pieces out to be 8 x 4 inches.
Pin the linen cross stitched piece onto the center of the natural colored fabric. Use a tight, short zig zag stitch to sew around the entire linen piece. This helps prevent the linen from fraying from future use. Stitch as close to the edge as possible (while still making sure to securely fasten the linen down) to prevent excess fraying.
Next, place the felt under the natural colored fabric/linen piece. Place the right side of the unused second fabric on top of the right side of the linen piece. Make a loop with the twill tape and sandwich it in between the two top layers at the top of the bookmark. Make sure the loop part is being sandwiched (hidden) and the ends of the twill tape are sticking out of the top. Pin all three pieces together.
With a 1/4 inch seam allowance, sew around 3 sides of the bookmark and all four corners. Sew around the two longest sides, the top, and the bottom corners. Leave the straight part of the bottom side unsewn though.
Trim the corners and the excess twill tape hanging over the edge. Turn the fabric so the right sides are now showing. Poke the corners out. Fold the unsewn side so that it matches the rest of the sewn sides. Iron all four sides, and pin the open side shut.
Top stitch around the entire bookmark, as close to the edge as possible.
Trim all of the loose threads, and now you have a wonderful, finished bookmark. Find a book and put that beauty to use! Lauren is using hers in a Biostatistics textbook, how nerdy!
Subscribe to:
Posts (Atom)