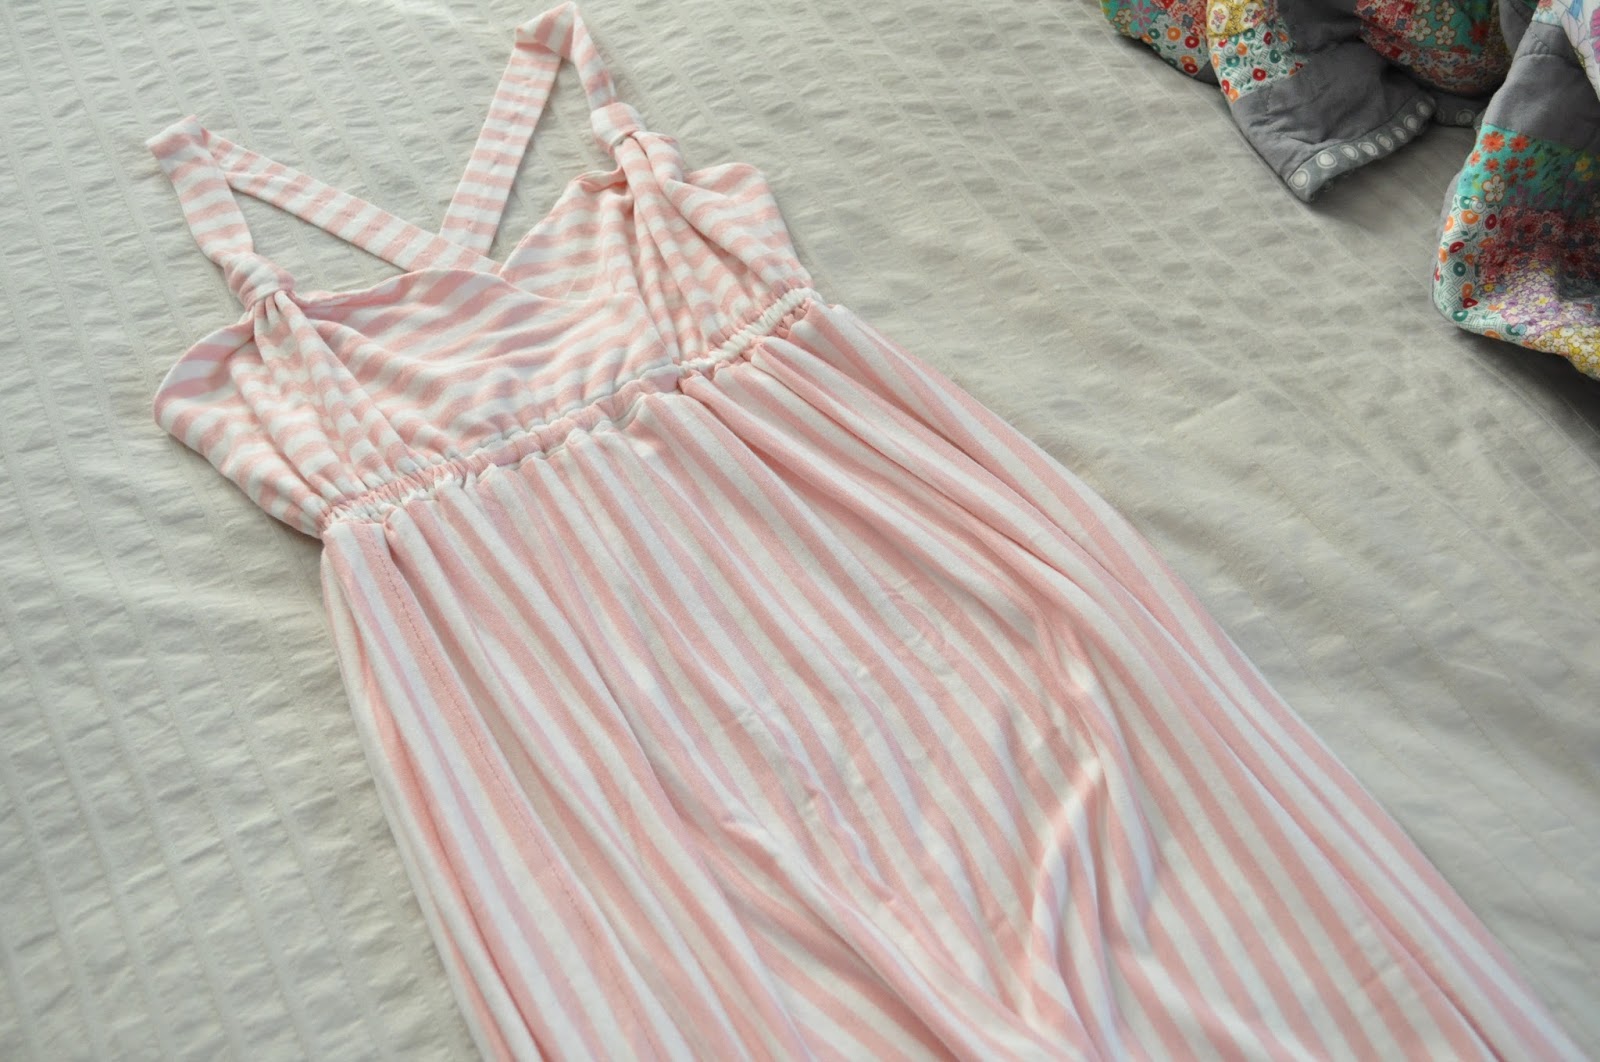
Monday, September 7, 2015

Mermaid Cross Stitch

In addition to the nightgown I sewed Marissa for her birthday, I also made her a cross stitched mermaid picture.
For the past few years, Marissa has liked all things mermaid. Hopefully that still holds true, since I bought her a mermaid card too. Anyway, this year I wanted to cross stitch something for her since I've knit and sewn her multiple things in the past. I figured it was about time she add a cross stitched mermaid to her collection of Courtney-made items. What are sisters for? Side note: for my birthday this year, she sewed an apron for me! Marissa has never really been into sewing before, but I'm excited she's taking an interest in it now.
I wanted this to be a more modern looking mermaid, but I had trouble finding a suitable pattern. So I went rogue, and attempted to write my own. Using graph paper I sketched out a mermaid, and let each square box represent 3 rows and 3 columns. I cross stitched the majority of the mermaid using this rough pattern, until I got to the mermaid's torso. At that point, I lightly penciled in the rest of the mermaid. I realize that this isn't how cross stitching is supposed to be, but it's what worked for me. I had a hard time figuring out how to cross stitch the hair. I wanted the mermaid to have a head full of beautiful flowing hair, which is a lot easier to achieve on paper than it is when you're constricted to square boxes. So continuing my rebellious streak, I used elongated straight stitches to create a head full of hair. It turned out better than it would've had I stuck to traditional cross stitches, but I still wasn't able to achieve that long flowing hair I imagined.

I thought the mermaid needed more texture. So, to add some pop, I added a tiny flower to her hair. To the mermaid's bust, I added back stitches to create a simple seashell pattern. I also wanted to mimic the look of scales on her tail, and so I used more back stitches here. I think these little details added a lot of depth to the overall picture, and I'm really glad I took the time to do this. 
In my mind, the rock is significantly smaller in relation to the mermaid, but I rolled with it and made it work by adding boats and a whale on the side. I was hesitant to include them as I thought they would take away from the mermaid, but I think they make the picture a lot better. How cool is that shiny gold boat, by the way?
 
I was intending for the mermaid to fit easily into a 5x7 inch picture frame, but soon realized that wasn't going to be possible. However, it fits wonderfully into an 8.5x11 inch frame. Normally I would've gone with a light brown or white frame, but since her new(!) bedroom has black accents, I stuck with that color scheme.
I'm glad I went ahead and tried making up my own pattern because I had a very specific vision for how I wanted this mermaid to look. For now though, I think I'll stick to published patterns that other people have already created. It's a lot less stressful, and so much more relaxing to work on a tried and true chart. Even though it's not perfect, I hope Marissa enjoys it!

Friday, September 4, 2015

Striped Knit Nightgown

First off, happy 24th birthday to my favorite sister in the world! 24 is a good number, Marissa! Since it's her birthday and she should've received her presents by now, I thought it was perfect to share her first handmade item on her actual birthday. I decided to sew Marissa a nightgown, something pretty basic and comfortable to sleep in.
I approached this nightgown as if it were a simple empire waist dress with a fun bust and a simple skirt. I loosely designed the top of this dress made up of two separate breast/cup pieces attached to two straps, with an elastic casing on the bottom. I have no experience in bra making and so had no idea what the cups for the bust should look like. I sketched out a very rough idea and went with it. Because the fabric I chose is a little bit sheer, I decided to line the top with the same fabric, basically making that part reversible. I cut the straps extra long, and since I had plenty of fabric to work with, I attached the straps so that they criss-cross in the back; I won't tell you how many times I had to redo this because I kept sewing them on twisted! Criss-crossing the straps also makes the top more supportive, I think.

I made a casing for the elastic 1 inch from the bottom of the bust piece, using 2/8 inch elastic. Surprisingly, this was my first time making a casing like this and although it was time consuming, it was so simple. Once the bust portion of the dress was "done", I tried it on and it was huge. Even though Marissa's bust measurement is larger than mine, there was no way she would be able to fill out the cups. Not only were the cups too big, but there was too much fabric under the arms, and the straps were way too long.
To fix all of these problems without having to start completely over while still making a finished garment that I'm proud of, I decided to rethink my original design. While wearing the bust piece, I played around with the excess fabric, and came up with a good solution. Twisting the the bust pieces several times, where they meet the straps, made the cups slimmer at the top. The resulting gathers at the top of the bust pieces were extra bonus details. The only problem now was the massive unsightly seam where the bust pieces meet the straps. I wanted this "fix" to look intentional. Instead of cutting off the excess fabric from the straps, I wrapped the extra fabric around the large seam several times. I folded down the raw edge on the back side, and hand stitched it in place so that it wouldn't be visible on the front. Although time consuming, I love how this turned out!
For the skirt, I cut two pieces of fabric- each 20.5 in. wide x 25 in. long. To make sure the skirt would be long enough, I had to piece the skirt together with the stripes going vertically. This contrast (the stripes on the top are horizontal) has really grown on me since. I sewed the two side seams, and then gathered the top of the skirt with basting stitches. I then sewed the skirt to the top with a 1/2 inch seam allowance, later cut down to 1/4 inch. I hemmed the dress so that it hits several inches above my knee; Marissa is an inch shorter than me so I think this will be a good length for her.
The nightgown is so soft! I hope Marissa enjoys wearing it to sleep, and even more so, I desperately hope that it fits her well. Happy birthday!