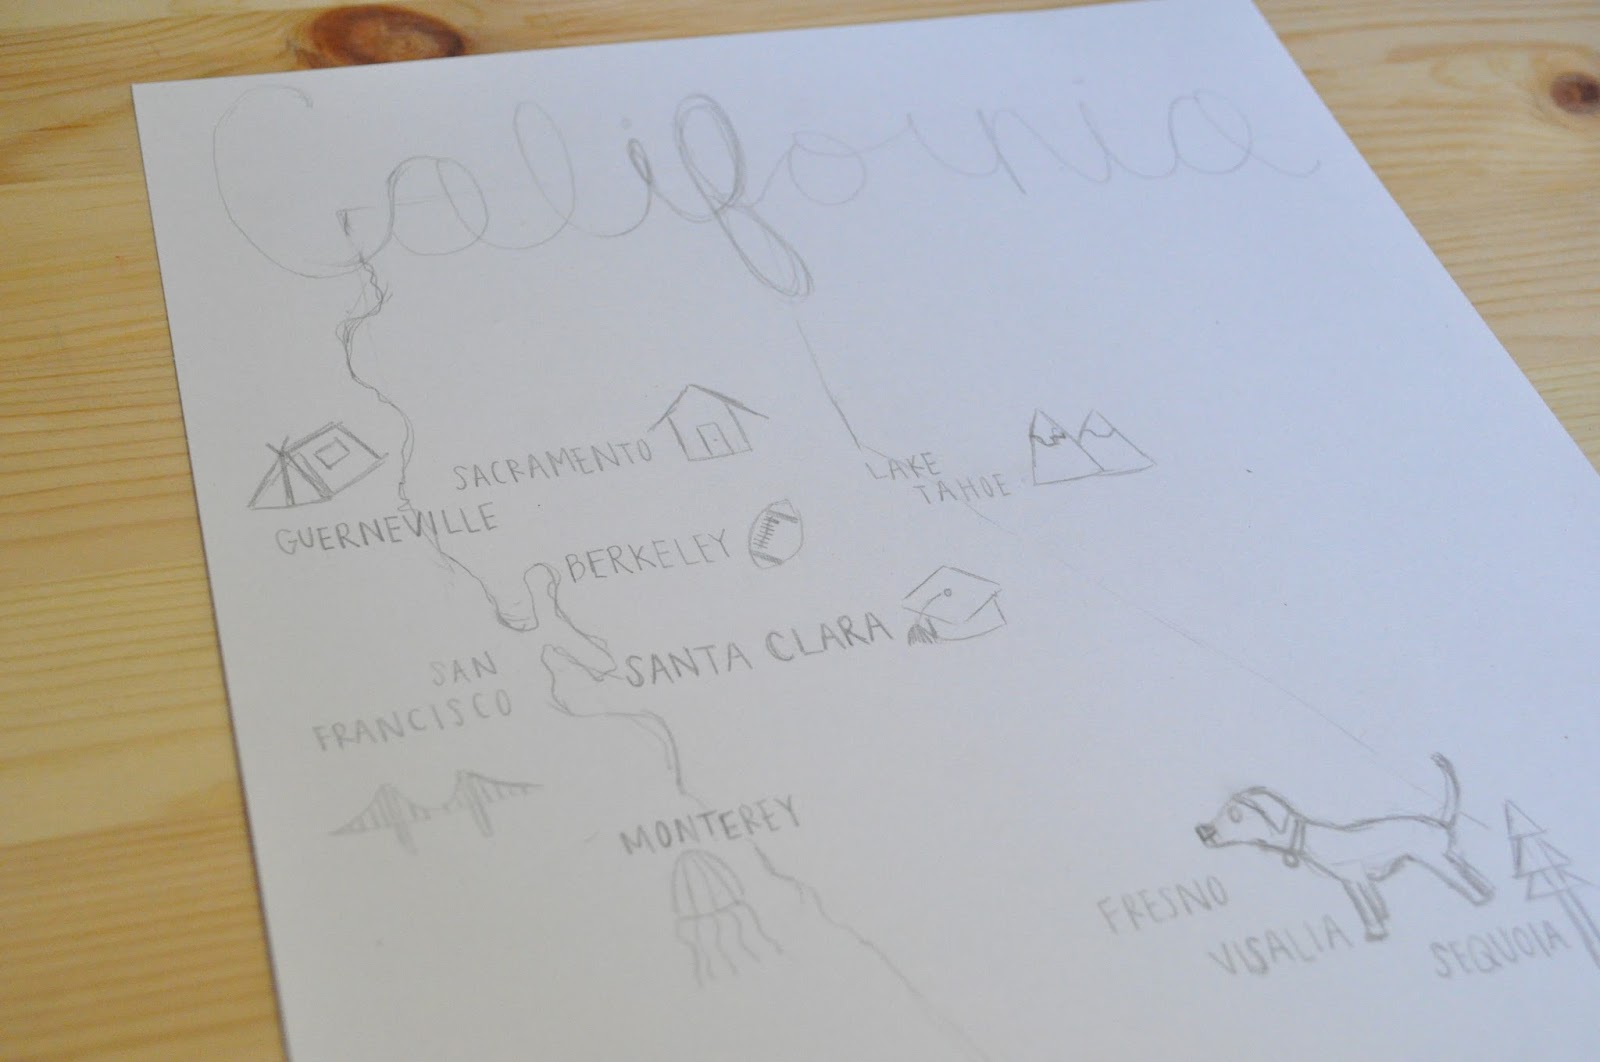
One of my goals this month is to finally finish my art wall. Basically, this means that I need to fill up five more frames with either art I make or purchase. I had fun using paint chips to make something to hang up on my wall, so I thought I'd give handmade art another go.
I've been wanting to incorporate my home state, California into the mix. I liked the idea of incorporating the actual shape of the state and highlighting several cities that hold dozens of memories.
I included a little picture symbolizing what each particular location means to me as a way to personalize my piece of art. Most people probably don't think of dalmatians when they hear of Fresno or Visalia, but that's the first thing I think of when those cities are mentioned.
I outlined everything in pencil while simultaneously looking at real and clip art images online. It took many tries and lots of erasing to arrive at what I believe are adequate representations of California's shape and my respective chosen symbols. I then wrote out all of the cities I wanted to include, pinpointing them as geographically accurate as possible.
I decided to keep the piece simple, just black and white, using black Sharpies on white card stock. I used a fine tip Sharpie to write "California" at the top, and an extra fine tipped Sharpie for the remainder of my art. Although I tend to like pops of color, I think this simple black and white piece will go well with the rest of my already colorful framed art.
Showing posts with label Paper Projects. Show all posts
Tuesday, June 9, 2015
Friday, June 5, 2015
2014 Scrapbook
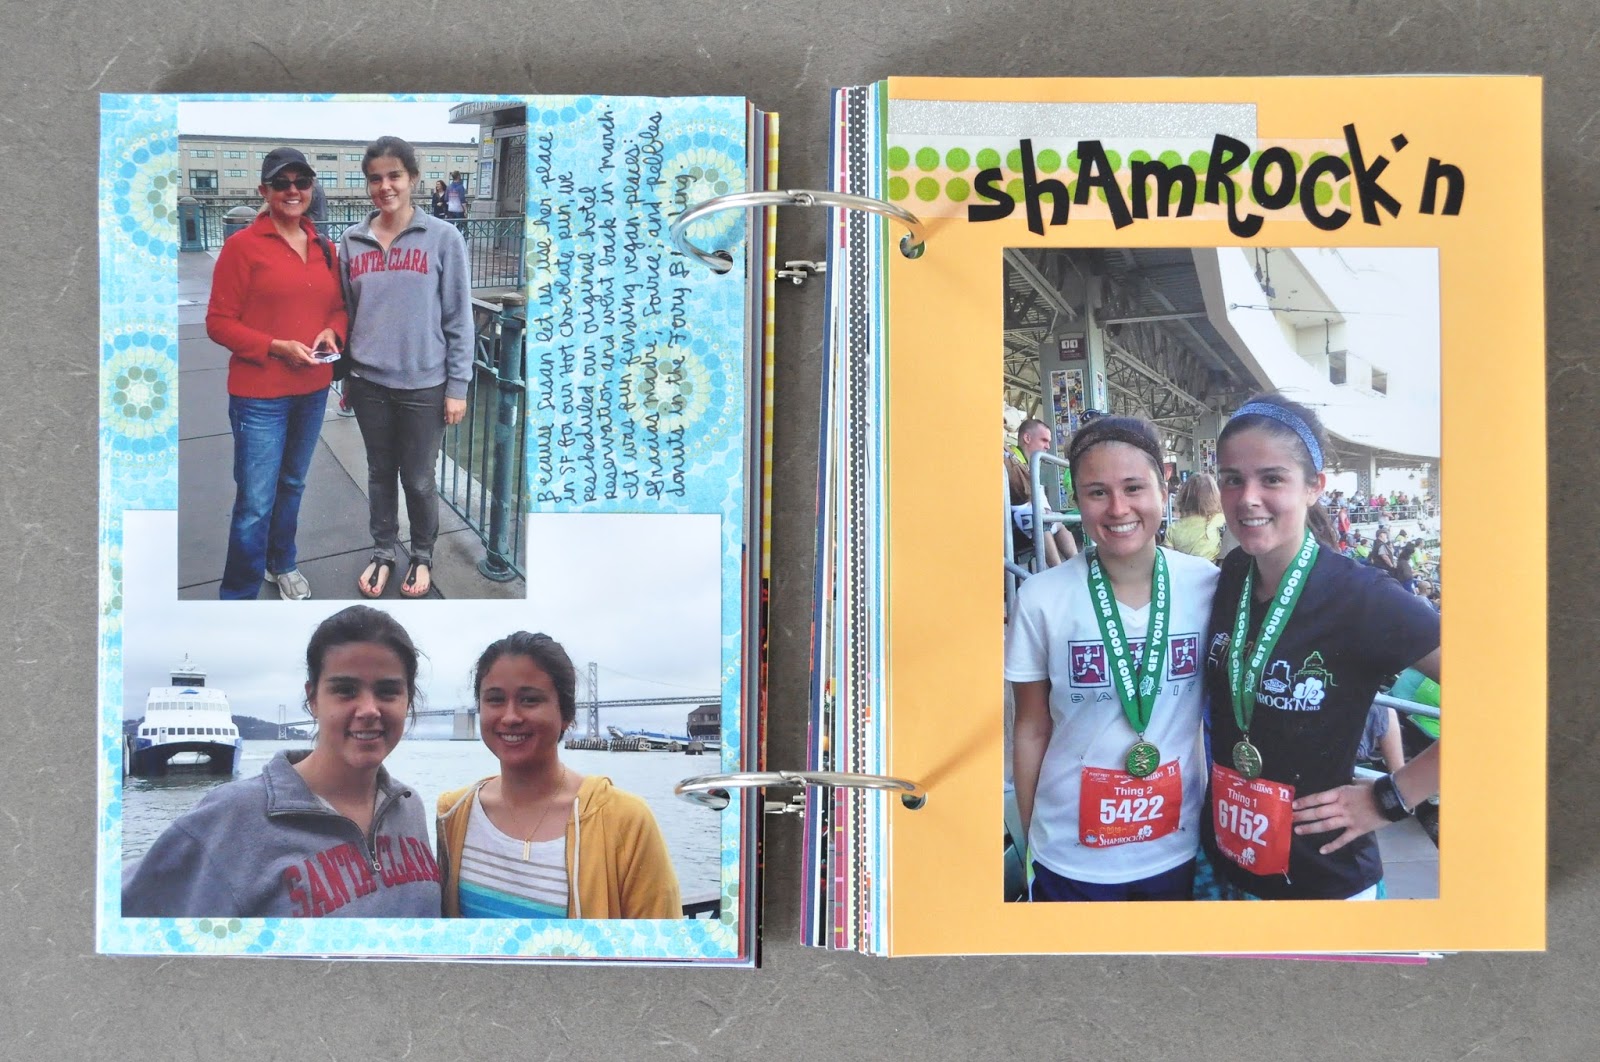
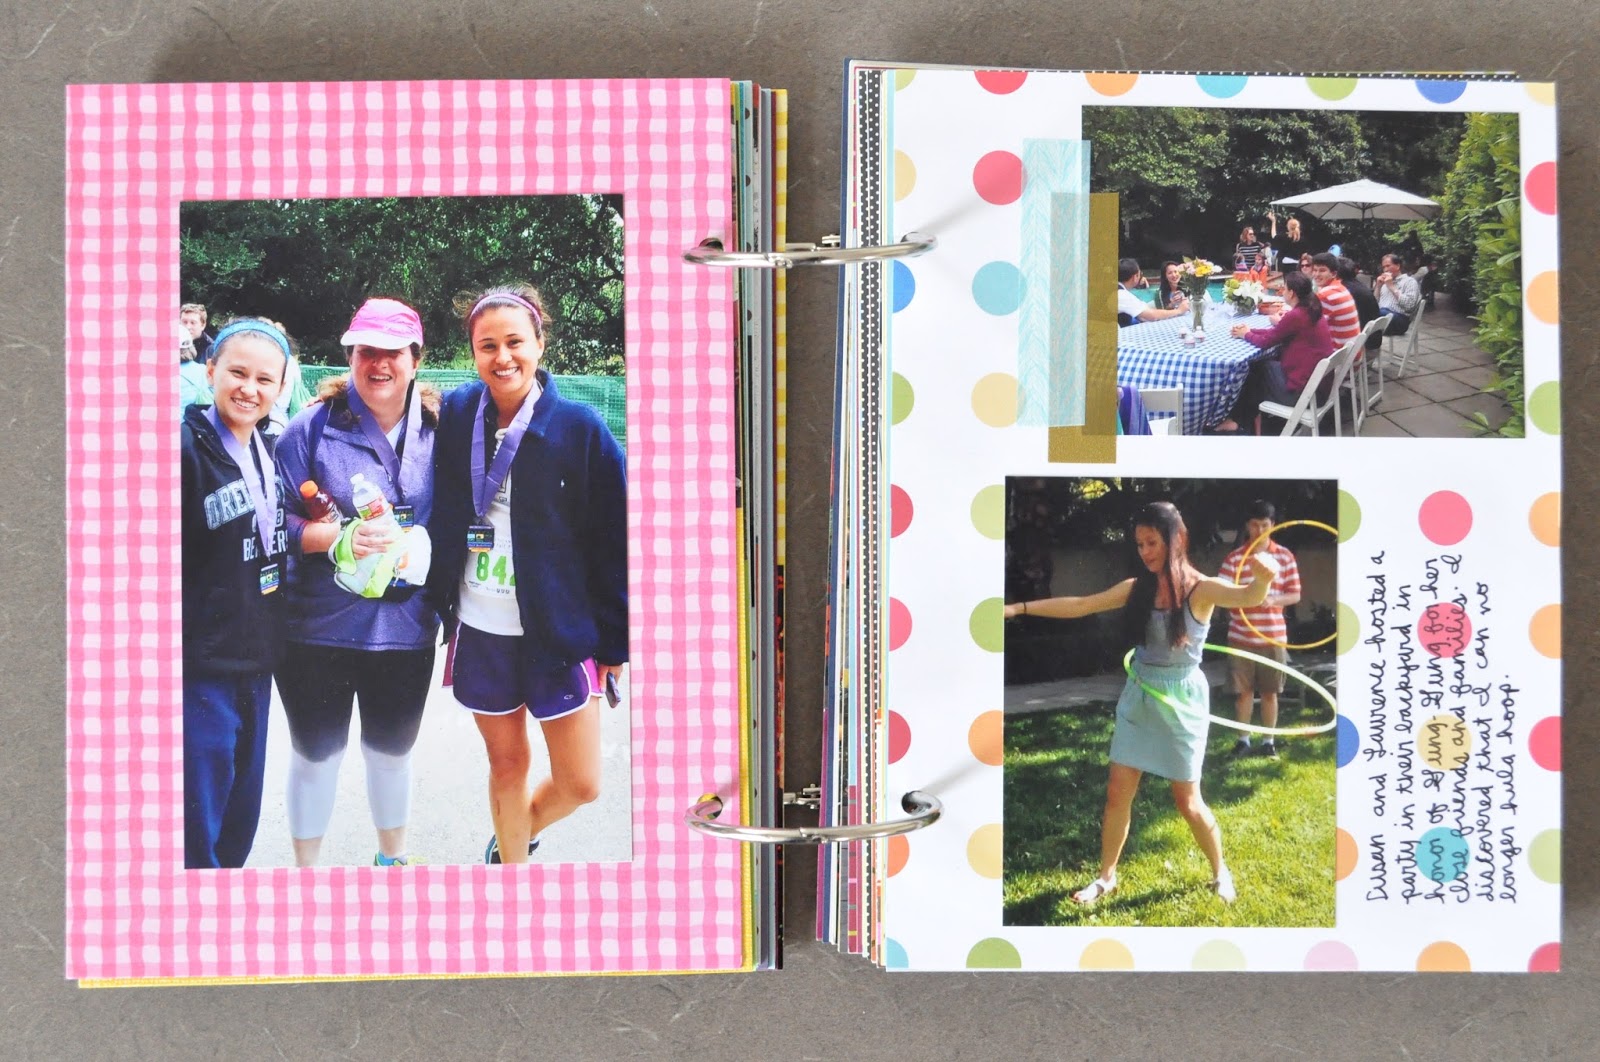
A few months ago I was really in the mood to scrapbook. I wanted to use up a lot of paper supplies I have, but mostly I just love looking at old photos. So, on a whim I decided to make a mini paper scrapbook to document the past year. My life has changed tremendously since then and it was nice to relive those moments.
My main purpose for my album was to incorporate as many pictures with people in them. To me, it's the people that you spend time with that create those precious memories, not necessarily the professionalism of the photographs. I thought I would run into trouble trying to write captions for a lot of events, but the opposite was true. Looking at the photos brings back so many funny stories and inside jokes that I hope to remember when I'm much older.
I worked on this project knowing that it was meant for me. I didn't need anything super fancy or expensive; mostly I wanted to use what I had lying around. All of the pages are made from random 12x12 scrapbook paper (purchased from either Michael's, JoAnn, or Target's DollarSpot), all cut down to 8x6 inch pages. The front and back covers are just plain brown kraft paper. I wasn't going for any theme, rather I simply selected papers that I thought would work well covered in pictures and writing. Solids are always a good, simple option. I also found I liked working with paper with tiny patterns- they didn't draw attention away from the photos, and they weren't completely hidden from the photos. I picked two cut down papers at random and attached them together to make double-sided paper. I tried several different methods for this: double-sided tape; glue stick; and Creative Memories adhesives. Obviously the adhesives worked the best, followed closely by double-sided tape.
I did my best to randomize the order of the colorful pages, although I did make sure to include the red and green "Christmas-y" papers towards the end of my book since I wanted to display my photos in chronological order. There are several page repeats so I also made sure to place them far apart from each other.
I went through all of my iPhone and big camera photos, selecting the ones that brought back the best memories. I didn't want all of my photos to start out as 4x6's, but I also wanted to keep the entire photo intact and keep their existing proportions. I didn't want to pay more for different sized photos that I would most likely end up cropping anyway, and I don't have much experience with resizing in Photoshop either. Instead, I used the Project Life app on my phone and resized some of the images I had already taken on my phone. As I went through my photos, I already pretty much knew which ones I wanted to standout. The photos that weren't destined to become the main focus of a layout thus became the ones I ended up resizing smaller. In the app, I just stuck to the simple two-photo layout and switched between the horizontal and vertical orientations, based upon the photos I was working with. It was really easy to select previously saved photos on my phone and drop them into the new Project Life templates. I saved these new images to my phone and then my computer. I added these resized images to a folder with the rest of my big camera photos I would be using, and then uploaded the entire folder to Shutterfly. Once I received my photos, I cut these resized images in half so that I now had 3x4 photos to work with as well. I know there are much simpler and quicker ways to do this, but this was the easiest for me to figure out. I'm really glad I did this because being able to play around with more than just 4x6 pictures made the process so much more interesting.
Next, I organized my photos in chronological order, and figured out that I should be using on average, 3-4 photos per page. Obviously I didn't stick to this throughout the entire book, but it created a great starting point for me to work off of. Making sure to keep all the pictures from one event on the same page(s) and keeping similar photos together, I developed a rough layout.
Then, I cropped my photos down so that all the necessary photos would fit on a single page, played around with the layout of the pictures, and then attached them with the Creative Memories adhesives.
Once all of the pictures were tacked down, I added some notes and captions to only some of the pages. I didn't want this scrapbook to turn into a journal, so I left a handful of the pages bare with just a photo or two. So that I wouldn't make silly errors, I typed up everything I wanted to write. It was much less stressful to put my pen on the paper doing it this way.
Now comes the fun part, details! I embellished my pages using Martha Stewart sticker labels, a date stamp, random letter stickers, alphabet stamps, more scrapbook paper, and washi tape. These little decorations really sealed the deal for me.
I hole punched all of my pages, using the the cover page as a template for the next page. I wish I hadn't made the holes so close to the edge of the paper though. I'm a little worried the holes will rip with time and use. I secured the entire book together with two loose-leaf rings, and deemed my mini scrapbook complete!
I want to do a better job at documenting my life through pictures so that I have tubs full of albums to look through when I'm older. New goal!
My main purpose for my album was to incorporate as many pictures with people in them. To me, it's the people that you spend time with that create those precious memories, not necessarily the professionalism of the photographs. I thought I would run into trouble trying to write captions for a lot of events, but the opposite was true. Looking at the photos brings back so many funny stories and inside jokes that I hope to remember when I'm much older.
I worked on this project knowing that it was meant for me. I didn't need anything super fancy or expensive; mostly I wanted to use what I had lying around. All of the pages are made from random 12x12 scrapbook paper (purchased from either Michael's, JoAnn, or Target's DollarSpot), all cut down to 8x6 inch pages. The front and back covers are just plain brown kraft paper. I wasn't going for any theme, rather I simply selected papers that I thought would work well covered in pictures and writing. Solids are always a good, simple option. I also found I liked working with paper with tiny patterns- they didn't draw attention away from the photos, and they weren't completely hidden from the photos. I picked two cut down papers at random and attached them together to make double-sided paper. I tried several different methods for this: double-sided tape; glue stick; and Creative Memories adhesives. Obviously the adhesives worked the best, followed closely by double-sided tape.
I did my best to randomize the order of the colorful pages, although I did make sure to include the red and green "Christmas-y" papers towards the end of my book since I wanted to display my photos in chronological order. There are several page repeats so I also made sure to place them far apart from each other.
I went through all of my iPhone and big camera photos, selecting the ones that brought back the best memories. I didn't want all of my photos to start out as 4x6's, but I also wanted to keep the entire photo intact and keep their existing proportions. I didn't want to pay more for different sized photos that I would most likely end up cropping anyway, and I don't have much experience with resizing in Photoshop either. Instead, I used the Project Life app on my phone and resized some of the images I had already taken on my phone. As I went through my photos, I already pretty much knew which ones I wanted to standout. The photos that weren't destined to become the main focus of a layout thus became the ones I ended up resizing smaller. In the app, I just stuck to the simple two-photo layout and switched between the horizontal and vertical orientations, based upon the photos I was working with. It was really easy to select previously saved photos on my phone and drop them into the new Project Life templates. I saved these new images to my phone and then my computer. I added these resized images to a folder with the rest of my big camera photos I would be using, and then uploaded the entire folder to Shutterfly. Once I received my photos, I cut these resized images in half so that I now had 3x4 photos to work with as well. I know there are much simpler and quicker ways to do this, but this was the easiest for me to figure out. I'm really glad I did this because being able to play around with more than just 4x6 pictures made the process so much more interesting.
Next, I organized my photos in chronological order, and figured out that I should be using on average, 3-4 photos per page. Obviously I didn't stick to this throughout the entire book, but it created a great starting point for me to work off of. Making sure to keep all the pictures from one event on the same page(s) and keeping similar photos together, I developed a rough layout.
Then, I cropped my photos down so that all the necessary photos would fit on a single page, played around with the layout of the pictures, and then attached them with the Creative Memories adhesives.
Once all of the pictures were tacked down, I added some notes and captions to only some of the pages. I didn't want this scrapbook to turn into a journal, so I left a handful of the pages bare with just a photo or two. So that I wouldn't make silly errors, I typed up everything I wanted to write. It was much less stressful to put my pen on the paper doing it this way.
Now comes the fun part, details! I embellished my pages using Martha Stewart sticker labels, a date stamp, random letter stickers, alphabet stamps, more scrapbook paper, and washi tape. These little decorations really sealed the deal for me.
I hole punched all of my pages, using the the cover page as a template for the next page. I wish I hadn't made the holes so close to the edge of the paper though. I'm a little worried the holes will rip with time and use. I secured the entire book together with two loose-leaf rings, and deemed my mini scrapbook complete!
I want to do a better job at documenting my life through pictures so that I have tubs full of albums to look through when I'm older. New goal!
Tuesday, March 17, 2015
Paint Chip Wall Art Tutorial
Over a year ago I pinned a link for a paint chip wall art DIY. Soon after admiring it, I went to Home Depot and selected a handful of paint chips in four different colors. I never actually read the tutorial, but I loved the general idea of the finished project. Like many other things though, these paint chips remained untouched and even moved with me across the country. A few months ago when I finally convinced myself to start an art/gallery wall, I knew I'd finally put these paint chips to use. I selected one of my empty Ikea frames and got to work. While all of my inspiration for this project came from this initial tutorial, I went rogue and ended up creating my own. I loved the use of triangles, but I wanted something slightly more detailed/intricate with more white space showing. Plus, I like math, so of course I needed to reacquaint myself with some basic geometry !
Supplies:
- Frame (optional, but everything looks better framed!)
- 1 sheet of white cardstock, slightly larger than your desired finished piece
- 4 different colors of paint chips, 3 sheets of each color (I used Glidden)
- Scissors
- Elmer's glue
- Q-tip
- 2-3 different colored pens
- Ruler
The frame I picked came with a mat that I wanted to use, so I simply placed my mat over my cardstock and drew an outline of the space I needed to fill.
I tried out various sizes of triangles, but I ended up liking the smallest ones the best. To obtain these triangles, I drew a grid on the back of the paint chip that looks like this. Basically, you'll want to make 1/2 inch x 1/2 squares in one color of ink. In another color of ink, make vertical lines every 1/4 inch (you're dividing each 1/2 x 1/2 inch square in half). The column and row shaded in black were shorter than 1/2 inch, so I ended up tossing those pieces out.
Now, cut out your squares, using the black ink as a guide. Do not cut on the pink colored lines, just the black!
So now you have a bunch of tiny squares with a pink line running down the middle. You're two cuts away from having yourself a perfect triangle! Position your square so that the pink line is running vertically. Cut from the bottom right corner up to the tip of the pink line. Then cut from the bottom left corner up to the top of the pink line. To clarify, I drew where to cut with a blue pen, although I just free-handed this part. Do this with all of your paint chips. I ended up using 2 1/2 sheets of 4 different colors (about 10 paint chips total).
Now you have yourself a bunch of tiny little triangles, so it's time to adhere them to the piece of cardstock. After experimenting, I found Elmer's glue and a q-tip to be the best method for attaching the triangles to the cardstock.
I started at the top left corner and worked my way to the right side. Then, I worked my way down from the top left corner to the bottom left corner to give myself somewhat of a template to work off of. For the first row and column, it helped to lay out all of the triangles before gluing them down to make sure that the spacing worked out.
For the two vertical columns that make up the perimeter, I just cut a triangle in half to fit the open space. All you have to do is cut on the pink line to achieve this.
My favorite part of the entire project was "randomly" choosing which color to use next. I didn't want to have the same color adjacently touching one another, so I took this into account when selecting the next color. Technically it wasn't truly random, but I definitely wasn't going for any type of pattern either.
Lauren walked by my desk as I was about halfway through with the project and admitted that it was making her dizzy looking at it. I could definitely see how this is possible, but I don't get that vibe at all after I framed it. I love the way it turned out and I think it'll add a nice pop of color to my art wall!
Supplies:
- Frame (optional, but everything looks better framed!)
- 1 sheet of white cardstock, slightly larger than your desired finished piece
- 4 different colors of paint chips, 3 sheets of each color (I used Glidden)
- Scissors
- Elmer's glue
- Q-tip
- 2-3 different colored pens
- Ruler
The frame I picked came with a mat that I wanted to use, so I simply placed my mat over my cardstock and drew an outline of the space I needed to fill.
I tried out various sizes of triangles, but I ended up liking the smallest ones the best. To obtain these triangles, I drew a grid on the back of the paint chip that looks like this. Basically, you'll want to make 1/2 inch x 1/2 squares in one color of ink. In another color of ink, make vertical lines every 1/4 inch (you're dividing each 1/2 x 1/2 inch square in half). The column and row shaded in black were shorter than 1/2 inch, so I ended up tossing those pieces out.
Now, cut out your squares, using the black ink as a guide. Do not cut on the pink colored lines, just the black!
So now you have a bunch of tiny squares with a pink line running down the middle. You're two cuts away from having yourself a perfect triangle! Position your square so that the pink line is running vertically. Cut from the bottom right corner up to the tip of the pink line. Then cut from the bottom left corner up to the top of the pink line. To clarify, I drew where to cut with a blue pen, although I just free-handed this part. Do this with all of your paint chips. I ended up using 2 1/2 sheets of 4 different colors (about 10 paint chips total).
Now you have yourself a bunch of tiny little triangles, so it's time to adhere them to the piece of cardstock. After experimenting, I found Elmer's glue and a q-tip to be the best method for attaching the triangles to the cardstock.
I started at the top left corner and worked my way to the right side. Then, I worked my way down from the top left corner to the bottom left corner to give myself somewhat of a template to work off of. For the first row and column, it helped to lay out all of the triangles before gluing them down to make sure that the spacing worked out.
For the two vertical columns that make up the perimeter, I just cut a triangle in half to fit the open space. All you have to do is cut on the pink line to achieve this.
My favorite part of the entire project was "randomly" choosing which color to use next. I didn't want to have the same color adjacently touching one another, so I took this into account when selecting the next color. Technically it wasn't truly random, but I definitely wasn't going for any type of pattern either.
Lauren walked by my desk as I was about halfway through with the project and admitted that it was making her dizzy looking at it. I could definitely see how this is possible, but I don't get that vibe at all after I framed it. I love the way it turned out and I think it'll add a nice pop of color to my art wall!
Tuesday, November 11, 2014
Project 365: Days without Pictures
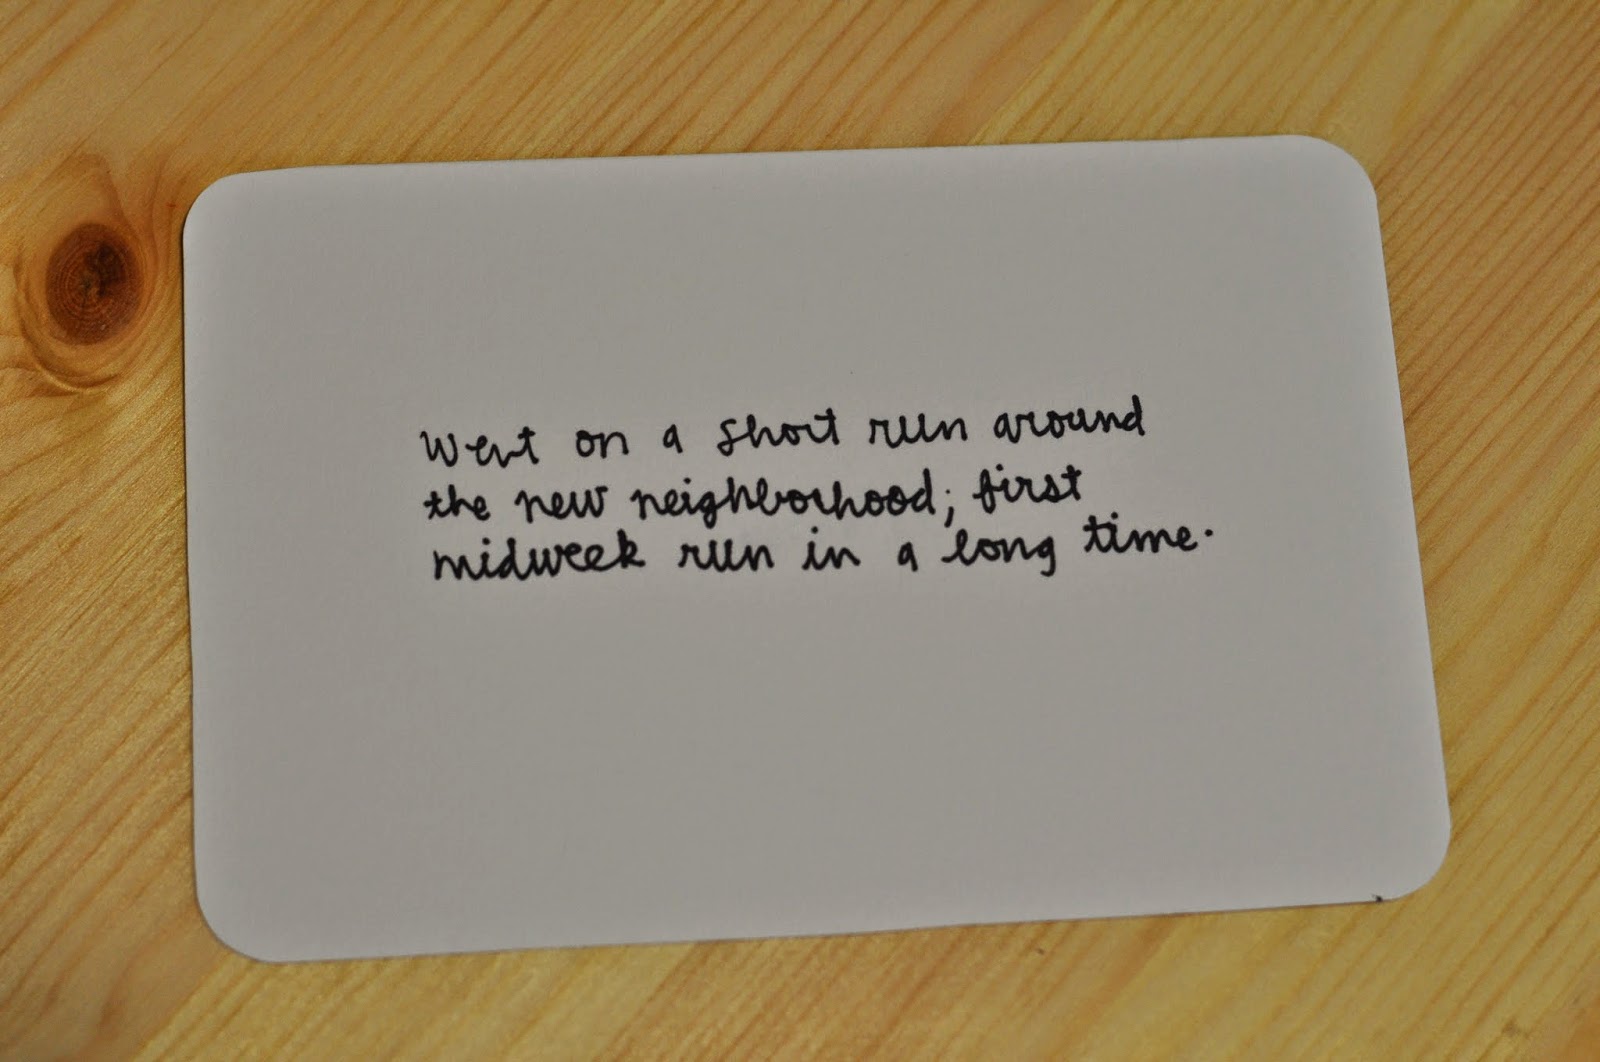
I shared my idea for Project 365 earlier, but I also wanted to show how I'm utilizing the empty spaces for the days where I forgot to take a picture. Since I'm storing all of my photos in albums, I didn't want to just leave several pockets completely blank simply because I didn't have a picture to display for that particular day. I wanted to be able to write my daily statement somewhere in the album (even if I don't have an actual photograph to complement it) so that I'd have a complete account of all six years, in one place.
It was important to me that everything inside my albums still flow well together. However I made up for the missing pictures, I was sure I wanted it to be cohesive with the rest of the book. After holding out and waiting till the perfect idea came to mind, I knew I just had to buckle down and figure out what I really wanted. I hated that having this little detail not yet figured out prevented me from completing my project (for now). Lauren likes to say that my decision making skills resemble a squirrel crossing the road. I might have to agree with that.
After much internal debate, I cut white card-stock into 4x6 inch pieces (the same size as the pictures) and rounded the corners. I wanted to incorporate the date stamp since the rest of my pictures include that. I stamped the date in black ink in the center of each respective card, then wrote my daily statement on the back in fine black Sharpie, just like I did for the days where I did have an actual picture representation.
Fast, simple, pretty cohesive, and to the point. Just like I wanted. I can finally say I'm up to date with my Project 365 albums!
It was important to me that everything inside my albums still flow well together. However I made up for the missing pictures, I was sure I wanted it to be cohesive with the rest of the book. After holding out and waiting till the perfect idea came to mind, I knew I just had to buckle down and figure out what I really wanted. I hated that having this little detail not yet figured out prevented me from completing my project (for now). Lauren likes to say that my decision making skills resemble a squirrel crossing the road. I might have to agree with that.
After much internal debate, I cut white card-stock into 4x6 inch pieces (the same size as the pictures) and rounded the corners. I wanted to incorporate the date stamp since the rest of my pictures include that. I stamped the date in black ink in the center of each respective card, then wrote my daily statement on the back in fine black Sharpie, just like I did for the days where I did have an actual picture representation.
Fast, simple, pretty cohesive, and to the point. Just like I wanted. I can finally say I'm up to date with my Project 365 albums!
Saturday, November 1, 2014
Homemade Halloween Cards
Once I figured out that I would be moving to Philadelphia, one of the things I looked forward to the most was sending (and receiving) mail to different family members back in California. I mean, I love getting mail, especially packages, so wouldn't other people like receiving mail too?
Earlier this month my mom sent me a Halloween card (which she does for most holidays) that I appreciated. My little cousin Abby also sent me a picture she colored for Halloween that she was really proud of. It made my wheels start turning and I thought about how cool it would be if I sent holiday cards to my siblings and little cousin as well. I didn't really do anything with this thought though, until last weekend when several relatives came and visited. I was thanking Abby for the Halloween card she sent me, and she asked me to send her one too. Okay Abby, you got it! Since I had been thinking about sending cards anyway, I put my plan into action. I knew I wanted them to be homemade, while using supplies I already had on hand.
I cut up some kraft paper for the foundation of the cards and went digging through the fabric scraps box. Initially each card was going to have a single Halloween character on it. But then I thought, why not include more characters, but make them simpler. So that's what I did. I freehand cut out pumpkins, bats, ghosts, and crescent moons out of scrap fabric, then sewed one of each onto every card. I also glued sequin eyes onto the ghosts to make them look a little most ghostly.
I wasn't too worried about perfection for this project. I would've finished the cards a lot sooner had I simply glued the fabric onto the cards, but I really liked the look of the stitches. I didn't want all of the cards to be exactly the same, rather I wanted a more one-of-a-kind feel to them (while still having the same basic design). I think the unevenness of the stitches, different colored sequined eyes, and the freehand cutting helped accomplish this feel. Perhaps Thanksgiving cards are in the future? One thing is for sure though, I bet I can keep the post office in business!
Earlier this month my mom sent me a Halloween card (which she does for most holidays) that I appreciated. My little cousin Abby also sent me a picture she colored for Halloween that she was really proud of. It made my wheels start turning and I thought about how cool it would be if I sent holiday cards to my siblings and little cousin as well. I didn't really do anything with this thought though, until last weekend when several relatives came and visited. I was thanking Abby for the Halloween card she sent me, and she asked me to send her one too. Okay Abby, you got it! Since I had been thinking about sending cards anyway, I put my plan into action. I knew I wanted them to be homemade, while using supplies I already had on hand.
I cut up some kraft paper for the foundation of the cards and went digging through the fabric scraps box. Initially each card was going to have a single Halloween character on it. But then I thought, why not include more characters, but make them simpler. So that's what I did. I freehand cut out pumpkins, bats, ghosts, and crescent moons out of scrap fabric, then sewed one of each onto every card. I also glued sequin eyes onto the ghosts to make them look a little most ghostly.
I wasn't too worried about perfection for this project. I would've finished the cards a lot sooner had I simply glued the fabric onto the cards, but I really liked the look of the stitches. I didn't want all of the cards to be exactly the same, rather I wanted a more one-of-a-kind feel to them (while still having the same basic design). I think the unevenness of the stitches, different colored sequined eyes, and the freehand cutting helped accomplish this feel. Perhaps Thanksgiving cards are in the future? One thing is for sure though, I bet I can keep the post office in business!
Sunday, October 19, 2014
Baby Project Life Scrapbook
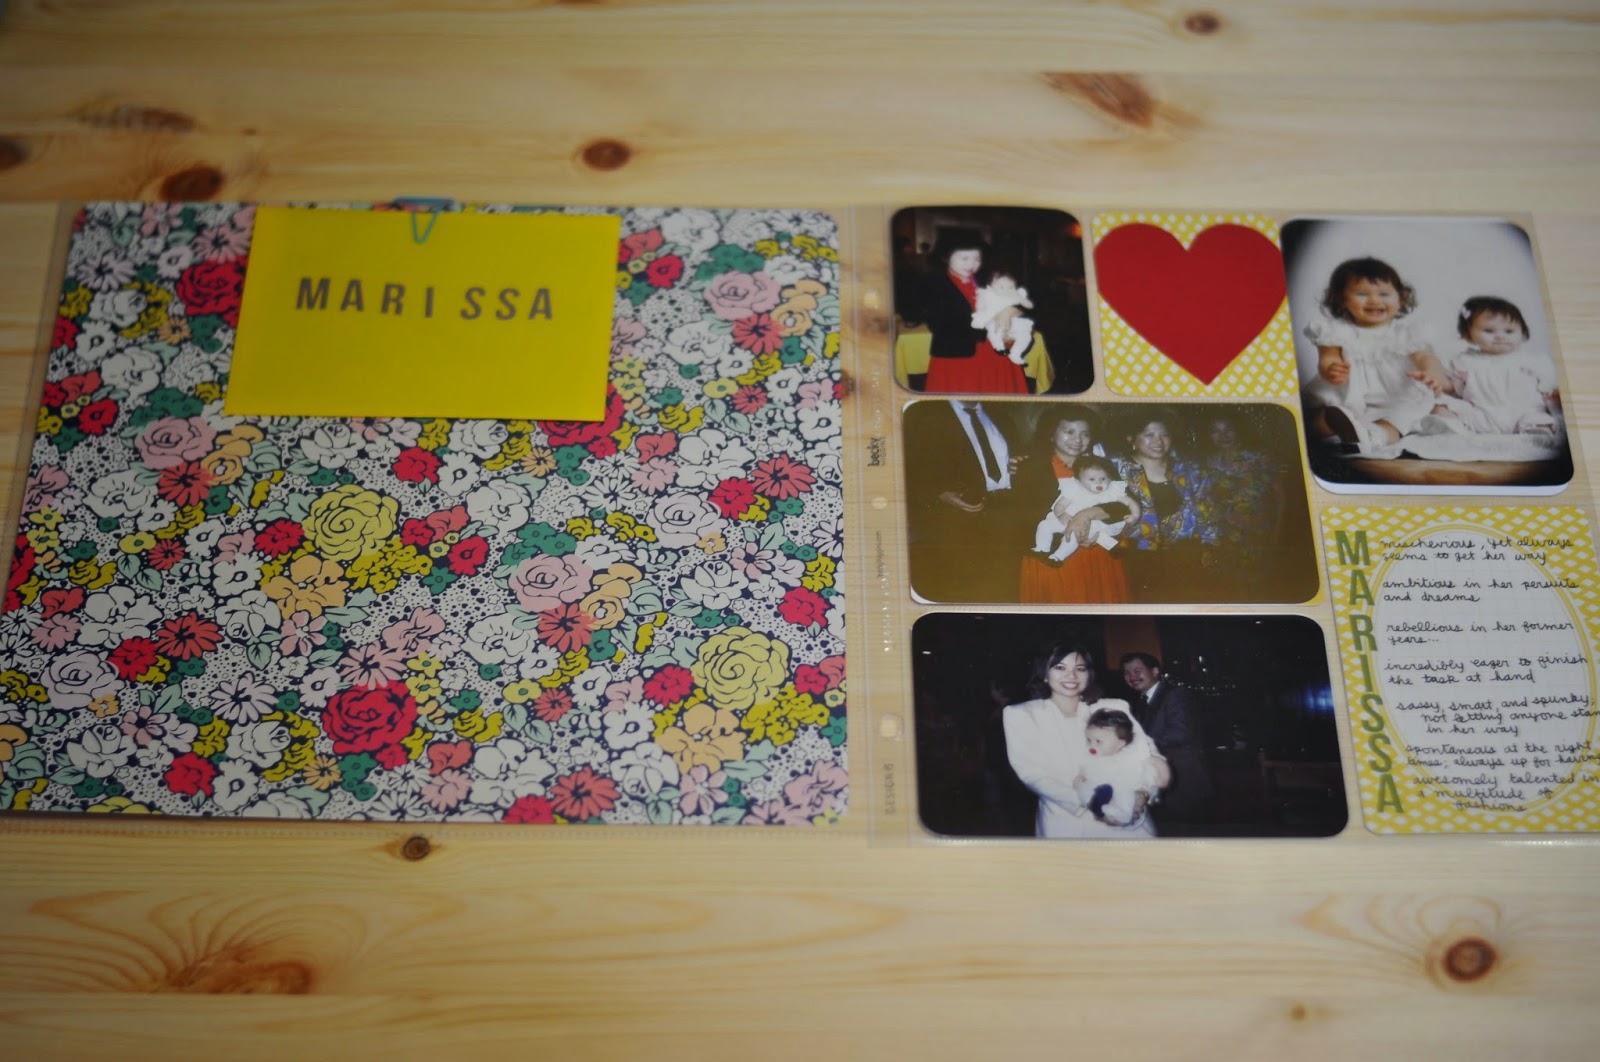
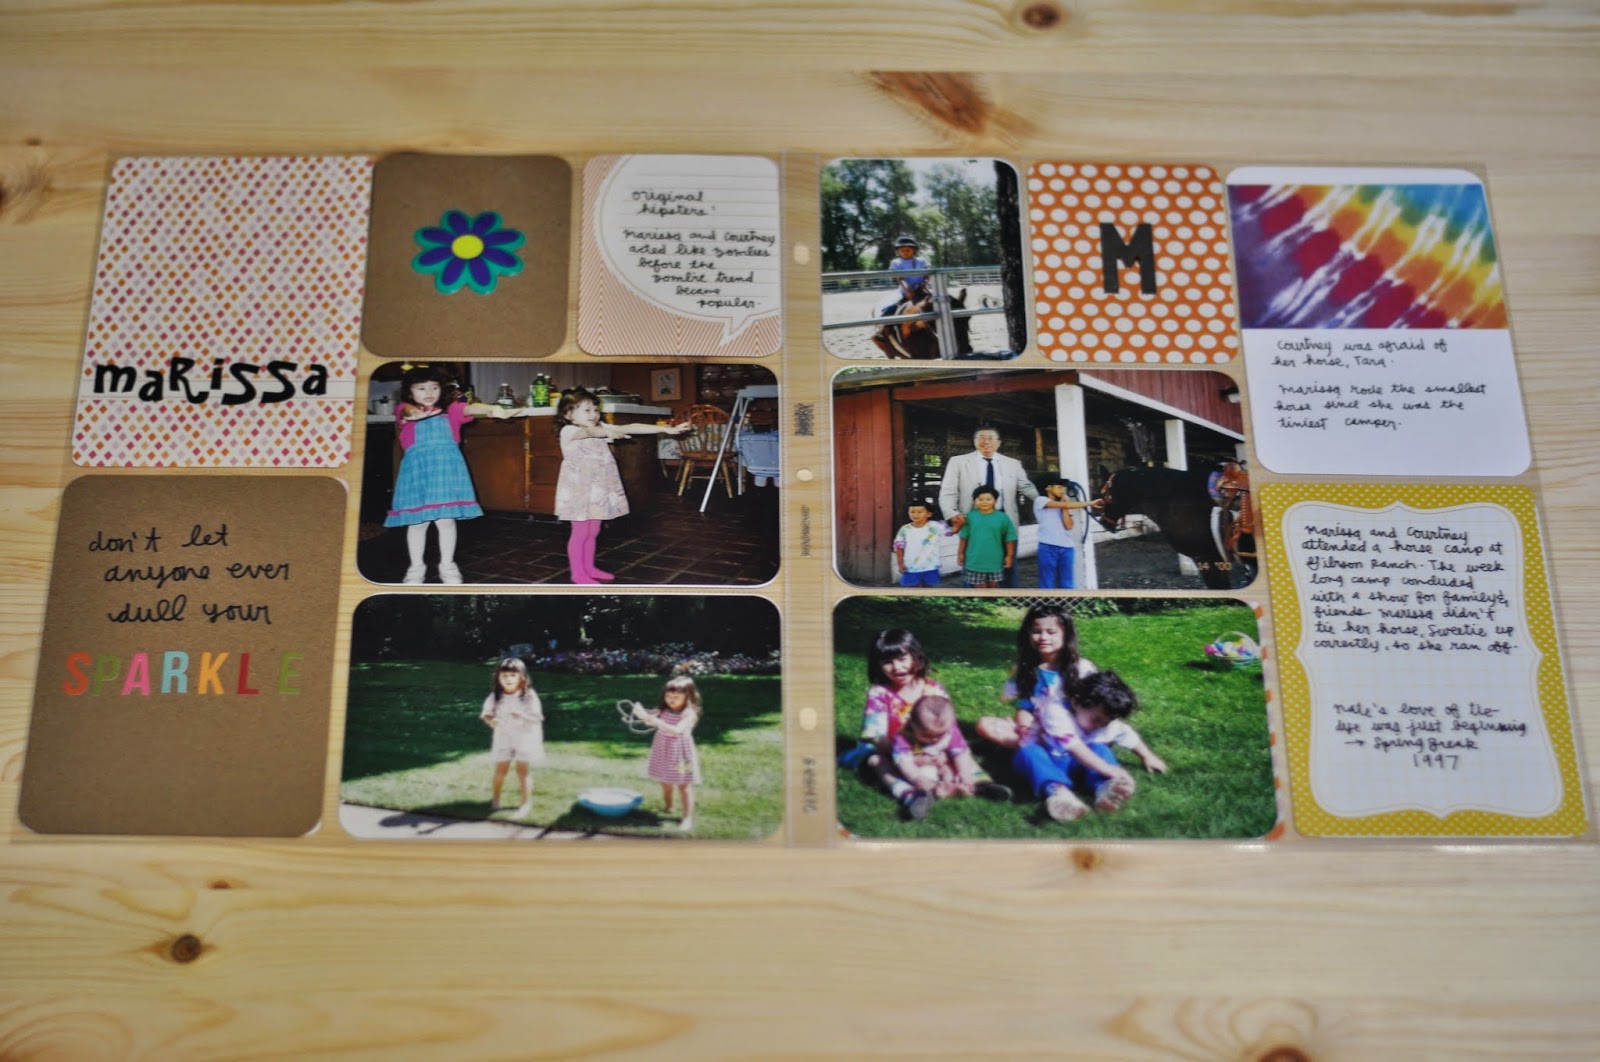
I finally finished Marissa's birthday present from last year!
My sister and I don't have a lot of baby pictures of ourselves because my mom likes to hoard them. In middle school my class was assigned to make a scrapbook of our lives, from our birth up to eighth grade. Since it was a school assignment and my grade depended on it, my mom surrendered some baby and toddler pictures so that I could make copies for my scrapbook, with the understanding that I would give her back the originals. Well, needless to say, I didn't follow through with that entire plan. To this day, almost seven years later, I still have those pictures. Marissa, doesn't really have any though. But fortunately for her, since we're only a year apart, she's in a lot of the pictures I have of myself. A few times last year she was complaining that she doesn't have any baby pictures to share with her friends (because that's what friends do, we share baby pictures of ourselves). I just knew I needed to make her a baby album so that she had some tangible memories of her tiny self.
Another day, a month or so later, I was at my grandma's house and I was helping her organize her belongings. With five children of her own and nine grandchildren, you could imagine the countless boxes full of photographs she has and the humungous amount of space they take up. So, as I was helping her condense those boxes, I mentioned my idea of making Marissa a baby album for her birthday. My grandma was more than accommodating and quickly gave me many of the double prints she had of mine and Marissa's early years. With the photos from my grandma and the ones I already "borrowed" from my mom, I set out to make Marissa's birthday present.
It started off well. At the time I was obsessed with the Project Life concept. I scanned the pictures onto my computer and ordered prints from Shutterfly. I bought a binder, page inserts, and baby-themed card inserts. I cropped all of the pictures, rounded the corners, and inserted them into their respective pockets. But after that, the unfinished scrapbook sat. And it sat uncompleted for about a year. I was so stuck on how to "decorate" the blank pockets and make the overall scrapbook something to be proud of.
As her birthday approached this year, I was reminded of this unfinished and super belated gift. I promised that it would be done by her birthday this year (September 4). So I got back to work on it. I rearranged a lot of the pictures and made a rough outline of the text I wanted to include. I wanted to ask my parents about several of the pictures and events, so I was hesitant to write anything down permanently in the scrapbook until I got their advice. So once again, the scrapbook sat unfinished and her birthday passed with no present in sight.
I really wanted to finish her scrapbook in early September so that I wouldn't have to move across the country with it. But that didn't happen. I made a second promise to get the finished gift mailed to Marissa by the end of September. On one of the last days of September (shocker), I spent an entire day working tirelessly. I added all the text, fancy titles, and lots of cute and random (yet appropriate) quotes to the pages. The end was in sight! But I still had a few empty pockets to fill and I needed to order a 12 x 12 photo to cut up to fill an entire page. The shipment on that alone would take up to a week, so my September deadline was out of reach.
The 12 x 12 photo actually came much quicker than I expected, although September was already over. As soon as it arrived, I manipulated it until it was just the way I envisioned. I spent another day finishing up the rest of the empty pockets. Then the next day, I completed all the necessary sewing. And boom, it was complete!
So there's the story of Marissa's very belated baby scrapbook birthday present. Now I need to get to work on her presents for this year (belated of course, once again). I want to have them finished and mailed to her before Christmas!
Because it was so long in the making and this project has been on many of my "goals lists", I just had to share some pictures of the album. My focus is to share the layouts rather than the personal photos and text, so the photos aren't that sharp, but hopefully still enjoyable.
My sister and I don't have a lot of baby pictures of ourselves because my mom likes to hoard them. In middle school my class was assigned to make a scrapbook of our lives, from our birth up to eighth grade. Since it was a school assignment and my grade depended on it, my mom surrendered some baby and toddler pictures so that I could make copies for my scrapbook, with the understanding that I would give her back the originals. Well, needless to say, I didn't follow through with that entire plan. To this day, almost seven years later, I still have those pictures. Marissa, doesn't really have any though. But fortunately for her, since we're only a year apart, she's in a lot of the pictures I have of myself. A few times last year she was complaining that she doesn't have any baby pictures to share with her friends (because that's what friends do, we share baby pictures of ourselves). I just knew I needed to make her a baby album so that she had some tangible memories of her tiny self.
Another day, a month or so later, I was at my grandma's house and I was helping her organize her belongings. With five children of her own and nine grandchildren, you could imagine the countless boxes full of photographs she has and the humungous amount of space they take up. So, as I was helping her condense those boxes, I mentioned my idea of making Marissa a baby album for her birthday. My grandma was more than accommodating and quickly gave me many of the double prints she had of mine and Marissa's early years. With the photos from my grandma and the ones I already "borrowed" from my mom, I set out to make Marissa's birthday present.
It started off well. At the time I was obsessed with the Project Life concept. I scanned the pictures onto my computer and ordered prints from Shutterfly. I bought a binder, page inserts, and baby-themed card inserts. I cropped all of the pictures, rounded the corners, and inserted them into their respective pockets. But after that, the unfinished scrapbook sat. And it sat uncompleted for about a year. I was so stuck on how to "decorate" the blank pockets and make the overall scrapbook something to be proud of.
As her birthday approached this year, I was reminded of this unfinished and super belated gift. I promised that it would be done by her birthday this year (September 4). So I got back to work on it. I rearranged a lot of the pictures and made a rough outline of the text I wanted to include. I wanted to ask my parents about several of the pictures and events, so I was hesitant to write anything down permanently in the scrapbook until I got their advice. So once again, the scrapbook sat unfinished and her birthday passed with no present in sight.
I really wanted to finish her scrapbook in early September so that I wouldn't have to move across the country with it. But that didn't happen. I made a second promise to get the finished gift mailed to Marissa by the end of September. On one of the last days of September (shocker), I spent an entire day working tirelessly. I added all the text, fancy titles, and lots of cute and random (yet appropriate) quotes to the pages. The end was in sight! But I still had a few empty pockets to fill and I needed to order a 12 x 12 photo to cut up to fill an entire page. The shipment on that alone would take up to a week, so my September deadline was out of reach.
The 12 x 12 photo actually came much quicker than I expected, although September was already over. As soon as it arrived, I manipulated it until it was just the way I envisioned. I spent another day finishing up the rest of the empty pockets. Then the next day, I completed all the necessary sewing. And boom, it was complete!
So there's the story of Marissa's very belated baby scrapbook birthday present. Now I need to get to work on her presents for this year (belated of course, once again). I want to have them finished and mailed to her before Christmas!
Because it was so long in the making and this project has been on many of my "goals lists", I just had to share some pictures of the album. My focus is to share the layouts rather than the personal photos and text, so the photos aren't that sharp, but hopefully still enjoyable.
Subscribe to:
Posts (Atom)